
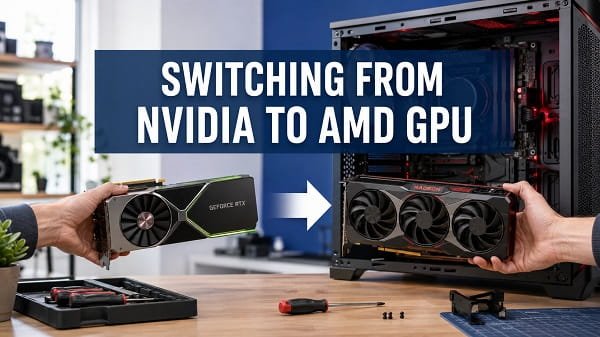
Switching from an NVIDIA to an AMD GPU is usually straightforward, but it involves more than removing one graphics card and inserting another. Windows stores display drivers, background services, control-panel components, game profiles and cached settings from the old card. If those files are not handled correctly, the new AMD GPU may produce a black screen, low resolution, driver installation errors, crashes or poor gaming performance.
The safest approach is to prepare the computer before opening the case, uninstall the NVIDIA software, shut the PC down completely, install the AMD card and then add the correct AMD driver. Your games and personal files will remain intact. You normally do not need to reinstall Windows or download every game again.
This article explains how to switch from NVIDIA to AMD GPU on Windows 11 or Windows 10, when Display Driver Uninstaller is necessary and how to solve the problems that can appear after the change.
Can You Replace an NVIDIA GPU With an AMD GPU?
Yes. A desktop computer does not require a particular graphics-card brand just because it previously used NVIDIA. You can replace a compatible NVIDIA GeForce card with an AMD Radeon card as long as the following requirements are met:
- The AMD card fits inside the computer case.
- The motherboard has a suitable PCI Express x16 slot.
- The power supply has enough capacity for the new card.
- The required PCIe power connectors are available.
- The card supports your version of Windows.
- Your monitor has an input that matches one of the card’s outputs.
Modern AMD and NVIDIA cards use the PCI Express interface, so changing brands does not normally require a new motherboard. PCIe generations are also backward compatible in most situations. A PCIe 4.0 graphics card can generally work in a PCIe 3.0 slot, although bandwidth limitations may affect performance in certain configurations.
The biggest compatibility concerns are usually physical clearance and power, not the NVIDIA-to-AMD brand change itself.
Do You Need to Uninstall NVIDIA Drivers Before Installing AMD?
I recommend uninstalling the NVIDIA display driver and related software before installing the AMD driver. Windows can sometimes operate with driver packages from both brands installed, but keeping unnecessary NVIDIA services and components creates more opportunities for conflicts.
Old drivers can cause problems such as:
- AMD Software failing to install correctly.
- Windows choosing the wrong display driver.
- Games opening on the wrong graphics adapter.
- Black screens or flickering after startup.
- Incorrect screen resolution or refresh rate.
- Leftover NVIDIA processes consuming resources.
- Game overlays and recording shortcuts no longer working properly.
You do not always need a specialist removal tool. If the NVIDIA installation is healthy and the PC has no graphics problems, uninstalling NVIDIA software through Windows is often enough. Display Driver Uninstaller, commonly called DDU, becomes useful when the normal process fails, you have experienced driver corruption or the new AMD card develops unexplained display problems.
Before Switching From NVIDIA to AMD
Do not remove the old card until you have checked the new GPU and prepared the software you may need. These preliminary steps make it much easier to recover if the computer temporarily loses internet access or starts at a low resolution.
Confirm the AMD GPU and Power Supply Requirements
Check the AMD card manufacturer’s product page or printed manual for its recommended power-supply capacity. The wattage number alone is not enough. Make sure the PSU is a reliable model and has the correct number of 6-pin, 8-pin or newer power connectors required by the card.
Never force a connector into the GPU. CPU and PCIe power connectors can look similar on some modular power supplies but are wired differently. Use only the PCIe or GPU cables supplied for that exact power-supply model.
Measure the card’s length, height and thickness against the available space in the case. Large Radeon cards may occupy three slots and can interfere with storage cages, expansion cards or front-mounted radiators.
Check Your Monitor Connection
Look at the outputs on the AMD GPU before installation. Your current NVIDIA card may use a connector that the Radeon card does not include. If necessary, obtain a suitable DisplayPort or HDMI cable before making the swap.
When the new card is installed, the monitor cable must be connected to the AMD GPU, not the motherboard’s video output. Connecting it to the motherboard is one of the most common reasons a replacement GPU appears not to work.
Download the AMD Driver in Advance
Visit the official AMD Drivers and Support page and download the driver for the exact Radeon model and Windows version. AMD also provides an automatic detection tool, but selecting the product manually can help ensure you know exactly which package has been downloaded.
Save the installer somewhere easy to find, such as the Downloads folder. Do not install it while the NVIDIA card is still active. You only need the package ready for later.
If you plan to use DDU, download it from the official Wagnardsoft website before disconnecting the internet. Extract it to a clearly labelled folder, but do not run it yet.
Save Important Settings
Changing GPU brands removes access to NVIDIA Control Panel profiles. Take screenshots of any settings you may want to recreate, including:
- Custom resolutions.
- Scaling mode.
- Colour settings.
- Frame-rate limits.
- Per-game 3D settings.
- G-SYNC configuration.
- Digital vibrance adjustments.
- Recording and overlay shortcuts.
AMD Software uses different names and menus, so the profiles cannot simply be imported into Radeon settings.
Create a Restore Point
A restore point is optional but useful before making major driver changes.
- Press Windows + S and search for Create a restore point.
- Open the matching result.
- Select the Windows system drive.
- Click Configure and enable system protection if it is disabled.
- Select Create.
- Give the restore point a name such as Before AMD GPU installation.
System Restore does not replace a personal backup, but it can reverse certain driver and system-setting changes if something goes wrong.
How to Switch From NVIDIA to AMD GPU
Follow these steps in order. The instructions apply to most desktop computers running Windows 11 or Windows 10.
Step 1: Uninstall NVIDIA Applications
Begin with the standard Windows removal process:
- Press Windows + I to open Settings.
- Go to Apps > Installed apps.
- Search for NVIDIA.
- Uninstall NVIDIA Graphics Driver.
- Remove the NVIDIA App, GeForce Experience and other NVIDIA components you no longer need.
- Follow the prompts shown by each uninstaller.
Components such as NVIDIA HD Audio Driver may be used for audio over HDMI or DisplayPort. The AMD driver will install its own corresponding component, so the NVIDIA version can be removed.
If your processor or motherboard contains unrelated NVIDIA hardware, check the item carefully before uninstalling it. The objective is to remove software associated with the old graphics card, not an unrelated device that the computer still uses.
If you later need to diagnose a damaged NVIDIA installation, my article on how to reinstall NVIDIA drivers explains the normal and clean-installation methods.
Step 2: Decide Whether to Use DDU
For a healthy computer, proceed after the normal uninstall. Use DDU when:
- NVIDIA software refuses to uninstall.
- The PC has recently experienced driver crashes or corruption.
- You have switched cards before and several display packages remain installed.
- AMD Software reports a driver conflict.
- A black screen or severe instability appears after the swap.
- You want the cleanest possible vendor change and understand how to use Safe Mode.
DDU is a third-party utility, not a built-in Windows or GPU manufacturer tool. Download it only from its developer’s official website. Create a restore point first and avoid copies hosted on random download sites.
To use it for this switch:
- Disconnect the PC from the internet. Unplug Ethernet or switch off Wi-Fi.
- Open Settings > System > Recovery.
- Beside Advanced startup, click Restart now.
- Choose Troubleshoot > Advanced options > Startup Settings > Restart.
- Press 4 to enter Safe Mode.
- Open DDU.
- Set the device type to GPU and the manufacturer to NVIDIA.
- Choose Clean and shutdown.
The shutdown option is designed for situations where the graphics card will be replaced. Once the PC turns off, do not restart it with the old driver cleanup unfinished unless you need to troubleshoot.
DDU should not become part of every routine driver update. It is most valuable for difficult driver problems and changes between GPU manufacturers.
Step 3: Shut Down and Disconnect the PC
If you used only the normal uninstall process, shut Windows down after it finishes. Then:
- Switch off the power supply using its rear switch, if present.
- Unplug the power cable from the computer.
- Disconnect display cables and other cables that block access.
- Press the PC’s power button for several seconds after unplugging it.
- Move the case to a clean, stable and well-lit surface.
Avoid working on carpet. Touch an unpainted metal part of the case before handling components, or use a properly grounded antistatic wrist strap.
Step 4: Remove the NVIDIA Graphics Card
Open the side panel and locate the existing GPU.
- Disconnect every PCIe power cable attached to the NVIDIA card.
- Remove the screws securing its bracket to the case.
- Release the retaining clip at the end of the motherboard’s PCIe slot.
- Support the card with both hands.
- Pull it straight out using gentle, even pressure.
Do not twist the card or pull aggressively. The PCIe retention clip must be released first. If the clip is difficult to reach, use a non-conductive tool carefully and avoid scraping the motherboard.
Place the NVIDIA card in an antistatic bag or on appropriate antistatic packaging. Keeping it safe is helpful if the new GPU needs to be returned or tested.
Step 5: Install the AMD Graphics Card
Remove any additional case-slot covers required by the thicker card. Align the AMD GPU with the primary PCIe x16 slot, which is normally the full-length slot closest to the CPU.
- Hold the GPU level with the slot.
- Press it down firmly until it is fully seated and the retention clip locks.
- Secure the bracket with the case screws.
- Connect all required PCIe power cables.
- Check that no cable can touch the card’s fans.
- Refit the side panel.
- Connect the monitor directly to the AMD card.
Use separate PCIe power cables from the PSU when the card manufacturer recommends them. A single daisy-chained cable may not be appropriate for a high-power GPU even if it has enough plugs.
Step 6: Start Windows With the New GPU
Reconnect power and start the computer. The first boot can take longer than usual while the motherboard detects the new card.
Windows may initially use Microsoft Basic Display Adapter. During this stage, the resolution may be low, a second monitor may not work and the refresh rate may be limited. This is normal until the Radeon driver is installed.
If there is no display at all, turn the PC off and check the following before continuing:
- The monitor is connected to the graphics card.
- The correct input is selected on the monitor.
- Every GPU power connector is fully inserted.
- The card is seated completely in the PCIe slot.
- The PSU switch is on.
- The display cable works with another device or output.
Step 7: Install AMD Software: Adrenalin Edition
Keep the internet disconnected if you used DDU. This prevents Windows Update from installing a display driver before you run the AMD package you downloaded.
- Open the downloaded AMD installer.
- Allow the program to detect the Radeon card.
- Review the driver version and installation location.
- Choose the normal recommended installation unless you have a specific reason to use another option.
- Allow the display to flicker or go black briefly during installation.
- Restart the computer when prompted.
AMD’s official Adrenalin installation instructions cover the current installer requirements and potential setup errors. Install AMD Software: PRO Edition instead only if you use a supported professional Radeon product and specifically require its certified workstation features.
After the restart, reconnect the internet and let Windows complete any pending device setup.
Step 8: Verify the AMD Driver
Confirm that Windows is using the new card correctly:
- Right-click Start and open Device Manager.
- Expand Display adapters.
- Confirm that the correct AMD Radeon model appears.
- Make sure there is no warning icon beside it.
- Open AMD Software: Adrenalin Edition.
- Go to its system or driver information area and confirm the installed version.
You can also open Task Manager > Performance > GPU while running a game to confirm that the Radeon card is handling the workload.
Settings to Check After Changing to AMD
Installing the driver is not the final step. Windows and AMD Software may initially use safe default settings.
Restore the Correct Resolution and Refresh Rate
Open Settings > System > Display > Advanced display. Select the monitor, confirm its native resolution and choose the highest refresh rate that the screen and connection support.
If the displayed desktop size does not match the active signal resolution, my active signal mode troubleshooting article explains how to correct driver, cable and display-mode problems.
Configure Adaptive Sync
If your display supports AMD FreeSync, open AMD Software and enable the feature where available. You may also need to turn Adaptive-Sync or FreeSync on through the monitor’s physical on-screen menu.
A monitor advertised only for G-SYNC may offer limited or no variable-refresh support with an AMD card, depending on the model. Displays labelled G-SYNC Compatible or Adaptive-Sync are more likely to work across brands, but you should verify the monitor’s specifications.
Recreate Game and Colour Settings
NVIDIA Control Panel profiles do not transfer to AMD Software. Recreate only the settings you actually need rather than changing every global option immediately.
Check:
- Radeon Anti-Lag or equivalent latency settings.
- Frame-rate limits.
- Scaling and integer-scaling options.
- Colour format and pixel depth.
- Per-game graphics profiles.
- Recording, microphone and screenshot shortcuts.
- Performance tuning and fan controls.
Run games at their existing settings first, then adjust them based on the new card’s performance. Shader compilation after a driver change can cause temporary stutter during the first few minutes of some games.
Remove Remaining NVIDIA Software
Return to Settings > Apps > Installed apps and search for NVIDIA. Remove applications that belong only to the old GPU, such as NVIDIA App, GeForce Experience, FrameView SDK or NVIDIA Broadcast, if you no longer use supported NVIDIA hardware.
NVIDIA Control Panel may disappear automatically after its driver is removed. If it remains installed, it will not control the Radeon GPU. The same applies to NVIDIA Overlay and its shortcuts.
NVIDIA Features and Their AMD Alternatives
Changing brands means learning a different software interface, but many common features have AMD equivalents.
| NVIDIA feature | AMD alternative or equivalent |
|---|---|
| NVIDIA Control Panel | AMD Software: Adrenalin Edition |
| NVIDIA Overlay | AMD Software in-game overlay |
| Instant Replay | Record & Stream Instant Replay |
| ShadowPlay recording | AMD Record & Stream |
| G-SYNC | AMD FreeSync or Adaptive-Sync |
| NVIDIA Reflex | Radeon Anti-Lag, where supported |
| DLSS | AMD FidelityFX Super Resolution in supported games |
| NVIDIA Image Scaling | Radeon Super Resolution or FSR, depending on the game |
| Game Ready Driver | AMD Software: Adrenalin Edition gaming driver |
| NVIDIA performance tuning | AMD Performance Tuning |
These technologies are not always identical. Availability depends on the Radeon model, monitor, driver version and individual game. A game may support DLSS but not FSR, or it may support both.
Your old NVIDIA keyboard shortcuts will also stop working. If Alt + Z previously opened the NVIDIA interface, review the AMD hotkey settings and choose combinations that do not conflict with games or other applications. My article about the NVIDIA overlay shortcut can help you identify old NVIDIA hotkeys that may still be stored in your workflow or game configuration.
Problems After Switching From NVIDIA to AMD
Most changes work on the first attempt. If yours does not, match the symptom to the checks below.
Black Screen After Installing the AMD GPU
First verify the cable, monitor input, GPU power connectors and PCIe seating. Try a different output on the card and temporarily connect only one monitor.
If the PC shows the motherboard logo but goes black when Windows loads, the problem is more likely driver-related. Start in Safe Mode, remove existing NVIDIA and AMD display packages with DDU, and reinstall the current AMD driver while offline.
If the motherboard has integrated graphics, connecting the monitor to it temporarily may let you enter Windows and inspect Device Manager. This works only when the processor includes integrated graphics and the firmware has not disabled it.
AMD Software Says the Hardware Is Unsupported
Confirm that the installed card matches the driver package. Laptop and professional graphics products may require a different driver from a mainstream desktop Radeon card. Also check whether the card is still supported by the current AMD release.
If Windows Update replaced the driver, AMD Software may report that its version is incompatible. Reinstall the matched AMD package and pause driver updates long enough to finish the process.
Low Resolution or Missing Refresh Rates
This usually means Windows is still using Microsoft Basic Display Adapter, an incomplete driver or an unsuitable cable. Check Device Manager, reinstall AMD Software and confirm that the monitor is attached to the GPU rather than the motherboard.
For a display that stays incorrect after the driver is active, use the steps in Windows graphics reset to refresh the display stack before attempting another full driver removal.
Games Crash or Perform Worse
Allow each game to rebuild its shader cache. Reset old graphics settings, disable overlays temporarily and confirm that the game is using the Radeon GPU. Update the game’s graphics options because NVIDIA-specific settings such as DLSS may remain selected but unavailable.
Check GPU temperatures and power connections under load. If performance is much lower than expected, confirm that the card is installed in the primary x16 slot and that the motherboard firmware has not restricted the slot unexpectedly.
Do not compare two GPUs using different game settings, resolutions or upscaling modes. Use the same scene and settings when testing performance.
Windows Keeps Reinstalling an NVIDIA Driver
Open Device Manager and check whether another NVIDIA display adapter is still present. Select View > Show hidden devices, expand Display adapters, and remove a greyed-out old NVIDIA GPU entry if it is clearly associated with the removed card.
Do not remove hidden devices you cannot identify. A laptop or specialised system may contain more than one legitimate graphics adapter.
If NVIDIA software remains in Installed apps, uninstall it and restart. A DDU cleanup in Safe Mode is the more thorough option when Windows repeatedly restores the unwanted package.
AMD Driver Installation Freezes or Fails
Restart the PC and run the installer as an administrator. Temporarily close monitoring, overclocking and overlay tools. Make sure there is enough free space on the system drive and install pending Windows updates before trying again.
If the error continues, clean both NVIDIA and incomplete AMD display drivers with DDU in Safe Mode, restart offline and run a freshly downloaded AMD installer.
Can You Keep Both NVIDIA and AMD GPUs in One PC?
Windows can support NVIDIA and AMD GPUs in the same computer, but doing so is different from replacing one card with another. You need enough PCIe slots, physical space, power capacity and a clear reason for the arrangement.
Running both cards may be useful for multiple displays, specific compute workloads or software that needs features from each vendor. It does not normally combine their gaming performance, and technologies such as SLI or CrossFire do not merge an NVIDIA and AMD card.
For an ordinary gaming PC, using only the new AMD card is simpler. It reduces power consumption, heat, driver complexity and the chance that an application chooses the wrong adapter.
Do You Need to Reinstall Games or Windows?
No. Switching from NVIDIA to AMD does not delete installed games, personal files or Windows applications. Launchers such as Steam, Epic Games Launcher and Xbox should continue to recognise existing installations.
Some games will rebuild shader caches or reset graphics options after detecting the new card. You may also need to replace NVIDIA-only settings with supported AMD or game-level alternatives.
A clean Windows installation should be a last resort, not a normal part of a GPU upgrade. Consider it only after confirming that the new hardware works, performing a complete driver cleanup and ruling out power, firmware and Windows corruption problems.
Frequently Asked Questions
Can I install the AMD driver before removing my NVIDIA GPU?
Download the AMD installer in advance, but wait to install it until the Radeon card is physically installed and detected. The installer needs compatible AMD hardware to complete the correct setup.
Is DDU required when switching from NVIDIA to AMD?
No. A standard NVIDIA uninstall is often sufficient when the current driver is healthy. DDU is useful for corrupted drivers, recurring conflicts, black screens or users who want a thorough vendor cleanup.
Will changing from NVIDIA to AMD reduce game performance?
Performance depends on the exact GPU models, game, resolution and settings, not simply the manufacturer. Compare reliable benchmarks for the two specific cards and recreate equivalent graphics settings after the switch.
Can I use an AMD GPU with an Intel processor?
Yes. AMD Radeon graphics cards work with compatible systems using Intel or AMD processors. The motherboard slot, power supply, case clearance and operating-system support matter more than matching the CPU and GPU brands.
Will my G-SYNC monitor work with an AMD GPU?
It should still display an image, but variable refresh rate support depends on the monitor. A G-SYNC Compatible or Adaptive-Sync display is more likely to support an AMD card than an older monitor containing a G-SYNC-only hardware module. Check the exact monitor model.
Should I reset BIOS before installing the AMD card?
Usually not. Most motherboards detect the new GPU automatically. Consider clearing or updating firmware settings only when the card is compatible but the system will not detect it after you have checked seating, power and display connections.
Can I switch back to NVIDIA later?
Yes. Remove the AMD driver, shut down, reinstall the NVIDIA card and install the appropriate driver. If the switch develops driver conflicts, use the same DDU clean-and-shutdown process with AMD selected instead of NVIDIA. My NVIDIA driver rollback article is also useful if the problem is caused by a particular NVIDIA driver version rather than the hardware change.
Once the Radeon driver is installed and the correct display settings are restored, test several games and everyday applications before selling or storing the old NVIDIA card permanently. That short testing period gives you time to catch power, cable, temperature or software issues while the previous GPU is still available for comparison.
