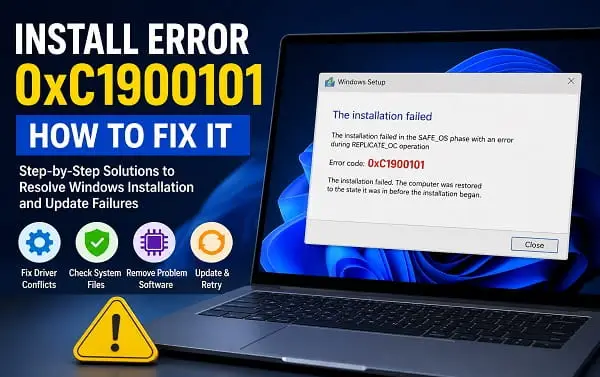
If Windows displays “Install error – 0xC1900101” while installing an update or upgrading to Windows 11, the update usually started correctly but failed during setup and rolled your computer back to its previous state.
This error is frustrating because Windows often gives you the code without identifying the exact driver or software responsible. You may see messages such as Undoing changes made to your computer, Attempting to recover installation, or simply Installation failed before Windows starts normally again.
The good news is that 0xC1900101 is not usually a sign that Windows is permanently damaged. Microsoft identifies it as a generic upgrade rollback error that is commonly associated with incompatible or problematic drivers. Storage controllers, graphics drivers, network adapters, external devices, antivirus software, and other low-level software can all interfere with an upgrade.
The fixes below are arranged from the safest and simplest to the more advanced diagnostic steps. Start at the top and stop when the update installs successfully.
What Does Install Error 0xC1900101 Mean?
0xC1900101 is a Windows installation or upgrade rollback code. In plain terms, Windows Setup encountered a problem serious enough to abandon the installation and restore the previous working version of Windows.
The code by itself is often not specific enough to identify the exact cause. You may see a longer version such as:
0xC1900101 - 0x200040xC1900101 - 0x2000C0xC1900101 - 0x200170xC1900101 - 0x300180xC1900101 - 0x4000D0xC1900101 - 0x40017
The second code can help identify the stage of Setup where the failure happened. Microsoft documents 0xC1900101 as a generic rollback result that is commonly linked to incompatible drivers and recommends using the extended error code and setup diagnostics when the basic fixes do not identify the cause.
That means the most useful approach is not to keep retrying the same update. First remove common sources of interference, then diagnose the failed installation if it continues.
Before You Try Anything: Back Up Important Files
A normal Windows update should not erase your files. However, repeated failed upgrades, driver changes, BIOS updates, and advanced repair work always carry some risk.
Before continuing:
- Back up important documents and photos.
- Make sure you know your BitLocker recovery key if device encryption is enabled.
- Keep your laptop connected to reliable power.
- Do not force the computer off while Windows is actively installing an update.
If the computer is already having boot problems after a failed update, see Boot Device Not Found HP? 9 Ways to Fix 3F0 Error for recovery-related checks before assuming the drive itself has failed.
1. Restart Windows and Try the Update Again
Start with a proper restart.
Open:
Start > Power > Restart
Do not rely only on sleep mode or closing the laptop lid. A restart reloads Windows services and drivers from a cleaner state.
After the PC starts again:
- Open Settings.
- Select Windows Update.
- Click Check for updates.
- Install the update again.
If the same error returns immediately, continue to the next step.
2. Disconnect Unnecessary External Devices
Microsoft specifically recommends reducing the number of connected peripherals when troubleshooting 0xC1900101 upgrade failures.
Disconnect non-essential devices such as:
- External hard drives and USB flash drives
- USB hubs and docking stations
- Printers and scanners
- Game controllers
- External webcams
- SD card readers
- USB Wi-Fi or Bluetooth adapters you do not need for the upgrade
- Audio interfaces and other specialist USB hardware
Leave only what is necessary to use the computer, such as the display, keyboard, mouse, and power connection.
Then restart Windows and retry the installation.
This matters because Windows Setup may attempt to detect, migrate, or install a driver for an attached device during the upgrade. A problematic external driver can cause Setup to fail even though Windows works normally before the update.
If removing an external device allows the update to complete, reconnect your devices one at a time afterward and update the driver for the one that caused the conflict.
3. Update Important Drivers Before Retrying
Because 0xC1900101 is frequently driver-related, this is one of the most important fixes.
Do not download a random “driver updater” program. Start with the official support page for your PC, laptop, motherboard, or device manufacturer.
Pay particular attention to:
- Chipset drivers
- Storage controller or RAID drivers
- Intel Rapid Storage Technology drivers where applicable
- Graphics drivers
- Network drivers
- Wi-Fi and Bluetooth drivers
- Audio drivers
- USB and Thunderbolt drivers
For laptops, the manufacturer’s support page is often the safest starting point because the manufacturer may provide a driver package specifically tested for that model.
For example, a damaged or incorrect network driver can cause wider problems than just internet access. My guide on Windows Could Not Find a Driver for Your Network Adapter explains why identifying the exact adapter and obtaining the correct official driver is safer than installing generic driver packages.
Check Device Manager
Press:
Windows + X
Then select:
Device Manager
Look for:
- Yellow warning symbols
- Unknown devices
- Devices that repeatedly disconnect
- Hardware you recently installed
- A driver you recently updated before the installation error began
If the problem started immediately after installing a driver, rolling that driver back may be more appropriate than installing another version over it.
To check for rollback:
- Open Device Manager.
- Right-click the affected device.
- Select Properties.
- Open the Driver tab.
- Select Roll Back Driver if the option is available.
Restart the PC and try Windows Update again.
4. Uninstall or Temporarily Remove Third-Party Security Software
Third-party antivirus, endpoint protection, encryption software, and security tools can interfere with major Windows upgrades.
If you use a non-Microsoft security suite, temporarily uninstalling it is often more effective than simply clicking a “disable protection” button. Some low-level services and filter drivers can remain active even when the visible interface says protection is turned off.
Before removing security software:
- Make sure you have the installer or account details needed to reinstall it later.
- Do not leave the computer unprotected longer than necessary.
- Keep Microsoft Defender active unless you have a specific reason not to.
After uninstalling the third-party security software:
- Restart Windows.
- Try the update again.
- Reinstall the security software only after the upgrade succeeds.
If your PC is managed by an employer or school, do not remove required security software without approval. Contact the administrator instead.
5. Perform a Clean Boot Before Installing the Update
A clean boot helps determine whether a third-party service or startup program is interfering with Windows Setup.
This is different from Safe Mode. A clean boot starts normal Windows while disabling non-essential third-party startup items and services for troubleshooting.
How to perform a clean boot
- Press
Windows + R. - Type
msconfig. - Press Enter.
- Open the Services tab.
- Check Hide all Microsoft services.
- Click Disable all.
- Open the Startup tab.
- Select Open Task Manager.
- Disable non-essential startup applications.
- Restart the computer.
After the restart, try installing the update.
If the update succeeds, re-enable your startup programs and services gradually until you identify the conflict.
Do not leave everything disabled permanently. A clean boot is a diagnostic step, not a normal long-term Windows configuration.
If you are already seeing crashes, driver failures, or blue screens, How To Fix MEMORY_MANAGEMENT Win32k.sys BSOD may also help you investigate a broader driver or hardware problem before attempting the upgrade again.
6. Repair Windows System Files With DISM and SFC
A damaged Windows component store or corrupted system files can complicate the update process.
Open Command Prompt, PowerShell, or Windows Terminal as administrator.
Run:
DISM.exe /Online /Cleanup-Image /RestoreHealthWait for the command to finish.
Then run:
sfc /scannowRestart the computer after both commands complete.
DISM repairs the Windows image and component store, while System File Checker checks protected Windows system files and replaces damaged files when possible.
If SFC returns the message “Windows Resource Protection could not perform the requested operation,” do not keep running the same command repeatedly. Follow my detailed guide on Windows Resource Protection Error: How to Fix It for the specific repair steps.
You can also see the same DISM-and-SFC repair approach explained in my Copy and Paste Not Working in Windows 11 troubleshooting guide.
7. Make Sure You Have Enough Free Storage Space
A major Windows update needs temporary working space during download, extraction, installation, migration, and rollback.
Open:
Settings > System > Storage
Check the free space on the Windows drive.
If storage is low:
- Delete unnecessary large files.
- Empty the Recycle Bin.
- Remove temporary files.
- Uninstall applications you no longer use.
- Move large videos or archives to another drive.
Do not delete files from C:\Windows, Program Files, or other system folders manually just to create space.
If your computer has a small system drive, Windows Storage settings are a safer place to identify removable temporary files.
8. Check for Disk Errors
File-system errors can contribute to failed installations, especially if Windows Setup cannot reliably read or write files during the upgrade.
Open Command Prompt as administrator and run:
chkdsk C: /scanThis checks the C: drive without immediately scheduling an offline repair.
If Windows reports that a repair is required, you may need to use a repair command or follow the instructions Windows provides.
For a more extensive repair scan, you may see instructions recommending:
chkdsk C: /fWindows may ask to schedule the repair for the next restart.
Do not interrupt the computer while a scheduled disk repair is running.
If the update problem is accompanied by repeated boot errors, sudden disk disappearance, or recovery screens, treat possible storage hardware problems seriously rather than repeatedly reinstalling Windows.
9. Update the BIOS or UEFI Only When It Is Relevant
An outdated BIOS or UEFI firmware can sometimes contribute to hardware compatibility problems during a major Windows upgrade.
However, a BIOS update is not the first thing I recommend for every 0xC1900101 error.
Consider checking for a BIOS update when:
- The PC manufacturer specifically recommends one for your Windows version.
- The error began after installing new hardware.
- You have a known storage, chipset, or compatibility issue.
- The current BIOS release notes mention Windows compatibility or stability improvements.
Use the official support page for the exact PC or motherboard model.
A failed BIOS update can make a computer unbootable, so do not install firmware simply because a third-party driver website says it is “recommended.”
10. Remove Unused or Problematic Drivers
Old drivers can remain installed even after the hardware they supported is no longer connected.
Examples include drivers for:
- Old printers
- Virtual network adapters
- VPN software
- Storage controllers
- RGB and hardware-monitoring tools
- Virtual machines
- Older USB devices
- Legacy audio interfaces
If the error started after installing or removing a particular device, that device deserves special attention.
You can inspect installed devices through Device Manager, but do not uninstall random entries just because you do not recognize them. Some system devices are essential to Windows.
If you are not sure what a device is, identify its hardware ID or check the PC manufacturer’s documentation before removing its driver.
11. Try Windows Update Again With a Minimal Hardware Setup
At this point, the ideal retry environment is:
- Unnecessary USB devices disconnected
- Third-party security software removed if appropriate
- Important drivers updated
- No yellow warning symbols for active hardware
- Clean boot enabled
- Enough free storage available
- Windows system files repaired
Restart the computer once more and try the update.
If the installation succeeds, restore normal startup settings and reconnect your devices.
If it fails with the exact same 0xC1900101 code, the next step is to find the specific cause instead of repeating the general fixes.
12. Run Microsoft’s SetupDiag Tool
This is one of the most useful advanced steps for a recurring feature-update or upgrade failure.
Microsoft’s SetupDiag tool examines Windows Setup logs and attempts to identify why an update or upgrade failed.
Download and usage instructions are available in Microsoft’s official SetupDiag documentation.
After a failed upgrade, run the latest version of SetupDiag and review the results it generates.
The diagnostic output may point to:
- A problematic driver
- An incompatible application
- A failed migration operation
- A setup phase where the rollback occurred
- Another specific setup rule or error
This is far more useful than repeatedly searching the basic 0xC1900101 code because the code is generic.
Microsoft also documents detailed mitigation procedures for 0xC1900101 and its extended codes in its Windows upgrade resolution procedures.
13. Check the Full Error Code
Do not ignore the numbers after the main error.
For example:
0xC1900101 - 0x20017
provides more information than:
0xC1900101
The extended code can indicate the setup phase or operation where the failure occurred.
Some common patterns are associated with:
- SAFE_OS problems
- FIRST_BOOT failures
- SECOND_BOOT failures
- Driver migration problems
- Hardware or external-device conflicts
- Software or service interference
If you can find the full error in Windows Update history, SetupDiag, Event Viewer, or the Windows Setup logs, troubleshoot that specific extended code rather than treating every 0xC1900101 failure as identical.
14. Check Setup Logs for the Actual Driver or Software
This is an advanced step, but it can save a lot of time when the error keeps returning.
Windows Setup logs can contain the name of a driver or component that failed during installation.
Microsoft commonly refers administrators to logs such as:
setuperr.logsetupact.log- Device installation logs
- Rollback logs
Depending on the upgrade phase, the relevant files may be located in Windows Setup directories such as the Panther or Rollback folders.
You do not need to understand every line in the logs. Search for terms such as:
ErrorFailRollback.sysincompatibledriver
The last serious error before the rollback is often more useful than dozens of earlier warnings.
Be careful not to delete a .sys file simply because its name appears in a log. First identify which driver or software owns the file and obtain the correct update or removal procedure.
15. Use Safe Mode to Remove a Suspected Conflict
If a driver or application appears to be causing crashes or preventing normal startup, Safe Mode can provide a cleaner environment for removing it.
A typical route in Windows 11 is:
Settings > System > Recovery > Advanced startup > Restart now
Then:
Troubleshoot > Advanced options > Startup Settings > Restart
Choose the appropriate Safe Mode option.
In Safe Mode, you can:
- Remove a recently installed application.
- Roll back a recently updated driver.
- Uninstall a conflicting device.
- Remove third-party security or system utilities.
Safe Mode loads a reduced set of drivers and services, making it useful for diagnosis. It is not a permanent replacement for normal Windows startup.
16. Consider an In-Place Repair or Fresh Installation Only After Diagnosis
If 0xC1900101 continues after the driver, hardware, software, and diagnostic checks above, the Windows installation may need more extensive repair.
Before performing a clean installation, consider whether an in-place repair installation is appropriate for your situation. A repair install can reinstall Windows components while preserving personal files and, in many cases, installed applications.
A clean installation should generally be a later option because it requires more preparation and can remove applications and data.
If you have already tried several failed upgrades, do not assume that a clean installation is automatically necessary. SetupDiag or the setup logs may still identify a specific driver or hardware conflict that can be fixed without wiping the PC.
Why Error 0xC1900101 Keeps Coming Back
When the same error returns every time, something is usually being preserved between attempts.
The most common repeat offenders are:
- The same incompatible driver.
- A connected external device.
- Third-party antivirus or security software.
- A storage or controller driver.
- A startup service that clean booting has not isolated yet.
- Hardware instability.
- An outdated BIOS or firmware issue.
- A failed component migration that SetupDiag can identify.
That is why repeatedly clicking Retry without changing anything rarely solves a persistent 0xC1900101 problem.
Frequently Asked Questions
What causes install error 0xC1900101?
The error is commonly caused by an incompatible or problematic driver during a Windows update or upgrade. External hardware, storage controllers, graphics drivers, network drivers, third-party security software, and other low-level system components can contribute.
Is 0xC1900101 a driver error?
It is commonly associated with driver compatibility problems, but the main code is generic. The full extended error code and Windows Setup diagnostics can provide a more precise explanation.
Can antivirus cause 0xC1900101?
Yes. Third-party antivirus and security products can interfere with major Windows upgrades through background services or low-level drivers. Temporarily uninstalling the conflicting product can help when appropriate.
Should I update all my drivers to fix 0xC1900101?
No. Avoid indiscriminately installing drivers from random websites. Focus on important hardware drivers and use the official PC, motherboard, or device manufacturer as the primary source.
Can I fix 0xC1900101 by resetting Windows Update?
Resetting Windows Update components may help some update failures, but 0xC1900101 often points to a driver or upgrade compatibility issue. Start with the driver, device, security software, clean-boot, and diagnostic checks before assuming the update cache is the main problem.
Does unplugging USB devices really help?
It can. Windows Setup interacts with connected hardware and its drivers during an upgrade. Removing non-essential peripherals reduces the number of devices that can introduce a compatibility conflict.
Should I update my BIOS?
Only when there is a good reason. Check the official support page for your exact model and review the firmware notes. A BIOS update can help with genuine compatibility problems, but it is not a routine fix for every Windows update error.
What should I do if 0xC1900101 happens during a Windows 11 upgrade?
Disconnect unnecessary devices, update critical drivers, remove conflicting third-party security software, perform a clean boot, repair Windows with DISM and SFC, then use SetupDiag if the upgrade still fails.
The Best Way to Approach 0xC1900101
The most important thing to understand about install error 0xC1900101 is that it is usually a rollback signal, not a complete diagnosis.
Start by simplifying the upgrade environment: disconnect unnecessary hardware, update critical drivers, remove likely software conflicts, and repair Windows system files. If the installation still fails, stop guessing and use the full error code, SetupDiag, and Windows Setup logs to narrow the problem to a specific driver, device, or component.
That approach gives you a much better chance of fixing the actual cause without unnecessarily resetting or reinstalling Windows.
