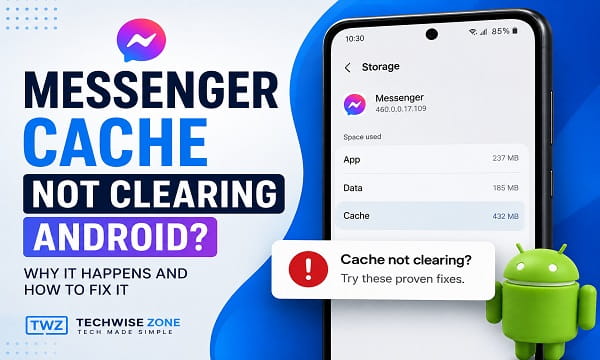
Messenger can build up a surprising amount of temporary data on an Android phone. Normally, opening Settings > Apps > Messenger > Storage & cache > Clear cache removes that temporary data.
Sometimes, however, the cache size appears unchanged, returns almost immediately, or the Clear cache button seems to do nothing. This does not always mean Android failed to clear Messenger’s cache. Android can rebuild temporary files as soon as Messenger starts running again, so the storage figure may increase after you reopen the app.
If you are dealing with Messenger cache not clearing on Android, the first thing I recommend is checking the cache immediately after clearing it, before opening Messenger again. If it still does not change, force stop the app, restart your phone, update Messenger, and work through the other fixes below.
What Happens When You Clear Messenger Cache?
Clearing an app’s cache removes temporary files stored by the app. Google explains that clearing cached data can temporarily free storage, but cached data can build up again over time. citeturn0search0turn0search1
That means you should not expect Messenger’s cache to remain at exactly 0 B.
Messenger can create temporary data again when you:
- Open the app
- Browse conversations
- Load photos or videos
- Search through chats
- Make or receive calls
- Load other content that Messenger needs temporarily
So if you clear the cache and immediately reopen Messenger, seeing some cached data again can be completely normal.
The important question is whether Android is actually clearing the cache when you request it.
How to Clear Messenger Cache Correctly on Android
The exact menu names vary between Samsung Galaxy, Google Pixel, Motorola, Xiaomi, OnePlus, Tecno, Infinix, and other Android phones. Google also notes that Android settings can differ by device manufacturer. citeturn0search0
Try these steps:
- Open Settings.
- Tap Apps or Apps & notifications.
- Select Messenger.
- Tap Storage or Storage & cache.
- Tap Clear cache.
- Wait a few seconds.
- Check the cached data size again.
If your phone uses a different menu structure, search Settings for Messenger, App info, or Storage.
Do not tap Clear storage, Clear data, or a similarly named option unless you understand what it does. Android distinguishes between clearing an app’s cache and clearing its stored data. Clear cache removes temporary data, while Clear storage permanently deletes the app’s stored data. citeturn0search1
Messenger Cache Is Not Clearing? Force Stop the App First
If the Clear cache button appears to have no effect, force stop Messenger before trying again.
Go to:
Settings > Apps > Messenger > Force stop
Confirm the action, then return to:
Storage & cache > Clear cache
Check the cache size before opening Messenger again.
Google recommends force stopping an Android app when it is not responding or working correctly, followed by clearing its cache when appropriate. citeturn0search0
This can help if Messenger has a background process running while you are trying to clear its temporary files.
Restart Your Android Phone
A restart can help when Android’s app storage screen or Messenger itself is behaving unexpectedly.
After restarting:
- Do not open Messenger immediately.
- Go to Settings > Apps > Messenger.
- Open Storage & cache.
- Tap Clear cache.
- Check the cache size.
- Open Messenger afterward.
If the cache remains low until Messenger starts running, Android successfully cleared it. Messenger simply created new temporary files afterward.
If your Android phone is experiencing other software problems at the same time, our guide on Android Stuck in Safe Mode covers additional troubleshooting steps, including restarting the device and checking for problematic apps.
Check Whether You Are Clearing Cache or Storage
Android usually provides two separate options:
Clear cache
and
Clear storage or Clear data
They are not the same.
Clear cache deletes temporary files. Some apps may take slightly longer to open the next time because those files have to be created again. citeturn0search1
Clear storage permanently deletes the app’s stored data from the device. That is a much more significant step.
If your only goal is to remove Messenger’s temporary files, use Clear cache rather than immediately clearing storage.
Check Your Phone’s Available Storage
A nearly full Android phone can make app problems more difficult to troubleshoot.
Open:
Settings > Storage
and check how much free space remains.
If your phone is almost full, remove unnecessary downloads, large videos, duplicate files, or unused apps before troubleshooting Messenger again.
Google recommends checking storage when freeing space and notes that clearing cached data is only a temporary way to recover storage because the cache can build up again. citeturn0search1turn0search2
After freeing some space, restart your phone and try clearing Messenger’s cache again.
Update Messenger
An outdated Messenger installation can contain bugs that have already been fixed in a newer version.
Open the Google Play Store, search for Messenger, and check whether an Update button is available.
Google’s Android troubleshooting guidance recommends updating an app when it is not working properly. citeturn0search0
After updating:
- Restart your phone.
- Force stop Messenger.
- Open Settings > Apps > Messenger > Storage & cache.
- Tap Clear cache.
- Check the storage information again.
Clear Cache From Messenger’s App Info Page
If you normally try to clear Messenger’s cache through a storage-cleaning tool or shortcut, use Android’s built-in App info screen instead.
Find Messenger in your app drawer, press and hold its icon, and tap App info if your phone provides that option.
Then select:
Storage & cache > Clear cache
This gives Android direct control over Messenger’s temporary app data.
Messenger Cache Keeps Coming Back Immediately
This is one of the most confusing parts of the problem.
Suppose you do this:
Clear cache > Open Messenger > Check storage
and discover that Messenger already has cached data again.
That does not necessarily mean the cache failed to clear.
Messenger can create new temporary data as soon as it starts loading conversations, images, videos, calls, and other content.
To test whether clearing the cache is actually working:
- Clear Messenger’s cache.
- Stay on the App info screen.
- Check the cache size.
- Restart the phone if necessary.
- Check the cache again before opening Messenger.
If the cache is small or empty before Messenger runs, the clear-cache operation worked.
Messenger Cache Shows 0 B, Then Increases
Seeing 0 B immediately after clearing the cache can be normal.
For example, you might see:
Before clearing: 500 MB
Immediately after clearing: 0 B
After opening Messenger: 20 MB
That does not mean Android failed to clear the cache.
The app simply generated new temporary data after it started running.
Google explicitly notes that cached data can build up again over time, so a cache that increases after you use Messenger is not automatically a problem. citeturn0search0
What If the Clear Cache Button Is Missing?
If you cannot find Clear cache, open Messenger’s Android App info page.
Depending on your phone, look under:
Settings > Apps > Messenger > Storage
or:
Settings > Apps > Messenger > Storage & cache
Some manufacturers use different labels or organize app settings differently.
If the option is still missing, make sure you are looking at the actual Messenger app rather than another Meta application.
You can also use the Settings search box and search for Messenger or App info.
Free Up Space Without Clearing Messenger’s App Data
If your main reason for clearing Messenger’s cache is to free storage, check whether Messenger is actually using enough space to make a meaningful difference.
Go to:
Settings > Storage > Apps
or your phone’s equivalent storage-management screen.
Compare Messenger with your other large apps.
You may find that downloaded videos, photos, offline files, browser data, or another application is consuming much more storage.
Because cached data can build up again, repeatedly clearing Messenger’s cache is not a permanent storage-management solution. citeturn0search1
Try Clearing Messenger Cache After an App Update
If Messenger was recently updated and its storage information looks unusual, give the app a fresh start.
Try this sequence:
- Update Messenger from Google Play.
- Restart your Android phone.
- Open Settings.
- Go to Apps > Messenger.
- Tap Force stop.
- Open Storage & cache.
- Tap Clear cache.
- Check the cache size before reopening Messenger.
This combines several standard Android troubleshooting steps: restart the device, update the app, force stop it, and clear its cache. citeturn0search0
Clear Messenger Storage Only as a Last Resort
If Messenger continues to malfunction after clearing its cache, force stopping it, restarting the phone, updating the app, and checking available storage, you may consider clearing its app storage.
However, this is very different from clearing the cache.
Android states that Clear storage permanently deletes all app data stored on the device. citeturn0search1
For that reason, I would not use Clear storage simply because Messenger’s cache keeps coming back.
Before taking this step, make sure you understand how your Messenger account and chat history are currently stored and protected.
Reinstall Messenger If the Problem Continues
If Messenger is still malfunctioning after the less disruptive fixes, reinstalling the app can provide a cleaner installation.
Before uninstalling Messenger, make sure important Messenger information you need is available through your account and any applicable secure-storage or backup features.
Then:
- Uninstall Messenger.
- Restart the phone.
- Install Messenger again from Google Play.
- Sign in.
- Check whether the original problem has disappeared.
Google lists uninstalling and reinstalling an app among the later troubleshooting steps when an Android app continues to malfunction. citeturn0search0
If you only wanted to reduce Messenger’s cache size, however, reinstalling the app is usually unnecessary.
Check Your Internet Connection If Messenger Is Also Failing to Load
Sometimes a cache problem is only one symptom of a broader connectivity issue.
If Messenger will not load conversations, send messages, make calls, or display media after clearing the cache, test another app or website.
If multiple apps cannot access the internet, troubleshoot the Android connection rather than repeatedly clearing Messenger’s cache.
Our guide on Android Hotspot Not Working covers several Android connectivity checks, including mobile data, VPNs, network settings, and connection troubleshooting.
What If Messenger Still Does Not Work After Clearing the Cache?
If clearing Messenger’s cache does not solve the underlying problem, treat it as an app troubleshooting issue rather than a cache issue.
Try these steps in order:
- Force stop Messenger.
- Restart your phone.
- Update Messenger.
- Check your internet connection.
- Check available storage.
- Clear the cache again.
- Check for an Android system update.
- Consider reinstalling Messenger if the problem continues.
Google recommends restarting and updating the device or app, force stopping the app, clearing its cache, and uninstalling/reinstalling it when necessary. citeturn0search0
If other apps are also malfunctioning, the problem may be with Android rather than Messenger itself.
Frequently Asked Questions
Why is Messenger cache not clearing on Android?
Messenger’s cache may actually be clearing but then rebuilding when the app starts again. Check the cache immediately after clearing it and before reopening Messenger.
How do I force Messenger to clear its cache?
Open Settings > Apps > Messenger > Storage & cache, tap Force stop, then tap Clear cache. Menu names vary between Android manufacturers.
Why does Messenger cache come back after I clear it?
Messenger can recreate temporary data when you reopen the app. A cache value that increases after using Messenger does not necessarily indicate that the clear-cache operation failed.
Will clearing Messenger cache delete my messages?
Clearing cache removes temporary files and is different from clearing app storage. It should not be treated as the same operation as clearing Messenger’s stored app data.
Is it safe to clear Messenger cache?
Yes. Clearing an app’s cache is a standard Android troubleshooting step. It removes temporary data and does not have the same effect as clearing the app’s stored data. citeturn0search1
Should I clear Messenger storage instead of cache?
Not as the first step. Clearing storage permanently deletes the app’s stored data from the device, so use it only when normal troubleshooting has failed and you understand the implications. citeturn0search1
How often should I clear Messenger cache?
There is no need to clear Messenger’s cache on a fixed schedule. Consider doing it when Messenger is malfunctioning, its temporary storage has become unusually large, or you are troubleshooting an app problem.
Why does Messenger cache keep increasing?
Messenger creates temporary files as you use the app. Loading conversations, images, videos, and other content can cause the cache to increase again after it has been cleared.
What should I do if clearing Messenger cache does nothing?
Force stop Messenger, restart the phone, update the app, and try clearing the cache again before opening Messenger. If the problem continues, check your phone’s storage and consider reinstalling Messenger as a later step.
When Clearing the Cache Is Not the Real Problem
A Messenger cache that increases after clearing is often normal. The more useful test is whether Messenger’s cache drops when you select Clear cache and whether the app works normally afterward.
If the cache drops and later grows again, there is usually nothing wrong with Android’s cache system.
If Clear cache does nothing at all, Messenger continues malfunctioning, or Android’s App info screen behaves incorrectly, move on to force stopping the app, restarting the phone, updating Messenger, checking storage, and eventually reinstalling the app if necessary.
The goal is not to keep Messenger’s cache permanently at 0 B. The goal is to make sure Android can clear the temporary data when requested and that Messenger works normally afterward.
