
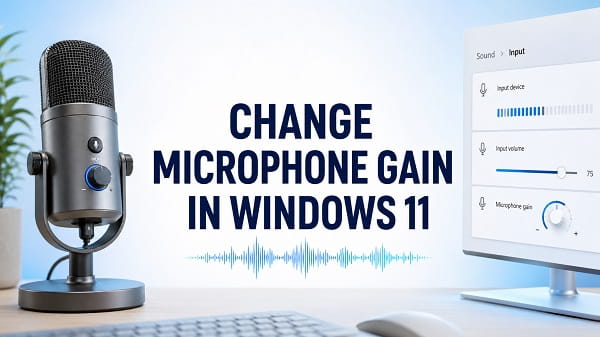
To change microphone gain in Windows 11, open Settings > System > Sound, select your microphone under Input, and adjust the Input volume slider. Use Start test to record a short sample and confirm that your voice is loud enough without sounding distorted.
If the microphone is still too quiet, open Settings > System > Sound > More sound settings, select the Recording tab, open your microphone’s Properties, and check the Levels tab for a Microphone Boost control. Not every microphone or audio driver provides this option.
Windows users often call both controls “gain,” but they are not exactly the same. Input volume changes the level Windows receives or passes to applications. True microphone gain controls how strongly a microphone’s electrical signal is amplified before conversion. On a USB microphone or audio interface, true gain may be controlled by a physical knob or the manufacturer’s application rather than Windows.
This distinction matters because increasing the wrong control can make a recording noisy, clipped or inconsistent.
Microphone Gain vs Input Volume in Windows 11
The following controls can all affect how loud you sound:
| Control | What it changes | Where to find it |
|---|---|---|
| Input volume | The microphone level Windows provides to applications | Settings > System > Sound > Input |
| Microphone level | The recording device’s level in the classic Sound panel | More sound settings > Recording > Properties > Levels |
| Microphone Boost | Additional amplification, usually measured in decibels | Microphone Properties > Levels |
| Hardware gain | Amplification before the signal reaches Windows | Microphone or audio-interface gain knob |
| App microphone level | The level used inside one application | Zoom, Teams, Discord, OBS or another app |
| Automatic gain control | An app or device automatically raises and lowers the level | Application or device software |
Changing Input volume is the correct first step for most laptop microphones, webcams and headsets. Use Microphone Boost only when the regular level is too low and the option is available.
More boost is not automatically better. It can amplify fan noise, keyboard sounds, electrical interference and room echo along with your voice.
Before Changing the Gain
Check these basics first:
- Select the microphone you actually intend to use.
- Confirm that a headset or microphone is fully connected.
- Turn off any physical mute switch.
- Position the microphone correctly.
- Close applications that may be controlling the microphone automatically.
- Make a short recording before changing anything.
- Note the original level so you can restore it.
Windows computers can have several input devices, including a laptop microphone array, webcam mic, headset, controller, Bluetooth device, monitor microphone and USB interface. Raising the wrong one will have no effect on your call or recording.
Method 1: Change Microphone Gain in Windows 11 Settings
This is the quickest and safest method.
- Press Windows + I to open Settings.
- Select System.
- Click Sound.
- Scroll to the Input section.
- Select the microphone you want to adjust.
- Find Input volume.
- Move the slider to the right to make the microphone louder or left to make it quieter.
Microsoft’s official microphone troubleshooting instructions use this same path for increasing microphone volume in Windows 11.
Do not immediately set the slider to 100. Start around the existing level, speak at your normal distance and increase it gradually.
Test the Microphone
On the microphone properties page:
- Find Test your microphone.
- Click Start test.
- Speak normally for several seconds.
- Click Stop test.
- Select Play if Windows offers a playback option.
- Listen for low volume, clipping, background noise or changes in loudness.
Microsoft also documents the current Windows microphone test, including the Start test and Input volume controls.
The percentage shown by a Windows test is not a universal recording target. Different microphones, voices and distances produce different results. Judge the recorded sample as well as the meter.
Method 2: Change Microphone Gain Through More Sound Settings
The classic Sound control panel can expose controls that do not appear on the main Windows 11 Settings page.
- Press Windows + I.
- Go to System > Sound.
- Scroll down and select More sound settings.
- Open the Recording tab.
- Right-click the microphone.
- Select Properties.
- Open the Levels tab.
- Adjust the Microphone slider.
- Adjust Microphone Boost if it is available.
- Click Apply, then OK.
You can open the same panel more quickly:
- Press Windows + R.
- Enter
mmsys.cpl. - Press Enter.
- Open the Recording tab.
This shortcut does not bypass permissions or unlock hidden hardware features. It simply opens the classic Sound interface.
How Much Microphone Boost Should You Use?
Microphone Boost commonly appears in steps such as:
0.0 dB+10.0 dB+20.0 dB+30.0 dB
The values available depend on the audio chipset and driver.
Use the lowest amount that makes your normal voice clear:
- Set the regular microphone level first.
- Start with no boost or the lowest boost setting.
- Record a test while speaking normally.
- Increase one step only if the signal remains too quiet.
- Stop increasing when your voice is clear.
Large amounts of boost can introduce:
- Constant hiss
- Fan and keyboard noise
- Electrical hum
- Harsh or distorted speech
- Echo
- Clipping on loud words
If +30 dB is required for a microphone positioned close to your mouth, check the connection, selected device and driver before accepting the noise as normal.
Method 3: Change Gain in Realtek Audio Console
Many Windows 11 laptops and motherboards use Realtek audio hardware. The controls provided by Realtek vary between manufacturers.
- Open the Start menu.
- Search for Realtek Audio Console.
- Select the microphone or recording-device section.
- Look for microphone volume, recording volume, boost, noise suppression or connector settings.
- Make one change at a time.
- Record a test.
Some computers use a manufacturer-specific version of the Realtek application. Dell, HP, Lenovo, ASUS, Acer and other manufacturers may bundle audio tools from Realtek, Waves, Dolby, Nahimic or another partner.
Do not download a Realtek console or driver from an unknown driver website. Use Windows Update, the Microsoft Store when the computer directs you there, or the support page for the exact PC or motherboard model.
Check the Jack Type
A 3.5 mm headset microphone may be quiet or unavailable when:
- It uses separate headphone and microphone plugs but the laptop has one combined jack.
- It uses a four-pole TRRS plug with an incompatible wiring standard.
- A splitter is connected backwards.
- Windows detected the plug as headphones instead of a headset.
- The plug is not inserted completely.
If an audio console asks what was connected, choose Headset when the device includes both headphones and a microphone.
Method 4: Change Gain on a USB Microphone
USB microphones contain their own analogue-to-digital hardware. Windows may provide only an Input volume slider, while the microphone controls true gain itself.
Check the microphone for:
- A gain knob
- A microphone-level dial
- A mute button
- A headphone-monitoring control
- A companion application
Do not confuse headphone volume with microphone gain. A knob marked with a headphone icon changes what you hear, not necessarily what the microphone sends to the computer.
For a USB microphone:
- Set the physical gain to a moderate level.
- Position the microphone according to its pickup pattern.
- Speak at the distance you will use normally.
- Watch the meter in your recording or communication app.
- Adjust the hardware gain before relying on extreme Windows amplification.
- Fine-tune Windows Input volume afterwards.
Hardware gain normally produces a better signal than recording an extremely weak signal and amplifying it heavily in software.
Method 5: Change Gain on an Audio Interface
An audio interface used with an XLR microphone normally controls preamp gain through a physical knob.
The Windows Input volume control may:
- Be unavailable
- Have limited effect
- Adjust a digital level after conversion
- Be ignored by an ASIO application
Use this order:
- Connect the microphone to the correct interface input.
- Enable phantom power only when the microphone requires it.
- Turn the hardware gain down before connecting or changing microphones.
- Speak or perform at the loudest expected level.
- Raise the interface gain until the signal is healthy without triggering a clipping indicator.
- Fine-tune the track level inside the recording application.
Do not enable 48-volt phantom power merely to make every microphone louder. It is intended for compatible condenser microphones and certain active equipment. Follow the microphone and interface documentation.
Dynamic microphones can require more clean preamp gain than condenser microphones. If the interface cannot provide enough level without noise, changing Windows to 100 may not solve the underlying hardware limitation.
Method 6: Change Microphone Level in an Application
Zoom, Microsoft Teams, Discord, OBS Studio, game launchers and recording programs can use their own microphone settings.
The Windows level may be correct while one application remains too quiet because that program:
- Uses a different microphone
- Has its own input slider
- Applies automatic gain control
- Applies noise suppression
- Resets the microphone level
- Uses exclusive audio access
Open the application’s audio or voice settings and verify:
- The selected input device
- The application microphone slider
- Automatic input sensitivity
- Automatic gain control
- Noise suppression
- Push-to-talk behaviour
- Test-call or recording results
Avoid changing Windows, the hardware knob and the application slider at the same time. Adjust one stage, test it, then continue.
Stop Apps from Automatically Changing Microphone Gain
Some communication applications change the microphone level to keep voices at a consistent volume. This can make the Windows slider move by itself or return to a lower value.
Check the affected application’s settings for:
- Automatically adjust microphone volume
- Automatic gain control
- Automatically determine input sensitivity
- Mic normalization
- Voice processing
Turn off the automatic setting temporarily, choose a manual level and test.
Disable Exclusive Control as a Test
An application can request exclusive control of an audio device. This is useful in some recording situations, so do not assume it must always be disabled.
To test:
- Open Settings > System > Sound > More sound settings.
- Select the Recording tab.
- Open the microphone’s Properties.
- Select Advanced.
- Clear Allow applications to take exclusive control of this device.
- Click Apply.
- Restart the affected application.
If this makes no difference, restore the setting. Exclusive mode is not the cause of every automatic level change.
Why Is Microphone Boost Missing in Windows 11?
Microphone Boost is not a guaranteed Windows feature. The hardware and driver decide whether the additional boost control is exposed.
The option may be missing because:
- The microphone does not support software-controlled boost.
- The current driver exposes only a basic input level.
- A USB microphone manages gain internally.
- A Bluetooth headset manages input gain through its firmware.
- The computer manufacturer moved controls to an audio application.
- Windows installed a generic driver with fewer controls.
- The device is using a digital rather than analogue input.
Do not edit the Registry to create a fake boost slider. A visible option will not produce hardware amplification when the device and driver do not support it.
Fix 1: Confirm the Correct Microphone
- Open Settings > System > Sound.
- Find Input.
- Speak and watch which device meter responds.
- Select that microphone.
- Set it as the default input device if appropriate.
Also check the input selection inside the affected app. Windows and the app can use different defaults.
If no microphone responds or the device keeps disappearing, follow my Windows 11 microphone not working guide before trying to increase gain.
Fix 2: Reconnect the Microphone
For a wired microphone:
- Disconnect it.
- Inspect the plug and port.
- Reconnect it firmly.
- Try another compatible port.
- Avoid an unpowered USB hub during testing.
For a Bluetooth headset:
- Charge the headset.
- Disconnect it from other phones or computers.
- Remove and pair it again if necessary.
- Confirm that Windows selected its microphone input.
If Windows will not remove the old pairing, use my guide to removing a stuck Bluetooth device in Windows 11.
Fix 3: Check Microphone Privacy Permissions
Gain changes cannot help if Windows blocks microphone access.
- Open Settings.
- Select Privacy & security.
- Click Microphone.
- Turn on Microphone access.
- Turn on Let apps access your microphone.
- Review access for individual applications.
- Enable Let desktop apps access your microphone when needed.
Desktop applications may appear as a group rather than as individual switches.
Fix 4: Disable Audio Enhancements Temporarily
Noise suppression, beam forming, echo cancellation and other audio enhancements can improve speech, but a faulty or aggressive effect can also reduce volume or make it fluctuate.
- Open Settings > System > Sound.
- Select the microphone.
- Find Audio enhancements.
- Set the option to Off for testing.
- Record another sample.
The option may instead appear under More sound settings > Recording > Microphone Properties > Enhancements or Advanced.
If disabling enhancements makes the voice clearer, re-enable only the features you need.
Fix 5: Change the Default Format
An incompatible format can cause problems in a particular application, although it does not normally create true gain.
- Open More sound settings.
- Select Recording.
- Open the microphone’s Properties.
- Select Advanced.
- Choose another supported default format.
- Click Apply.
- Restart the application and test.
Use a standard format offered by the device. Do not assume the highest sample rate will make speech louder or better.
Fix 6: Update the Audio Driver Safely
If Microphone Boost disappeared after a driver change or the mic became unusually quiet:
- Open Settings > Windows Update.
- Install normal updates.
- Check Advanced options > Optional updates for relevant audio drivers.
- Visit the support page for the exact laptop, motherboard, USB microphone or interface.
- Install the manufacturer’s current Windows 11 driver when one is provided.
- Restart the computer.
Avoid automatic driver-download websites. An incorrect audio driver can remove jack detection, microphone arrays, enhancements or vendor-specific controls.
Roll Back a Recent Audio Driver
If the problem started immediately after an audio-driver update:
- Right-click Start.
- Select Device Manager.
- Expand Sound, video and game controllers.
- Open the relevant audio device.
- Select Driver.
- Click Roll Back Driver if available.
- Restart Windows.
Do not roll back unrelated devices until you identify which component controls the microphone.
Fix 7: Reinstall the Microphone Device
Use this when the device properties appear damaged or the microphone behaves incorrectly across every application.
- Open Device Manager.
- Expand Audio inputs and outputs.
- Right-click the microphone.
- Select Uninstall device.
- Do not select a driver-deletion option unless you already have the correct replacement.
- Restart Windows.
Windows should detect the device again. For an audio interface or specialist USB microphone, reinstall the official package instead of relying only on automatic detection.
Fix 8: Run the Windows Audio Troubleshooter
- Open Settings > System > Troubleshoot.
- Select Other troubleshooters.
- Find the audio or recording-audio troubleshooter offered by your Windows build.
- Click Run.
- Select the affected microphone.
- Apply only fixes you understand.
Windows can also launch automated help through the Get Help app. Menu names can change between Windows 11 updates.
The Microphone Is Loud but Sounds Bad
If raising the gain creates distortion, reduce amplification and improve the original signal.
Try:
- Moving closer to the microphone
- Speaking toward the correct side or end
- Lowering Microphone Boost
- Reducing the physical gain knob slightly
- Moving away from laptop fans
- Using a stand to isolate desk vibration
- Turning down loud speakers to reduce echo
- Testing without aggressive noise suppression
- Connecting directly instead of through a poor-quality hub or adapter
A clean moderate signal is better than a noisy signal made loud through maximum boost.
Microphone Is Too Quiet Even at 100
If Input volume is 100 and speech remains quiet:
- Confirm that the correct microphone is selected.
- Test in Sound Recorder, not only one communication app.
- Check the Levels tab for Microphone Boost.
- Check the manufacturer’s audio application.
- Reposition the microphone.
- Check the headset splitter or TRRS connection.
- Try the mic on another computer.
- Test another known-working microphone on the current PC.
- Update or reinstall the correct driver.
If the microphone is quiet on multiple computers, the microphone, cable or preamp is likely the limiting factor.
Microphone Gain Keeps Resetting
Possible causes include:
- Automatic gain control in a communication app
- Manufacturer audio software
- A driver service reapplying a profile
- Switching between power modes
- Reconnecting a USB or Bluetooth device
- Separate settings for different Windows user accounts
Close communication apps, set the Windows level and restart. If the level stays fixed until one app opens, inspect that application’s automatic microphone settings.
Bluetooth Headset Gain in Windows 11
Bluetooth headsets behave differently from analogue and USB microphones. During a call, Windows may switch the device into a hands-free communication mode that provides microphone access but reduces playback quality.
Windows might offer an Input volume slider without a Microphone Boost option. The headset firmware can control much of the input behaviour.
To improve Bluetooth microphone volume:
- Charge the headset fully.
- Update its firmware through the official companion app.
- Select the headset microphone in the calling application.
- Reduce the distance from the headset mic to your mouth.
- Disconnect the headset from other devices.
- Re-pair it with Windows.
- Test in another application.
Changing speaker volume does not necessarily change Bluetooth microphone gain.
Webcam Microphone Gain
A webcam microphone normally appears as a separate USB input.
- Select the webcam microphone under Settings > System > Sound > Input.
- Adjust Input volume.
- Check the webcam’s official application for microphone controls.
- Position the webcam closer if the mic is too far away.
- Test without the laptop microphone array selected.
A webcam placed across a large room will pick up more echo and noise when digitally boosted. An external microphone placed closer to the speaker will usually produce better results.
Laptop Microphone Array Gain
Laptop microphone arrays can use beam forming, noise suppression and automatic processing. Their level may change with the audio mode selected by the manufacturer.
Check for modes such as:
- Personal
- Conference
- Voice focus
- Omnidirectional
- Directional
- Noise removal
Choose a mode that matches how the laptop is being used. Conference mode may capture people around the computer but also include more room noise.
If You Mean Speaker or Headphone Gain
Windows does not provide one universal hardware-gain switch for every output device.
For ordinary speakers or headphones, use:
- Windows output volume
- The application’s volume
- The Volume mixer
- A physical amplifier or interface knob
- The device manufacturer’s application
High-gain and low-gain modes on headphone amplifiers or DACs are hardware-specific. Use the manufacturer’s instructions. Start on low gain, lower the volume before switching modes and protect your hearing.
Do not use microphone boost to make headphones louder. Microphone gain controls input, while speaker and headphone volume control output.
Frequently Asked Questions
Where is microphone gain in Windows 11?
Open Settings > System > Sound, select the microphone under Input and adjust Input volume. Additional Microphone and Microphone Boost controls may appear under More sound settings > Recording > Microphone Properties > Levels.
Is microphone gain the same as microphone volume?
Not always. Windows often uses an input-volume control that scales the signal. True gain amplifies the microphone before analogue-to-digital conversion and may be controlled by the audio hardware.
Why is there no Microphone Boost option?
The microphone, driver or audio hardware may not provide it. USB microphones, Bluetooth headsets and digital audio devices commonly manage gain through hardware or companion software instead.
Should microphone gain be set to 100?
Only if testing shows that the microphone remains clean and needs that level. A lower setting is better when 100 causes clipping, hiss or excessive background noise.
What does +10 dB microphone boost mean?
It adds amplification beyond the normal microphone level. Each additional boost step makes the signal louder but can also amplify noise.
Why does Windows keep lowering my microphone volume?
A communication app, automatic gain control, manufacturer audio software or a driver profile may be adjusting it. Disable automatic microphone adjustment in the affected application and test again.
How do I make my microphone louder without Microphone Boost?
Move closer, select the correct microphone, increase Input volume, check the manufacturer’s app and adjust the physical gain control on a USB microphone or audio interface.
Can changing microphone gain damage the microphone?
Changing a Windows input slider normally will not damage the microphone. However, incorrect connections, excessive monitoring volume or improper phantom-power use can affect equipment or hearing. Follow the hardware manufacturer’s instructions.
Does gain improve microphone quality?
Correct gain helps capture a strong, usable signal. Excessive gain reduces quality by adding noise and clipping. Gain cannot compensate completely for a damaged, incompatible or poorly positioned microphone.
Start with Windows Input volume, make a test recording and add only as much boost as necessary. If the Boost control is missing, treat that as a device capability question rather than forcing it through Registry changes. USB microphones and audio interfaces usually sound best when their physical gain is set correctly before Windows or application-level adjustments are applied.
You might like to read:
- Windows 11 Microphone Not Working? How to Fix It
- How to Create a Samba Share on Windows 11 for Easy File Sharing
- Windows Resource Protection Error: How to Fix It
- How to Check BIOS Version on Windows 11 (6 Easy Methods)
- Windows 11 Factory Reset From Boot: Step-by-Step
- Windows Resource Protection Error: How to Fix It
