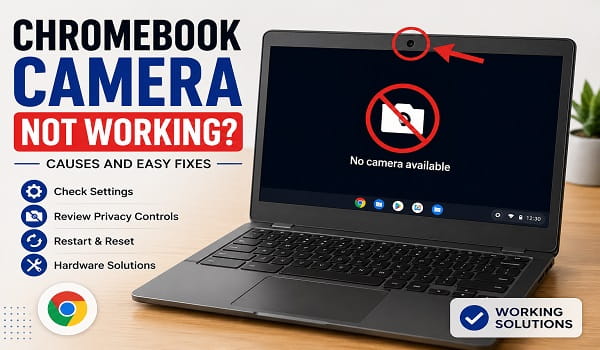
A Chromebook camera can fail in several different ways. The Camera app may open to a black screen, ChromeOS may report No camera found, Google Meet may refuse to detect the webcam, or the camera may work in one app but not another.
The Chromebook camera not working problem is not always caused by failed hardware. Camera privacy controls, blocked site permissions, a closed physical privacy shutter, an app-specific problem, ChromeOS glitches, or a temporary hardware-controller issue can all produce similar symptoms.
The fastest way to troubleshoot the problem is to determine whether the camera fails everywhere or only inside one app or website.
Open the built-in Camera app first. Then test the camera in another service such as Google Meet. When the camera works in one place but not another, focus on the affected app or website permissions. When ChromeOS cannot detect the camera anywhere, move on to hardware reset, system update, and repair checks.
Check Whether Your Chromebook Has a Camera Privacy Switch
Some Chromebooks have a physical camera shutter or privacy switch.
Look around:
- The top bezel near the webcam
- The side of the Chromebook
- The area directly beside the camera lens
Make sure the shutter is fully open and the privacy switch is in the camera-enabled position.
Google specifically notes that Chromebooks with a physical camera switch must have it turned on before apps can use the camera.
A closed privacy shutter can make the Camera app show a black screen even though ChromeOS is otherwise working normally.
Do not perform a Powerwash or system recovery before checking this simple hardware control.
1. Restart the Chromebook
Google’s own Chromebook camera troubleshooting starts with a complete restart.
Turn the Chromebook off rather than simply closing the lid.
Select the time in the bottom-right corner, choose Power, and shut the device down.
Wait several seconds, then turn it back on.
Open the Camera app immediately after startup.
A restart can clear temporary problems involving:
- Camera services
- ChromeOS background processes
- Android app access
- Sleep or wake behavior
- USB cameras
- Hardware initialization
When the camera works after restarting but stops again later, continue with the remaining steps instead of treating the restart as a permanent fix.
2. Test the Camera in Another App
Google specifically recommends testing the Chromebook camera in another app such as Google Meet.
Start with the built-in Camera app:
- Open the Launcher.
- Search for Camera.
- Open the Camera app.
- Check whether the live preview appears.
Then test another camera-enabled service.
For example, open Google Meet and enter a meeting preview.
Camera Works in Another App
When the camera works in Google Meet but not in another app, the Chromebook camera hardware is probably functioning.
Focus on the affected application.
Try:
- Closing the app completely
- Reopening it
- Checking its camera permission
- Updating it
- Reinstalling it if possible
Google’s Chromebook hardware troubleshooting guidance specifically recommends uninstalling and reinstalling the affected app when the camera works elsewhere.
Camera Fails Everywhere
When the Camera app, Google Meet, and other applications all fail to detect the webcam, the problem is more likely to involve:
- ChromeOS privacy controls
- Physical privacy switch
- Hardware initialization
- ChromeOS system software
- Camera hardware
Continue with the next steps.
3. Turn On Camera Access in ChromeOS Privacy Controls
ChromeOS provides system-wide privacy controls for the camera.
Open:
Settings > Privacy and security > Privacy controls
Find:
Camera access
Make sure it is turned on.
Google states that turning off Camera access in ChromeOS blocks camera access at all levels and services.
That means individual apps may still appear to have permission while the Chromebook itself blocks the camera globally.
After turning Camera access on:
- Close the Camera app.
- Reopen it.
- Test the camera again.
- Refresh any open websites that were trying to use the camera.
Google notes that apps and websites may need to be refreshed after camera access changes.
4. Check Camera Permission for the App
ChromeOS can allow camera access globally while still blocking a specific application.
Open:
Settings > Privacy and security > Privacy controls
Review the apps listed under camera access.
Enable the camera for the app you want to use.
Depending on whether the app is a web app, Chrome page, or Android application, the permission may appear differently.
Google explains that ChromeOS privacy controls synchronize with corresponding browser and Android app permissions.
When only one application cannot use the webcam, app-level permission is one of the strongest suspects.
5. Check Camera Permission for Websites in Chrome
A Chromebook camera may work in the Camera app but fail on Google Meet, Zoom, Microsoft Teams, a telehealth site, or another web service.
Open Chrome and go to the affected website.
Look for the camera icon or site-controls icon beside the address bar.
Make sure the site’s camera permission is set to:
Allow
You can also open:
chrome://settings/content/camera
Review:
- The default camera
- Sites allowed to use the camera
- Sites blocked from using the camera
Google’s current Chrome documentation says websites must receive camera permission before they can record video.
After changing the permission, reload the webpage.
Choose the Correct Camera
A Chromebook with more than one camera may expose:
- Built-in front camera
- Rear camera on convertible models
- USB webcam
Make sure the site or app is using the intended camera.
A wrong camera selection can make it look as though the built-in webcam has failed.
6. Close Other Apps That May Be Using the Camera
Only one application may be able to control the camera correctly in certain situations.
Close camera-using applications such as:
- Google Meet
- Zoom
- Microsoft Teams
- Discord
- Camera
- Browser tabs using video
- Android video apps
Then reopen only the app you want to test.
Also close unnecessary Chrome tabs.
A camera that works after another video app is closed points to an app conflict rather than failed hardware.
Restarting the Chromebook is also useful when you are unsure which process is holding the camera.
7. Perform a Chromebook Hardware Reset
A Chromebook hardware reset is one of Google’s recommended troubleshooting steps when the camera is not detected.
A hardware reset is different from Powerwash.
For most Chromebooks:
- Turn the Chromebook off.
- Press and hold Refresh.
- Tap Power.
- When the Chromebook starts, release Refresh.
Google explains that hardware reset restarts hardware components controlled by the Chromebook.
This can help when the camera stopped initializing correctly after:
- Sleep
- An update
- A system crash
- Repeated camera-app failures
Google warns that a hardware reset may affect some files in the Downloads folder, so back up important local files first when possible.
Use Google’s official Chromebook hardware reset instructions for model-specific alternatives.
8. Update ChromeOS
Camera problems can be fixed through ChromeOS updates.
Open:
Settings > About ChromeOS
Select:
Check for updates
Install any available update.
Restart the Chromebook afterward.
ChromeOS updates can include:
- Camera fixes
- Device firmware
- Driver changes
- Privacy-control updates
- Android compatibility improvements
- Security fixes
Google has previously resolved Chromebook camera problems through ChromeOS updates, so keeping the device current is important.
Do not switch to Developer or Beta channels simply to troubleshoot a normal webcam problem.
Stay on the stable channel unless you intentionally use another release track.
9. Check Whether the Camera Is Disabled by a School or Work Administrator
Managed Chromebooks can have camera features restricted by policy.
This is particularly important for:
- School Chromebooks
- Business Chromebooks
- Library devices
- Managed student accounts
An administrator can disable the Camera app or restrict camera access.
When settings are unavailable, locked, or marked as managed, contact the school or organization’s IT administrator.
Do not attempt to bypass management controls.
A Powerwash normally does not remove enterprise or school management from an enrolled Chromebook.
10. Test a USB Webcam
A USB webcam can help determine whether the problem is limited to the built-in camera.
Connect a known-working USB webcam.
Open the Camera app or Google Meet.
Select the USB camera if ChromeOS gives you a choice.
USB Camera Works
This suggests:
- ChromeOS camera functionality is generally working
- Browser permissions are probably functioning
- The built-in camera may have a hardware or internal connection problem
Continue with manufacturer support if the built-in camera still fails after hardware reset and updates.
USB Camera Also Fails
A broader ChromeOS, permissions, or software issue becomes more likely.
Recheck:
- Camera access
- Site permissions
- App permissions
- ChromeOS update
- Hardware reset
Not every Android app on ChromeOS supports every external USB webcam correctly, so test the camera in the built-in Camera app or Chrome before drawing conclusions.
11. Check for a Black Screen Versus “No Camera Found”
These two symptoms are not identical.
Camera Opens but Shows a Black Screen
Check:
- Physical privacy shutter
- Camera access
- App permissions
- Another app using the camera
- Lighting
- Wrong camera selected
- Camera hardware
Shine normal room light toward yourself and make sure the camera lens is not covered.
ChromeOS Says “No Camera Found”
This means the operating system or app is not detecting a usable camera.
Google’s current Chromebook troubleshooting specifically lists No camera found as a camera failure symptom.
Try:
- Restart Chromebook.
- Hardware reset.
- ChromeOS update.
- USB webcam test.
- System recovery only after less destructive fixes.
When the built-in camera remains completely absent, hardware repair becomes more likely.
12. Check Whether the Problem Is Limited to Google Meet
When the Camera app works but Google Meet does not, do not reset the entire Chromebook.
Open Meet and check:
Settings > Video
Select the correct camera.
Then check Chrome permission for:
meet.google.com
Make sure the camera is allowed.
Google Meet also recommends checking Chromebook hardware reset when its self-preview cannot detect the camera, but that step is more appropriate when the camera also fails elsewhere.
When the built-in Camera app works perfectly, focus on Meet permissions and camera selection first.
13. Check Whether the Problem Is Limited to Zoom or Another Android App
Android applications on ChromeOS use their own app permission layer.
Open:
Settings > Apps
Select the affected app.
Review its permissions.
Make sure Camera permission is allowed.
Then reopen the application.
When the camera works in Chrome but not in an Android app:
- Update the Android app
- Check its permissions
- Restart the Chromebook
- Reinstall the app if appropriate
Do not assume external USB cameras will behave identically across Chrome web apps and Android apps. Application support can differ.
14. Remove and Re-add the User Account When the Problem Is Profile-Specific
A camera problem can occasionally be tied to one ChromeOS user profile.
If possible, sign out and test using another account or Guest mode where available.
When the camera works correctly outside your normal account, consider removing and re-adding the affected user.
Before removing an account:
- Back up important local files.
- Check the Downloads folder.
- Make sure important browser data is synchronized.
- Confirm you know the Google Account password.
Then remove the account from the Chromebook and add it again.
Do not use this step when the camera fails for every account.
15. Powerwash the Chromebook Only After Less Destructive Fixes
Google’s broader Chromebook troubleshooting can eventually lead to a factory reset when hardware or system problems remain unresolved.
A Chromebook factory reset is called Powerwash.
It removes locally stored account data and settings.
Back up important files first.
A common Powerwash method is:
- Sign out.
- Press
Ctrl + Alt + Shift + R. - Select Restart.
- Select Powerwash.
- Follow the instructions.
Powerwash makes more sense when:
- The camera worked previously
- Camera access is enabled
- No physical damage exists
- Hardware reset did not help
- ChromeOS is current
- The problem appears software-related
Powerwash makes less sense when:
- The camera is physically damaged
- A privacy shutter is broken
- The device was dropped
- The camera disappeared after liquid damage
- A USB webcam works but the built-in camera never appears
Do not Powerwash a school or work Chromebook without following the administrator’s support process.
16. Recover ChromeOS Only as a Last Software Step
Google’s official hardware and system troubleshooting lists ChromeOS Recovery after ordinary reset steps when the camera still does not work.
Recovery is more disruptive than Powerwash.
It reinstalls ChromeOS and erases local data.
Use Recovery only when:
- Normal troubleshooting fails
- Hardware reset fails
- ChromeOS appears damaged
- Powerwash does not solve the problem
- The camera still cannot be detected
- You have backed up important files
Do not jump straight to Recovery for a blocked camera permission or closed privacy shutter.
Google’s official Chromebook hardware and system troubleshooting lists recovery as a later step for persistent camera failures.
17. Contact the Chromebook Manufacturer
Hardware repair becomes more likely when:
- The camera is not detected anywhere
- Hardware reset does not help
- ChromeOS is updated
- Powerwash or recovery does not help
- A USB webcam works but the built-in camera does not
- The Chromebook was dropped
- The camera area is physically damaged
- The camera stopped after liquid exposure
Chromebooks are made by companies including:
- Acer
- ASUS
- HP
- Lenovo
- Samsung
- Dell
Contact the manufacturer for the exact model.
Check warranty coverage before opening the Chromebook yourself.
Built-in Chromebook cameras usually connect internally to the display assembly, so disassembly can involve delicate cables and may affect warranty coverage.
Chromebook Camera Not Working in Google Meet
When the Chromebook camera works in the Camera app but not Google Meet:
- Open Google Meet.
- Open Settings > Video.
- Select the correct camera.
- Check the Chrome site permission.
- Reload Meet.
- Close other camera apps.
- Restart Chrome.
- Restart the Chromebook if necessary.
Do not perform Recovery for a Meet-only problem.
A working Camera app proves that ChromeOS can access the camera.
Chromebook Camera Not Working in Zoom
First determine whether you use:
- Zoom in Chrome
- Zoom web app
- Zoom Android app
Check the camera permission for that specific version.
Then select the correct webcam inside Zoom settings.
When the built-in Camera app works normally, the problem is more likely to involve Zoom permissions or configuration than the Chromebook hardware.
Chromebook Camera Shows a Black Screen
A black camera preview can be caused by:
- Closed privacy shutter
- Blocked camera access
- Wrong camera
- Another app using the camera
- App malfunction
- Hardware problem
Start with the physical shutter and ChromeOS privacy controls.
Then test another app.
When every application shows black video after a hardware reset and update, contact the manufacturer.
Chromebook Says No Camera Found
Google treats No camera found as a camera hardware or system troubleshooting symptom.
Try:
- Restart Chromebook.
- Check privacy switch.
- Turn on Camera access.
- Test another app.
- Hardware reset.
- Update ChromeOS.
- Test a USB camera.
- Powerwash if the issue still looks software-related.
- Recover ChromeOS only as a last software step.
- Contact the manufacturer.
A persistent No camera found message after recovery increases the likelihood of a hardware problem.
Chromebook Camera Not Working After an Update
Restart the Chromebook first.
Then check:
Settings > About ChromeOS
Install any newer update available.
A later maintenance update may correct a camera problem introduced by an earlier release.
Also perform a hardware reset.
Do not immediately downgrade ChromeOS using unofficial methods.
If the camera stopped immediately after an update and many users with the same Chromebook model report the same problem, check official Google or manufacturer support for a known issue.
Chromebook Camera Not Working After Sleep
A camera that stops after waking from sleep but returns after restart points more strongly toward hardware initialization or software state than permanent camera failure.
Try:
- Restart Chromebook.
- Hardware reset.
- Update ChromeOS.
- Close unused camera apps.
- Test the Camera app immediately after startup.
When the problem repeatedly returns after sleep, record the Chromebook model and ChromeOS version before contacting support.
Chromebook Camera Light Is On but No Image Appears
The camera indicator can show that an application has opened the webcam even when video is not displayed correctly.
Check:
- Which app is using the camera
- Camera selection
- Privacy shutter
- App permissions
- Whether another app is competing for access
Close all camera applications and restart.
When the indicator remains on unexpectedly after apps are closed, restart the Chromebook.
For privacy reasons, investigate any camera activity you do not recognize rather than ignoring it.
Chromebook Camera Is Blurry
A blurry webcam is different from a camera that does not work.
Clean the camera lens gently with a soft microfiber cloth.
Also improve room lighting.
Built-in Chromebook webcams can look soft or noisy in dim conditions because small camera sensors need more light.
Check whether the camera is actually in focus before attempting resets.
A Powerwash will not improve a dirty lens or low-light image.
Can a School Chromebook Camera Be Disabled?
Yes.
Managed Chromebook administrators can restrict camera features and apps through organizational policies.
When the Camera app is missing, disabled, or a permission control cannot be changed on a managed Chromebook, contact the school administrator.
Do not attempt to remove management from a school-owned device.
Also Read:
- How to Fix Chromebook Keyboard Not Working
- Chrome Mouse Not Working? 12 Fixes to Try
- How to Fix Error Code: Out of Memory in Chrome or Edge
Frequently Asked Questions
Why is my Chromebook camera not working?
Common causes include a closed privacy shutter, disabled ChromeOS Camera access, blocked app or website permissions, another app using the camera, outdated ChromeOS, a temporary hardware problem, or physical camera failure.
How do I enable the camera on a Chromebook?
Open Settings > Privacy and security > Privacy controls and turn on Camera access. Also make sure the specific app or website has camera permission.
Why does my Chromebook say No camera found?
ChromeOS or the application is not detecting a usable camera. Restart the Chromebook, check the privacy switch, perform a hardware reset, update ChromeOS, and test another app.
Why does the camera work in the Camera app but not Google Meet?
The camera hardware is probably working. Check Google Meet’s selected camera and Chrome’s site permission for Meet.
How do I reset the Chromebook camera?
Google does not provide a separate camera-reset button. Use a Chromebook hardware reset by turning the device off, holding Refresh, and tapping Power on most models.
Will a hardware reset delete my files?
A hardware reset is not the same as Powerwash, but Google warns that it may delete some files from the Downloads folder. Back up important local files first.
Should I Powerwash my Chromebook to fix the camera?
Only after restarting, checking permissions, performing a hardware reset, updating ChromeOS, and testing other apps. Powerwash erases local account data and settings.
Can I use a USB webcam on Chromebook?
Yes, many USB webcams work with ChromeOS. Testing one can also help determine whether the built-in camera itself is faulty.
Why is my Chromebook camera black?
Check the physical camera shutter, system Camera access, app permissions, camera selection, and whether another app is using the webcam.
Can ChromeOS block camera access for all apps?
Yes. Google states that disabling Camera access in Privacy controls blocks access at all levels and services.
Can my school disable my Chromebook camera?
Yes. Managed Chromebook policies can disable camera features or the Camera app. Contact the administrator when camera settings are locked.
Should I replace the Chromebook camera?
Repair becomes more reasonable when the built-in camera is not detected after restart, hardware reset, ChromeOS updates, and software recovery, especially when an external USB webcam works normally.
Test Another App Before Assuming the Camera Has Failed
The most useful first distinction is whether the camera fails everywhere.
A webcam that works in the Camera app but not in Google Meet, Zoom, or another website is usually dealing with an app, browser, or permission problem. A camera that ChromeOS cannot detect anywhere deserves deeper troubleshooting through hardware reset, ChromeOS updates, and eventually manufacturer support.
Keep Powerwash and ChromeOS Recovery near the end of the process. Privacy settings, app permissions, a physical shutter, or a temporary hardware-controller problem are much easier to fix and do not require erasing the Chromebook.
