DISM error 0x800f0915 usually appears when Windows tries to repair the component store but cannot obtain compatible repair content. You may run the normal DISM /Online /Cleanup-Image /RestoreHealth command, watch the progress reach a high percentage or even 100%, and then receive an error saying the repair content could not be found.
That can be confusing because DISM is itself one of the tools Windows users rely on when system files or the Windows image are damaged. When the repair tool cannot find the files it needs, repeatedly running the same command rarely changes the result.
I recommend treating 0x800f0915 primarily as a repair-source problem until your troubleshooting shows otherwise. Start with Windows Update and the normal online repair process. If that fails, check your exact Windows version, obtain matching Windows installation media, identify the correct image edition inside the ISO, and point DISM to that known-good source.
This guide walks through that process without jumping straight to reinstalling Windows.
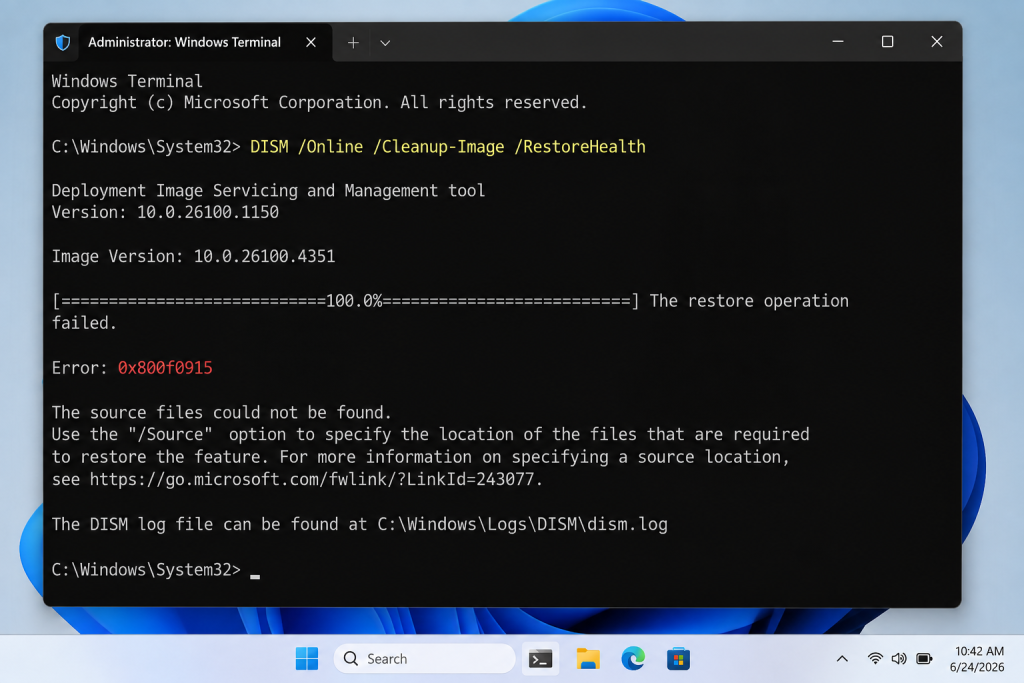
What Does DISM Error 0x800f0915 Mean?
DISM stands for Deployment Image Servicing and Management. On a running Windows installation, the /Online option tells DISM to work with the operating system you are currently using.
The command most people run is:
“` cmd DISM /Online /Cleanup-Image /RestoreHealth
`/Cleanup-Image` tells DISM to service the Windows image, while
`/RestoreHealth` scans for component-store corruption and attempts to
repair it.

Microsoft documents that DISM can use Windows Update to obtain files
needed for an online repair. Microsoft also supports specifying another
known-good repair location with the `/Source` option. Adding
`/LimitAccess` prevents DISM from contacting Windows Update and forces
it to rely on the source you provide.

Error `0x800f0915` can therefore appear when DISM cannot obtain suitable
repair content through the normal servicing path or when the local
source you supplied does not properly match what the installed Windows
image requires.

The important point is that the error does **not automatically mean your
SSD is failing or that Windows must be clean-installed**.

## Why Does Error 0x800f0915 Happen?

The exact cause can vary from one PC to another, but the most useful
possibilities to investigate are:

-   Windows Update cannot provide the required repair files
-   The Windows component store contains corruption that the normal
    online repair cannot resolve
-   A Windows ISO used as a repair source does not match the installed
    Windows release closely enough
-   The wrong Windows edition or image index is selected from
    `install.wim` or `install.esd`
-   The `/Source` path points to the wrong file or folder
-   DISM is prevented from using Windows Update because `/LimitAccess`
    was used without a valid local source
-   Servicing problems exist after a Windows update
-   The installation has deeper corruption that requires an in-place
    repair

Do not assume that every computer showing `0x800f0915` has the same
underlying problem. The error tells you that the repair operation
failed. Your job is to determine whether the failure is caused by online
servicing, the repair source, a source mismatch, or more extensive
Windows corruption.

## 1. Restart Windows and Run DISM Again

Before downloading an ISO or changing servicing settings, restart the
computer.

Then right-click **Start** and open **Terminal (Admin)**. Command Prompt
opened as administrator also works.

Run:
cmd DISM /Online /Cleanup-Image /RestoreHealth
Allow it to finish even if the percentage appears to pause for a while.

Microsoft notes that DISM repair operations can take several minutes. A
percentage that seems stuck temporarily is not by itself proof that DISM
has failed.

If the command completes with:
text The restore operation completed successfully. The operation completed successfully.
restart Windows and then run:
cmd sfc /scannow
If `0x800f0915` returns, continue below rather than running
RestoreHealth repeatedly.

## 2. Make Sure Windows Update Can Reach Microsoft

When you run RestoreHealth without specifying `/Source`, Windows can use
its configured repair source, including Windows Update where applicable.

Open:

**Settings \> Windows Update**

Click **Check for updates**.

Install pending servicing or cumulative updates, restart the computer,
and check Windows Update again.

Also make sure:

-   The PC has a working internet connection
-   A VPN is not interfering with Microsoft services
-   A proxy is not incorrectly configured
-   Windows Update itself is not currently failing
-   The date and time are correct

Then retry:
cmd DISM /Online /Cleanup-Image /RestoreHealth
This is worth doing before using an ISO because it preserves the
simplest supported repair path.

Microsoft's System File Checker guidance explains that DISM normally
uses Windows Update to provide files required to repair corruption. If
the Windows Update client is broken, Microsoft recommends using another
Windows repair source instead.

You can read Microsoft's official **[System File Checker and DISM repair
guidance](https://support.microsoft.com/en-us/windows/experience/backup-recovery/use-the-system-file-checker-tool-to-repair-missing-or-corrupted-system-files)**
if you want the underlying Microsoft procedure.

## 3. Check Whether the Component Store Is Repairable

Before moving to a local source, check the Windows image state.

Open Terminal or Command Prompt as administrator and run:
cmd DISM /Online /Cleanup-Image /CheckHealth
`CheckHealth` is a quick check that reports whether Windows has already
flagged the image as corrupted and whether it is repairable.

For a deeper scan, run:
cmd DISM /Online /Cleanup-Image /ScanHealth
The deeper scan takes longer.

Microsoft documents three important possibilities: the image can be
healthy, repairable, or non-repairable.

If DISM reports that the component store is repairable, using a correct
repair source is a logical next step.

If it reports no corruption, reconsider why you are running
RestoreHealth in the first place. The original Windows problem may not
be caused by component-store corruption.

If the image is reported as non-repairable, ordinary RestoreHealth
attempts may not be enough. Back up important data and consider the
in-place repair method later in this guide.

## 4. Check Your Exact Windows Version Before Downloading an ISO

This step is easy to skip and important to get right.

Press:
text Windows + R
Type:
text winver
and press Enter.
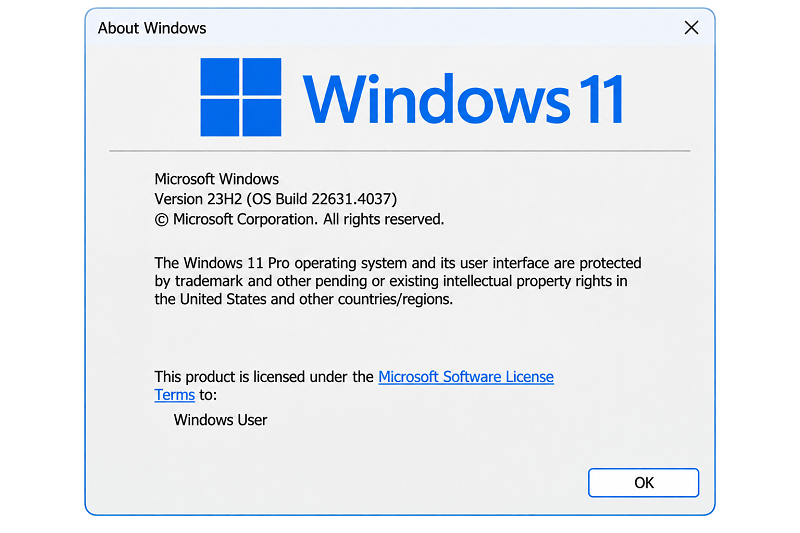
Note the Windows version and OS build displayed in the **About Windows**
dialog.
Also open:
**Settings \> System \> About**
Check:
- Windows edition
- Version
- System type
For example, note whether you are running Windows 11 Home or Pro and
whether the computer is x64 or Arm64.
The repair media should be appropriate for the Windows installation you
are servicing. Using an unrelated or unsuitable image can leave DISM
unable to locate compatible repair components even though the ISO itself
opens correctly.
 ## 5. Download a Windows 11 ISO From Microsoft
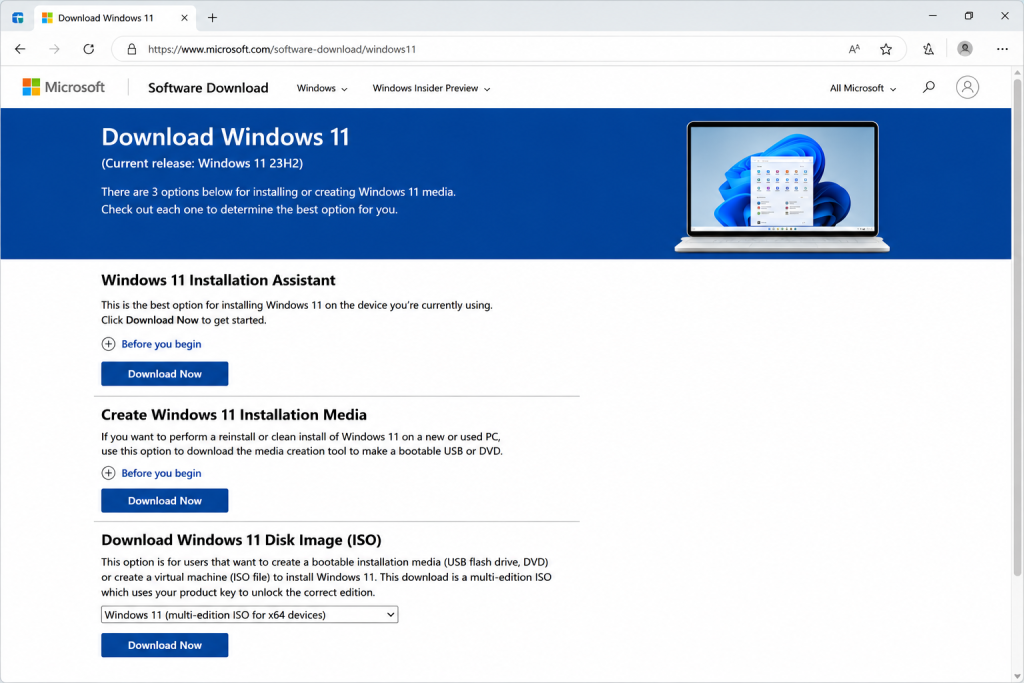
If the online RestoreHealth process still produces `0x800f0915`, use
official Windows installation media as the next repair source.
Go to Microsoft's **[Windows 11 download
page](https://www.microsoft.com/software-download/windows11)**.
Use the Windows 11 disk image option appropriate for your device and
select the correct product language.
Avoid downloading modified Windows ISOs from file-sharing sites or
unofficial download portals. A repair source should be trustworthy,
intact, and suitable for the Windows installation you are repairing.
Microsoft describes its Windows 11 ISO as multi-edition installation
media, which is why identifying the correct image inside the ISO becomes
important in a later step.
## 5. Download a Windows 11 ISO From Microsoft
If the online RestoreHealth process still produces `0x800f0915`, use
official Windows installation media as the next repair source.
Go to Microsoft's **[Windows 11 download
page](https://www.microsoft.com/software-download/windows11)**.
Use the Windows 11 disk image option appropriate for your device and
select the correct product language.
Avoid downloading modified Windows ISOs from file-sharing sites or
unofficial download portals. A repair source should be trustworthy,
intact, and suitable for the Windows installation you are repairing.
Microsoft describes its Windows 11 ISO as multi-edition installation
media, which is why identifying the correct image inside the ISO becomes
important in a later step.
 ## 6. Mount the Windows 11 ISO
After the ISO finishes downloading, open File Explorer and locate the
`.iso` file.
Right-click it and choose **Mount**. On many Windows 11 systems,
double-clicking the ISO will also mount it.
Windows assigns the mounted image a drive letter such as:
## 6. Mount the Windows 11 ISO
After the ISO finishes downloading, open File Explorer and locate the
`.iso` file.
Right-click it and choose **Mount**. On many Windows 11 systems,
double-clicking the ISO will also mount it.
Windows assigns the mounted image a drive letter such as:
text D:
or:
text E:
The letter on your computer may be different.

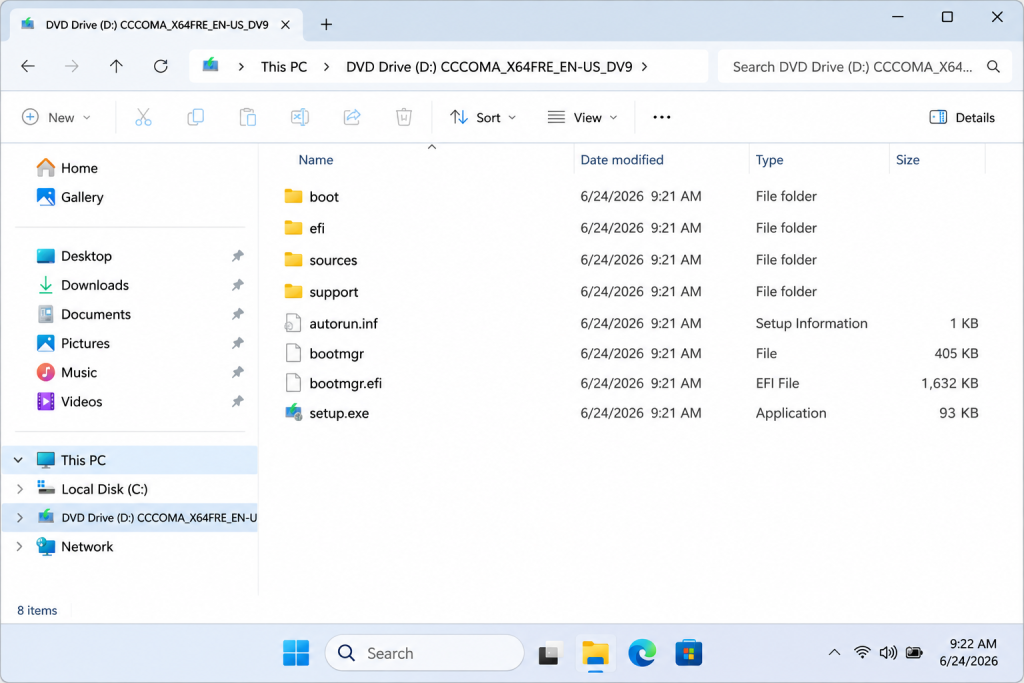
Open the mounted drive and confirm that you can see normal Windows
installation folders such as:
text boot efi sources support
For the examples below, I will use `D:`. Replace it with the actual
drive letter assigned on your PC.
 ## 7. Find Out Whether the ISO Contains install.wim or install.esd
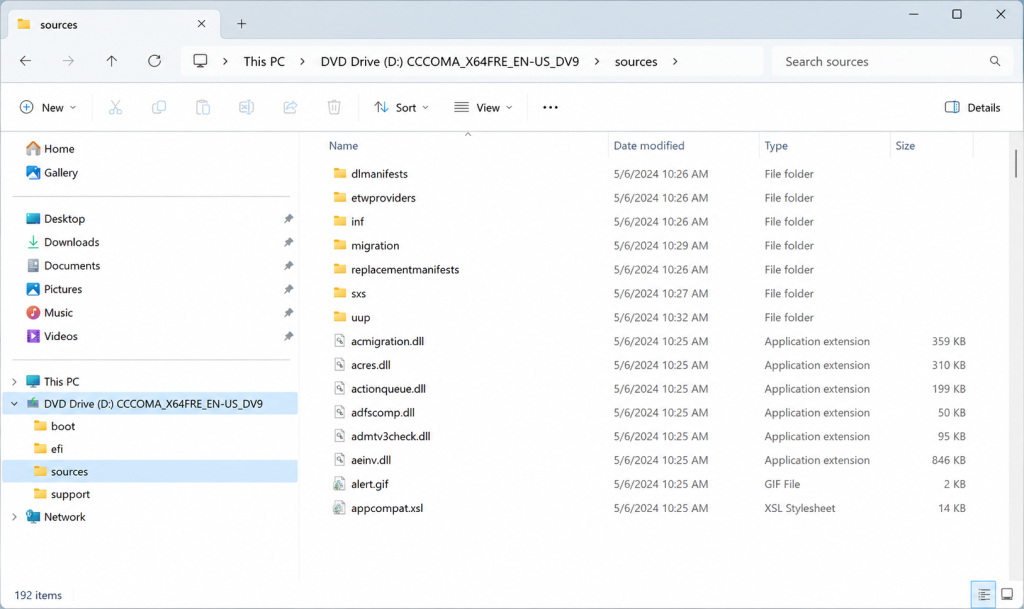
Open the mounted ISO and go to:
## 7. Find Out Whether the ISO Contains install.wim or install.esd
Open the mounted ISO and go to:
text D:\sources
Look for either:
text install.wim
or:
text install.esd
Do not assume that every Windows ISO uses the same file.

The distinction matters because the DISM source syntax changes depending
on which image format your media contains.

If you have:
text D:\sources\install.wim
you will use `WIM:` in the source.

If you have:
text D:\sources\install.esd
you will use `ESD:`.
 ## 8. Identify the Correct Windows Image Index
This is one of the most important parts of the repair.
A Windows installation image can contain multiple editions. You should
identify the index that corresponds to your installed edition instead of
blindly copying an index number from another website.
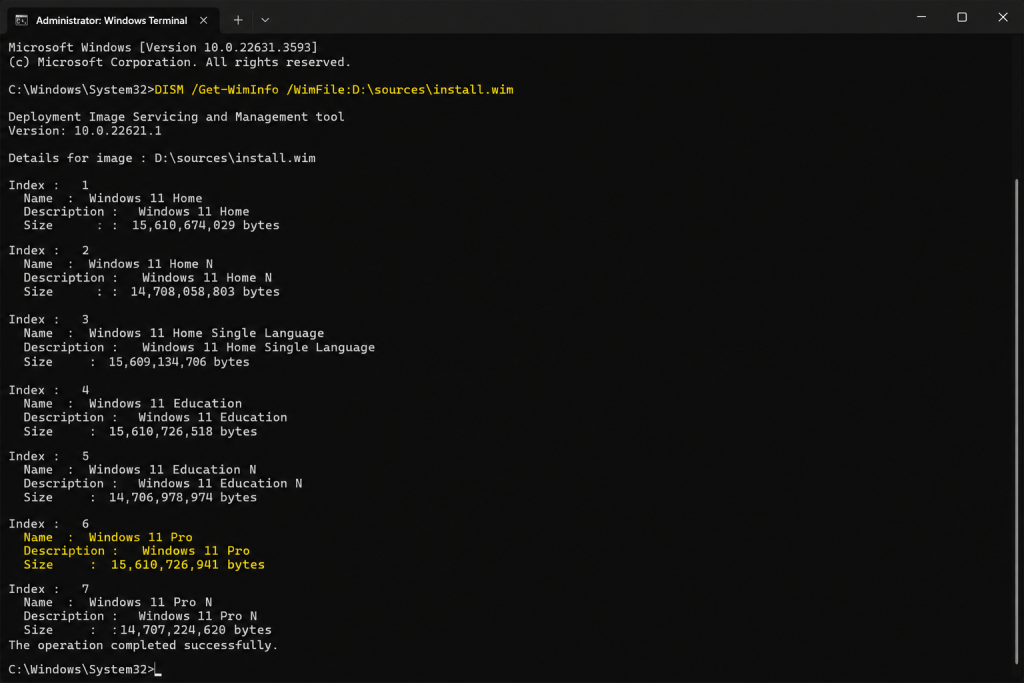
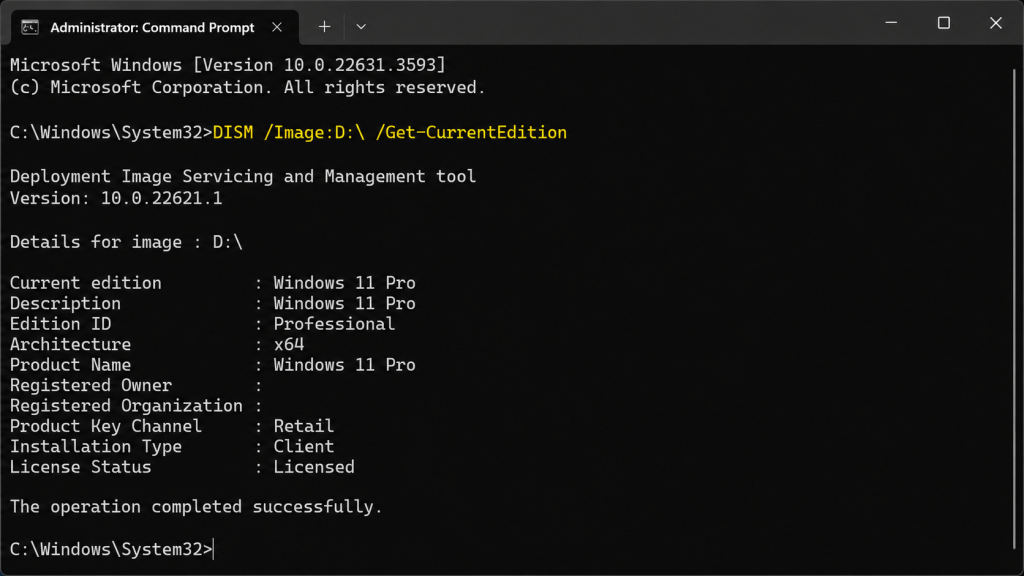
If your ISO contains `install.wim`, run:
## 8. Identify the Correct Windows Image Index
This is one of the most important parts of the repair.
A Windows installation image can contain multiple editions. You should
identify the index that corresponds to your installed edition instead of
blindly copying an index number from another website.
If your ISO contains `install.wim`, run:
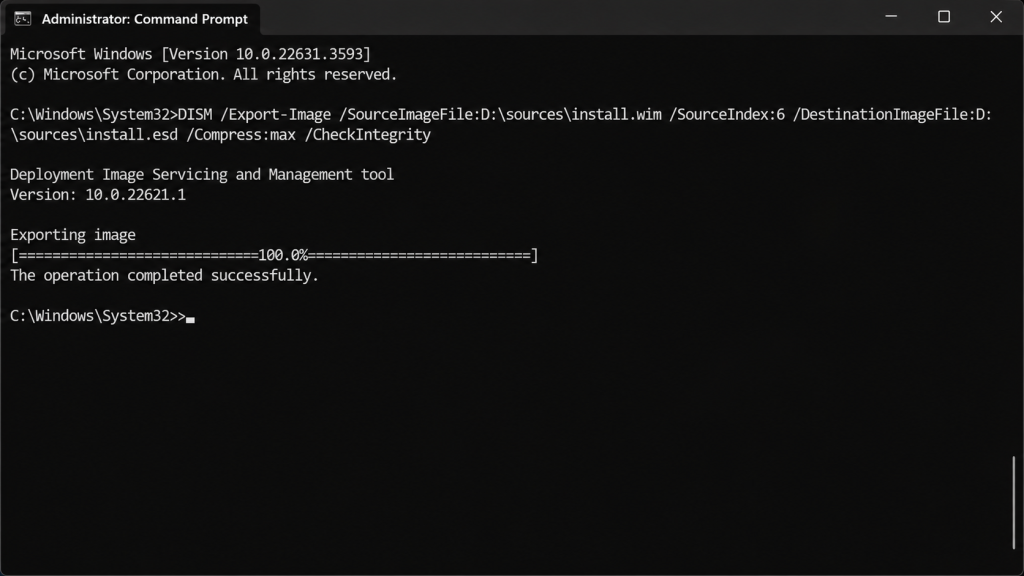
cmd DISM /Get-WimInfo /WimFile:D:\sources\install.wim
If it contains `install.esd`, run:
cmd DISM /Get-WimInfo /WimFile:D:\sources\install.esd
Replace `D:` with your mounted ISO drive letter.

DISM will list the images contained in the file. Look for the edition
that matches the Windows edition installed on your PC.

You may see output similar to:
text Index : 1 Name : Windows 11 Home
Index : 6 Name : Windows 11 Pro
Those numbers are only examples. **Use the index shown on your own
computer.**
Suppose your installed edition is Windows 11 Pro and DISM shows Windows
11 Pro at index `6`. You would use `6` in the repair command.
This is safer than assuming that Windows 11 Pro is always index 6
because image contents can differ.
 ## 9. Run RestoreHealth With the Matching WIM Source
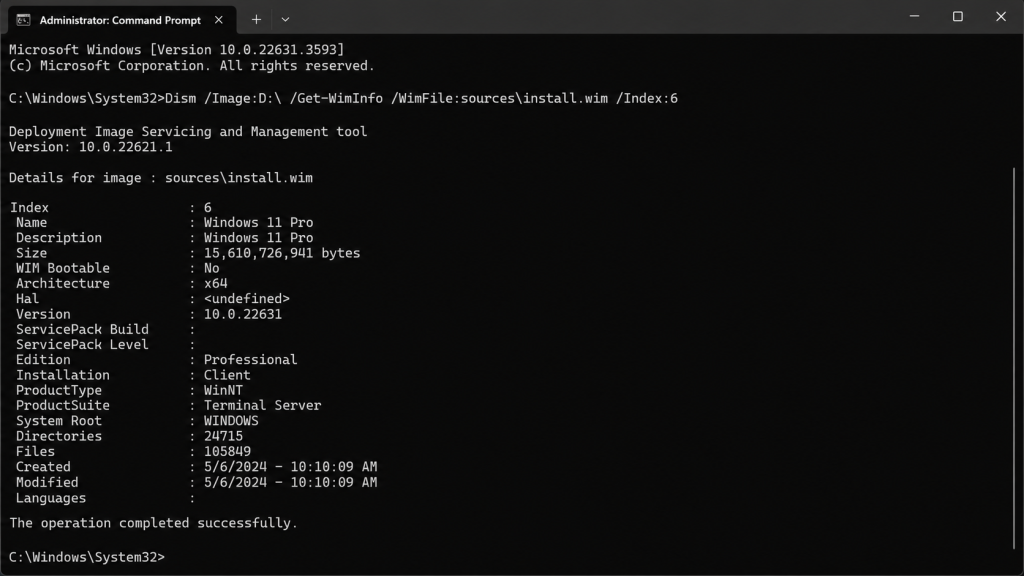
If your ISO contains `install.wim`, use a command in this form:
## 9. Run RestoreHealth With the Matching WIM Source
If your ISO contains `install.wim`, use a command in this form:
cmd DISM /Online /Cleanup-Image /RestoreHealth /Source:WIM:D:\sources\install.wim:6 /LimitAccess
Change:
- `D:` to the drive letter of your mounted ISO
- `6` to the index matching your installed Windows edition
The `WIM:` prefix tells DISM that the source is a WIM image.
`/LimitAccess` tells DISM not to use Windows Update as an additional
repair source. That is useful here because you are deliberately testing
a known local source after the online repair failed.
Microsoft officially documents `/Source` as the option for specifying
known-good repair files and `/LimitAccess` as the option that prevents
DISM from contacting Windows Update.
Do not close Terminal while the repair is running.
If it succeeds, you should receive a successful restore-operation
message.
 ## 10. Use the Correct Command if Your ISO Has install.esd
If the `sources` folder contains `install.esd` instead of `install.wim`,
do not use the WIM command unchanged.
Use:
## 10. Use the Correct Command if Your ISO Has install.esd
If the `sources` folder contains `install.esd` instead of `install.wim`,
do not use the WIM command unchanged.
Use:
cmd DISM /Online /Cleanup-Image /RestoreHealth /Source:ESD:D:\sources\install.esd:6 /LimitAccess
Again, replace the drive letter and index with the values from your
system.

Notice the difference:
text WIM:D:\sources\install.wim:6
versus:
text ESD:D:\sources\install.esd:6
A common troubleshooting mistake is to copy a command written for
`install.wim` even though the downloaded media contains `install.esd`.

Check the actual file first.

## 11. What if DISM Says the Source Files Still Cannot Be Found?

If the source-based repair still fails, do not immediately conclude that
DISM itself is broken.

Recheck these details:

### Confirm the ISO drive letter

Open File Explorer and verify that the mounted ISO is still assigned to
the drive letter used in your command.

### Confirm the filename

Make sure you actually have:
text install.wim
or:
text install.esd
and that your command uses the same format.

### Confirm the image index

Run `/Get-WimInfo` again and verify that the selected index corresponds
to your installed Windows edition.

### Confirm your Windows edition

Open:

**Settings \> System \> About**

and compare the edition with the DISM image list.

### Check the media itself

If the ISO is old, modified, damaged, or unsuitable for the installed
Windows release, download fresh official installation media and retry.

A source path can be syntactically perfect and still fail when the
underlying repair content does not match what DISM needs.

## 12. Run StartComponentCleanup

If servicing problems continue, you can clean superseded components from
the Windows component store.

Open Terminal as administrator and run:
cmd DISM /Online /Cleanup-Image /StartComponentCleanup
Allow the operation to finish, restart Windows, and retry the
appropriate RestoreHealth command.

I would not add `/ResetBase` casually. Microsoft notes that after
running `StartComponentCleanup` with `/ResetBase`, installed Windows
updates cannot subsequently be uninstalled. That makes `/ResetBase` a
materially different operation from ordinary component cleanup.

For this error, start with:
cmd DISM /Online /Cleanup-Image /StartComponentCleanup
without `/ResetBase`.
 ## 13. Run SFC After DISM Completes Successfully
Once DISM reports that the restore operation completed successfully, run
System File Checker:
## 13. Run SFC After DISM Completes Successfully
Once DISM reports that the restore operation completed successfully, run
System File Checker:
cmd sfc /scannow
Microsoft recommends DISM before SFC when Windows corruption is involved
because DISM provides the files that SFC can use to repair protected
system files.

Let SFC reach 100%.

Possible results include:

-   Windows Resource Protection did not find integrity violations
-   Windows Resource Protection found corrupt files and successfully
    repaired them
-   Windows Resource Protection found corrupt files but was unable to
    fix some of them
-   Windows Resource Protection could not perform the requested
    operation

If SFC itself cannot complete, see **[Windows Resource Protection Error:
How to Fix
It](https://www.techwisezoneblog.com/windows-resource-protection-error/)**.
That guide focuses specifically on SFC failures rather than DISM
repair-source errors.

Restart Windows after successful repairs.

## 14. Check the DISM and CBS Logs if the Error Persists

When `0x800f0915` survives a correctly matched source, the servicing
logs can provide clues that the error message alone does not reveal.

DISM's log is normally located at:
text C:\Windows\Logs\DISM\dism.log
Windows servicing information can also appear in:
text C:\Windows\Logs\CBS\CBS.log
You do not need to understand every line.

Start by looking near the time of the failed repair for:

-   `0x800f0915`
-   source-related errors
-   package failures
-   missing payload references
-   component-store errors

Do not download random DLL, CAB, or system files from third-party
websites just because a log mentions a missing component. Windows
servicing files are version-specific, and replacing them manually with
an unrelated copy can make the installation harder to repair.

## 15. Try the Repair Again After Windows Update Changes

A servicing failure that appears immediately after an update deserves
some caution.

Check:

**Settings \> Windows Update \> Update history**

Note what was installed around the time DISM began failing.

However, correlation does not prove that a specific cumulative update
caused `0x800f0915`. Unless Microsoft has confirmed a particular update
as the cause for your Windows build, I would not uninstall security
updates solely because DISM failed once.

First try:

1.  Installing any newer available updates
2.  Restarting Windows
3.  Running RestoreHealth normally
4.  Retrying with a suitable local repair source

This keeps the troubleshooting focused on repairing servicing rather
than creating another update problem.

## 16. Perform an In-Place Repair Upgrade if DISM Still Fails

When the normal online repair fails, a properly matched local source
fails, and Windows continues showing corruption or other system
problems, an in-place repair upgrade is the more substantial option.

An in-place repair reinstalls Windows system components while allowing
you to keep personal files and, when the appropriate option is
available, installed applications.

Before proceeding:

-   Back up important files
-   Make sure you have adequate free storage
-   Disconnect unnecessary external devices
-   Make sure Windows is activated
-   Use official Microsoft installation media
-   Confirm that the setup language and edition are appropriate

Mount the Windows 11 ISO and run:
text setup.exe
Follow Windows Setup and choose the option to keep personal files and
apps when available.
Carefully review the final screen before starting the installation.
 An in-place repair is much less destructive than a clean installation,
but it is still a major system operation. Backups matter.
If your PC is instead failing before Windows can start and shows a boot
recovery code, that is a different troubleshooting path. See **[Windows
11 Error 0xC0000185: How to Fix
It](https://www.techwisezoneblog.com/windows-11-error-0xc0000185/)** for
an example of a boot-level Windows recovery problem.
## Should You Uninstall a Windows Update to Fix 0x800f0915?
Not as the first response.
It is tempting to blame the most recent update when DISM starts failing
soon afterward, but `0x800f0915` is fundamentally a servicing failure
and can have more than one cause.
I would first:
1. Check for newer Windows updates
2. Test the normal online RestoreHealth command
3. Check component-store health
4. Use a matching official repair source
5. Verify the correct WIM or ESD index
6. Review the logs if necessary
Only consider removing an update when there is strong evidence that the
update itself is responsible and removal is appropriate for your
particular Windows build.
## Should You Download Missing DISM Files From the Internet?
No.
Avoid websites offering individual Windows DLLs, component-store files,
or unofficial "DISM repair packages."
Windows system components are tied to specific versions, packages,
architectures, and servicing states. A file with the right name is not
necessarily the right file for your installation.
Use Windows Update, official Windows installation media, or another
Microsoft-supported repair source instead.
## DISM Error 0x800f0915 vs. SFC Errors
DISM and SFC are related but they do different jobs.
DISM repairs the Windows image and component store. SFC checks protected
Windows system files and can replace damaged files using healthy copies
available to Windows.
That is why Microsoft recommends running:
An in-place repair is much less destructive than a clean installation,
but it is still a major system operation. Backups matter.
If your PC is instead failing before Windows can start and shows a boot
recovery code, that is a different troubleshooting path. See **[Windows
11 Error 0xC0000185: How to Fix
It](https://www.techwisezoneblog.com/windows-11-error-0xc0000185/)** for
an example of a boot-level Windows recovery problem.
## Should You Uninstall a Windows Update to Fix 0x800f0915?
Not as the first response.
It is tempting to blame the most recent update when DISM starts failing
soon afterward, but `0x800f0915` is fundamentally a servicing failure
and can have more than one cause.
I would first:
1. Check for newer Windows updates
2. Test the normal online RestoreHealth command
3. Check component-store health
4. Use a matching official repair source
5. Verify the correct WIM or ESD index
6. Review the logs if necessary
Only consider removing an update when there is strong evidence that the
update itself is responsible and removal is appropriate for your
particular Windows build.
## Should You Download Missing DISM Files From the Internet?
No.
Avoid websites offering individual Windows DLLs, component-store files,
or unofficial "DISM repair packages."
Windows system components are tied to specific versions, packages,
architectures, and servicing states. A file with the right name is not
necessarily the right file for your installation.
Use Windows Update, official Windows installation media, or another
Microsoft-supported repair source instead.
## DISM Error 0x800f0915 vs. SFC Errors
DISM and SFC are related but they do different jobs.
DISM repairs the Windows image and component store. SFC checks protected
Windows system files and can replace damaged files using healthy copies
available to Windows.
That is why Microsoft recommends running:
cmd DISM.exe /Online /Cleanup-Image /RestoreHealth
before:
cmd sfc /scannow
when repairing system corruption.

If DISM cannot repair the component store because its repair content
cannot be found, SFC may also struggle to repair certain corrupted
files.

For that reason, fix the `0x800f0915` DISM problem first, then run SFC.

## Frequently Asked Questions

### What is DISM error 0x800f0915?

It is a Windows servicing error that can appear when a DISM repair
operation cannot obtain suitable repair content. It is commonly
encountered while running `/RestoreHealth`.

### What does "the repair content could not be found" mean?

It means DISM could not locate or use the files needed to complete the
Windows image repair. The next step is usually to verify Windows Update
access or provide a suitable repair source with `/Source`.

### Can I fix 0x800f0915 without reinstalling Windows?

Yes, in many cases. Start with the normal online RestoreHealth command.
If that fails, use official Windows installation media as a repair
source and make sure the source format, edition, and image index are
correct.

### What does /LimitAccess do in DISM?

`/LimitAccess` prevents DISM from contacting Windows Update as a repair
source or backup repair source. When you use it with RestoreHealth, make
sure the local `/Source` you provide is valid.

### Should the Windows ISO match my installed Windows?

Use installation media appropriate for the Windows installation you are
repairing. Also verify the edition and select the correct image index
inside `install.wim` or `install.esd`.

### How do I know which WIM index to use?

Run:
cmd DISM /Get-WimInfo /WimFile:D:\sources\install.wim
Replace `D:` with your ISO drive. Find the index whose name matches your
installed Windows edition and use that index in the RestoreHealth source
command.

### What if my ISO contains install.esd instead of install.wim?

Use the ESD source format, for example:
cmd DISM /Online /Cleanup-Image /RestoreHealth /Source:ESD:D:\sources\install.esd:6 /LimitAccess “`
Replace the drive letter and index with the correct values for your computer.
Should I run SFC before or after DISM?
For Windows corruption repair, Microsoft recommends running DISM first and SFC afterward. Once DISM repairs the component store successfully, run sfc /scannow.
Can 0x800f0915 mean my hard drive is failing?
The error by itself does not prove that your drive is failing. It points to a Windows servicing/repair failure. Investigate storage separately if you also have disk errors, corrupted files, freezes, SMART warnings, or other symptoms.
Use the Repair Source That Matches Your Windows Installation
The most important lesson with DISM error 0x800f0915 is not to keep repeating the same RestoreHealth command and hope for a different result.
Let the failure tell you what to check next. Confirm that Windows Update works, determine whether the component store is repairable, record your Windows version and edition, and then use official installation media when a local repair source is necessary.
When you use an ISO, pay close attention to the details that are easy to miss: the mounted drive letter, whether the source is WIM or ESD, and the image index corresponding to your Windows edition.
Once DISM completes successfully, run SFC to finish checking protected system files. If Windows still shows broader instability afterward, investigate the underlying symptom rather than treating 0x800f0915 as the cause of every problem.
For other Windows issues where system corruption can affect normal operation, Ctrl Alt Delete Not Working? How to Fix It shows how DISM and SFC fit into a wider troubleshooting process.
