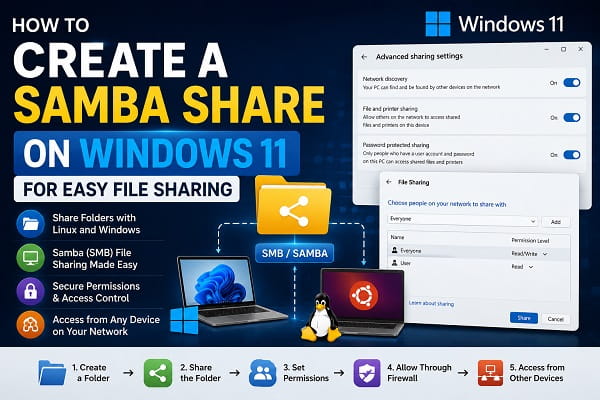
Sharing files between Windows and Linux does not require you to install Samba on Windows 11. Windows already includes built-in SMB file-sharing support, while Samba is the open-source implementation of SMB commonly used by Linux and Unix-like systems.
That distinction matters because many older guides describe the process as if Samba itself must be installed on Windows. In most cases, it does not.
You can create an SMB share directly from Windows 11, then access it from another Windows PC, Ubuntu, other Linux distributions, macOS, or devices such as a Raspberry Pi.
This guide explains how to create the share, configure the correct permissions, connect from Linux and Windows, use PowerShell, and troubleshoot the problems that most often prevent an SMB share from working.
What Is a Samba Share?
Samba is open-source software that implements the SMB protocol and allows Linux and Unix-like systems to communicate with SMB-based file shares.
SMB, or Server Message Block, is the network file-sharing protocol used by Windows to share files and other network resources.
When you share a folder from Windows 11, the Windows computer acts as the SMB server. A Linux computer running Samba or another SMB client can then connect to it.
So, when people search for “how to create a Samba share on Windows 11,” they are usually looking for instructions for creating an SMB share hosted by Windows.
What You Need Before Creating the Share
Before configuring the folder, check the following:
- Both computers are connected to the same local network.
- The Windows 11 connection is using a Private network profile if this is a trusted home or local network.
- Network Discovery is enabled if you want the computer to appear when browsing the network.
- File and Printer Sharing is enabled.
- The Windows account you intend to use has permission to access the folder.
- Windows Firewall allows File and Printer Sharing.
- You know the Windows computer name or local IP address.
If Windows is already having problems detecting your network adapter, fix that before troubleshooting SMB. Our guide on Windows Could Not Find a Driver for Your Network Adapter covers missing, disabled, and incompatible network drivers.
Step 1: Set the Network Profile to Private
If this is a trusted home or local network, set the Windows 11 network profile to Private.
Open:
Settings > Network & internetSelect the active Wi-Fi or Ethernet connection and check the network profile.
A Private profile is intended for trusted networks where your PC can communicate with other devices.
Do not set an unfamiliar public network to Private simply to make file sharing work.
Step 2: Turn On Network Discovery and File and Printer Sharing
Open:
Settings > Network & internet > Advanced network settings > Advanced sharing settingsUnder Private networks, turn on:
Network discovery
File and printer sharing
Network Discovery helps devices find one another on the local network. File and Printer Sharing allows Windows to provide network-sharing services.
These settings do not replace folder permissions. A computer can be visible on the network while a particular shared folder remains inaccessible.
Step 3: Create a Dedicated Folder
Create the folder you want to make available over the network.
For example:
C:\SharedFilesA dedicated folder is preferable to sharing the entire C: drive or your complete user profile.
Only place files in this folder that you are comfortable making available to the users or devices you authorize.
[IMAGE 1 — Windows 11 File Explorer showing the folder that will be shared]
Step 4: Open the Folder’s Sharing Settings
Right-click the folder and select:
PropertiesOpen the Sharing tab.
You can use the simpler Share option for basic sharing, but Advanced Sharing gives you more control over the share name and permissions.
Select:
Advanced SharingThen enable:
Share this folderGive the share a simple name, such as:
SharedFilesThe share name is the name other devices will use after the computer name.
For example:
\\DESKTOP-ABC123\SharedFilesStep 5: Configure Share Permissions
Inside Advanced Sharing, select:
PermissionsChoose the users or groups that should have access and assign the appropriate level.
Typical choices include:
- Read
- Change
- Full Control
For a basic home file share, Read is appropriate when users only need to open or copy files.
Use Change when they need to create, edit, rename, or delete files.
Avoid granting Full Control unless there is a specific reason to do so.
Step 6: Configure NTFS Permissions
This is one of the most important parts of Windows file sharing.
Windows can apply two permission layers to a network share:
- Share permissions
- NTFS permissions
Right-click the folder and open:
Properties > SecurityCheck the users and groups that have permission to access the folder.
For example, if a user needs to create and modify files, the NTFS permissions must allow those operations as well as the share permissions.
The user’s effective access is limited by the more restrictive combination of the two permission layers.
For example, giving a user Change permission at the share level does not allow them to modify files if the NTFS permissions only allow Read.
Step 7: Decide Whether to Use Password-Protected Sharing
For most home and small-network setups, keeping password-protected sharing enabled is the safer option.
Open:
Settings > Network & internet > Advanced network settings > Advanced sharing settingsExpand:
All networksCheck the Password protected sharing option.
With password-protected sharing enabled, the connecting device will need valid credentials for a Windows account that has permission to access the shared folder.
A dedicated local Windows account can be useful if you want a separate identity specifically for network file access.
Step 8: Allow File Sharing Through Windows Firewall
Windows Firewall can block SMB connections even when the folder itself is configured correctly.
Open:
Windows Security > Firewall & network protectionMake sure the appropriate File and Printer Sharing rules are allowed for the trusted network profile.
Do not disable Windows Firewall simply because another computer cannot connect.
If the firewall is configured correctly, Windows can allow the required SMB traffic without turning the firewall off.
Step 9: Find the Windows Computer Name
The computer name is useful when creating a network path.
Open:
Settings > System > AboutFind:
Device nameFor example, if the computer name is:
DESKTOP-ABC123and the share is:
SharedFilesthe Windows network path is:
\\DESKTOP-ABC123\SharedFilesThis is the path you can enter into File Explorer on another Windows computer.
Step 10: Test the Share From Another Windows PC
On another Windows computer connected to the same network:
- Open File Explorer.
- Click the address bar.
- Enter the network path.
For example:
\\DESKTOP-ABC123\SharedFilesPress Enter.
If Windows asks for credentials, enter the username and password of an authorized account on the computer hosting the share.
If the folder opens, the Windows SMB server, network connection, and permissions are working.
If File Explorer becomes unresponsive while you are testing the connection, our guide on How to Restart File Explorer on Windows 11 explains how to restart Explorer without rebooting the entire PC.
Step 11: Map the Share as a Network Drive
If you use the share regularly, you can map it as a drive.
On the client Windows PC:
- Open File Explorer.
- Select This PC.
- Choose Map network drive.
- Select a drive letter.
- Enter the network path.
For example:
\\DESKTOP-ABC123\SharedFilesEnable Reconnect at sign-in if you want Windows to reconnect automatically.
Select Finish.
The shared folder will then appear as a network drive in File Explorer.
Step 12: Access the Windows Share From Linux
Linux can access the Windows share using SMB.
On many Linux desktop environments, open the file manager and enter:
smb://DESKTOP-ABC123/SharedFilesIf the computer name does not resolve, use the Windows PC’s local IP address:
smb://192.168.1.100/SharedFilesReplace the example address with the actual IP address of your Windows computer.
You may be asked for:
- Username
- Password
- Workgroup or domain, depending on the configuration
Use credentials belonging to a Windows account with access to the shared folder.
[IMAGE 2 — Linux file manager showing an SMB path such as smb://DESKTOP-ABC123/SharedFiles]
Step 13: Find the Windows PC’s IP Address
If the computer name does not work, you can test the share using the Windows PC’s local IP address.
Open Command Prompt and run:
ipconfigFind the active network adapter and look for:
IPv4 AddressFor example:
192.168.1.100You can then try:
\\192.168.1.100\SharedFilesfrom Windows, or:
smb://192.168.1.100/SharedFilesfrom a Linux file manager.
Using the IP address is particularly useful when the SMB share works but Windows or Linux cannot resolve the computer name.
Create an SMB Share With PowerShell
Windows also provides the SmbShare PowerShell module.
The New-SmbShare command creates an SMB share and exposes a folder to remote clients.
For example:
New-SmbShare -Name "SharedFiles" -Path "C:\SharedFiles" -ChangeAccess "YourUsername"Replace YourUsername with the Windows user or group that should have Change access.
For read-only access:
New-SmbShare -Name "SharedFiles" -Path "C:\SharedFiles" -ReadAccess "YourUsername"For full share-level access:
New-SmbShare -Name "SharedFiles" -Path "C:\SharedFiles" -FullAccess "YourUsername"Use FullAccess carefully. Share permissions are only one layer of Windows security, and NTFS permissions still apply.
Check Existing SMB Shares
Run:
Get-SmbShareTo inspect a particular share:
Get-SmbShare -Name "SharedFiles"Remove an SMB Share
If you no longer need a share:
Remove-SmbShare -Name "SharedFiles"This removes the network share definition. It does not delete the underlying folder.
Do You Need to Enable SMB 1.0?
Usually, no.
Modern Windows and Linux systems generally use newer SMB versions. SMB1 is an old protocol with significant security weaknesses and should not be enabled simply because you are creating a Samba-compatible share.
If a modern Linux computer cannot access your Windows share, troubleshoot:
- Network connectivity
- Network Discovery
- File and Printer Sharing
- Windows Firewall
- Username and password
- Share permissions
- NTFS permissions
- SMB compatibility
before enabling SMB1.
Only consider SMB1 when you have a specific legacy device or application that genuinely requires it and you understand the security implications.
What SMB Version Does Windows 11 Use?
Windows 11 supports modern SMB dialects, including SMB2 and SMB3.
You generally do not need to select an SMB version manually when connecting a modern Linux or Windows client.
The client and server negotiate a compatible SMB dialect during the connection.
For a normal home network, the better approach is to leave modern SMB settings at their defaults rather than forcing an older protocol for compatibility without a specific reason.
Why Can’t Linux See My Windows 11 Share?
If Linux cannot see the Windows PC when browsing the network, test the share directly instead of relying on network discovery.
Try:
smb://DESKTOP-ABC123/SharedFilesIf that fails, try:
smb://192.168.1.100/SharedFilesIf the IP address works but the computer name does not, the problem is likely related to name resolution or network discovery rather than the shared folder itself.
Check Network Discovery
Open:
Settings > Network & internet > Advanced network settings > Advanced sharing settingsMake sure Network Discovery is enabled for the appropriate network profile.
Check File and Printer Sharing
Make sure File and Printer Sharing is enabled.
Check Windows Firewall
Verify that File and Printer Sharing is allowed through Windows Firewall for the trusted network profile.
Check the Credentials
Make sure the username and password belong to an account on the Windows PC and that the account has permission to access the folder.
Check the Network
Confirm that both devices are on the same local network.
A guest Wi-Fi network may isolate clients from other devices. A VPN, separate VLAN, or corporate network policy can also prevent local SMB connections.
If Windows is showing broader network connectivity problems, see Windows Could Not Find a Driver for Your Network Adapter before continuing with SMB troubleshooting.
Why Can I See the Share but Not Open It?
If another computer can identify the Windows PC or share but cannot open the folder, authentication or permissions are likely to be the problem.
Check:
- Windows username
- Windows password
- Share permissions
- NTFS permissions
- Password-protected sharing
- Windows Firewall
- Whether the account is allowed to access the folder
Do not solve the problem by giving Everyone Full Control unless you understand the security implications.
Why Does Windows Ask for a Username and Password?
Windows may request credentials because password-protected sharing is enabled.
Use an account that exists on the computer hosting the share and has permission to access the folder.
If you are connecting from Linux, the credentials requested by the file manager normally correspond to the Windows account rather than a separate Samba account.
Can I Create a Guest Samba Share on Windows 11?
For a normal Windows 11 home network, I would not recommend weakening SMB authentication simply to avoid entering a password.
Modern Windows security increasingly restricts insecure guest access. Using a dedicated Windows account with an appropriate password is generally a safer approach.
Is a Samba Share Secure?
It can be, provided it is configured correctly.
For a local network share:
- Use a strong password.
- Share only the folder that needs to be accessible.
- Grant the minimum permissions required.
- Keep Windows updated.
- Keep SMB1 disabled unless it is genuinely required.
- Keep Windows Firewall enabled.
- Use a Private network profile on a trusted local network.
- Avoid exposing SMB directly to the internet.
Do not forward TCP port 445 from your router to a Windows PC simply to make a home SMB share accessible from the internet.
For remote access, use a properly secured VPN or another solution designed for remote file access.
Samba vs SMB: What Is the Difference?
The terms are related but not interchangeable.
SMB is the network file-sharing protocol.
Samba is open-source software that implements SMB and allows Linux and Unix-like systems to participate in SMB networks.
Windows 11 already provides SMB server and client functionality, so Samba itself does not normally need to be installed on Windows.
That is why creating a “Samba share” on Windows 11 is really a matter of configuring an SMB share.
Frequently Asked Questions
Can Windows 11 create a Samba share?
Yes. Windows 11 can host an SMB share using its built-in SMB server. Samba itself does not need to be installed on Windows for Linux or other SMB clients to access the share.
Do I need to install Samba on Windows 11?
No. Windows 11 includes SMB client and server functionality. You can create a share through File Explorer or PowerShell.
How do I create a Samba share on Windows 11?
Create a folder, enable Network Discovery and File and Printer Sharing, open the folder’s Sharing settings, enable Advanced Sharing, configure permissions, and access the share using a path such as:
\\ComputerName\ShareNameHow do I access a Windows 11 Samba share from Linux?
Open your Linux file manager and enter:
smb://ComputerName/ShareNameIf the computer name does not work, use the Windows PC’s local IP address instead.
What is the Windows 11 SMB share path?
A typical Windows network path is:
\\ComputerName\ShareNameFor example:
\\DESKTOP-ABC123\SharedFilesWhat is the Linux SMB path?
A Linux file manager commonly uses:
smb://ComputerName/ShareNameFor example:
smb://DESKTOP-ABC123/SharedFilesDo I need SMB1 for Samba?
No. Modern Windows and Linux systems support newer SMB versions. SMB1 should generally remain disabled unless a specific legacy device requires it.
Why can’t my Linux computer access the Windows share?
Check the network connection, Network Discovery, File and Printer Sharing, Windows Firewall, Windows credentials, share permissions, and NTFS permissions. Testing the share directly by computer name and IP address can help identify where the problem is.
Can I map a Windows SMB share as a network drive?
Yes. On another Windows PC, open File Explorer, choose This PC > Map network drive, and enter the UNC path.
Can I create the share with PowerShell?
Yes. Windows provides the New-SmbShare cmdlet for creating SMB shares.
For example:
New-SmbShare -Name "SharedFiles" -Path "C:\SharedFiles" -ReadAccess "YourUsername"Should I enable password-protected sharing?
For most home and small-network setups, keeping password-protected sharing enabled is the safer choice. It requires users to authenticate rather than allowing unrestricted access to shared folders.
Can I access the Windows share from a Raspberry Pi?
Yes. Raspberry Pi OS and other Linux-based systems can access Windows SMB shares using Samba/SMB tools or a compatible file manager.
Related Windows Networking Content
If you are troubleshooting other Windows connectivity or system issues, these TechWiseZone guides are relevant:
- Windows Could Not Find a Driver for Your Network Adapter
- How to Restart File Explorer on Windows 11
- How to Remove Bluetooth Device on Windows 11
The links above are useful when the problem extends beyond SMB itself, such as a missing network adapter driver, an unresponsive File Explorer session, or a broader device connectivity problem.
