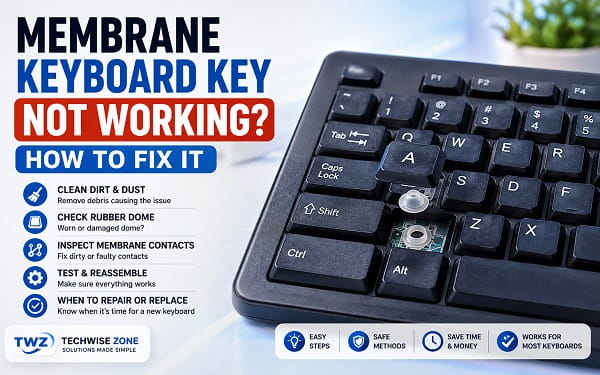
membrane keyboard can keep working normally even when one key suddenly stops registering. Sometimes the key works only if you press very hard. In other cases, it feels sticky, repeats characters, works intermittently, or does nothing at all.
Knowing how to fix a membrane keyboard key not working starts with figuring out whether the problem is really inside the keyboard.
A single dead key can be caused by:
- Dirt or debris around the key
- A damaged keycap
- A worn rubber dome
- Dirty membrane contacts
- Liquid residue
- A damaged conductive trace
- A loose internal ribbon cable
- Software or remapping
- A failing keyboard controller
Before opening the keyboard, confirm that the problem follows the physical key and is not limited to one app or shortcut.
This article focuses mainly on external desktop membrane keyboards. Laptop keyboards, low-profile scissor keyboards, sealed wireless keyboards, and specialty gaming keyboards can use different constructions. Do not pull keycaps or separate the keyboard housing unless the manufacturer design allows it.
First, Confirm That the Key Is Actually Broken
Open a simple text editor such as Notepad.
Press the affected key repeatedly.
Then test:
- The same key in another app
- Shift + the key
- Ctrl + the key if it is part of a shortcut
- Nearby keys
- The same keyboard on another computer
The Key Fails Everywhere
The problem is likely related to the physical keyboard, its firmware, or its connection.
The Key Works in Some Apps
The keyboard hardware may be fine.
Look for:
- App-specific shortcuts
- Keyboard remapping
- Gaming profiles
- Macro software
- Accessibility settings
- Layout/language settings
Only a Shortcut Fails
For example, if the C key types normally but Ctrl + C does not work, the membrane under C may not be the issue.
Test the Ctrl key and shortcut behavior separately.
If copy and paste is the only thing failing, see How to Fix Copy and Paste Not Working in Windows 11 before opening the keyboard.
1. Reconnect the Keyboard
For a USB membrane keyboard:
- Unplug it.
- Wait several seconds.
- Connect it to another USB port.
- Test the key again.
Avoid a USB hub temporarily.
For a wireless keyboard:
- Turn the keyboard off.
- Replace or recharge the batteries.
- Reconnect the wireless receiver or Bluetooth connection.
- Test again.
One dead key is less likely to be caused by the USB connection than an entire keyboard failure, but reconnecting is quick and helps rule out controller or communication glitches.
2. Restart the Computer
Restart Windows before doing hardware work.
A restart clears temporary keyboard hooks, remapping software, gaming utilities, and input problems.
After restart, open Notepad and test the key before launching:
- RGB software
- Macro utilities
- Game launchers
- Keyboard remappers
- Automation tools
If the key works until a specific utility opens, the membrane itself is probably not the problem.
3. Test the Keyboard on Another Computer
This is one of the best ways to separate hardware from Windows.
Connect the keyboard to another PC.
Open a text editor and test the dead key.
Key Still Fails
The fault follows the keyboard.
Continue with physical cleaning and inspection.
Key Works Normally
The original PC has a software, driver, layout, or remapping issue.
Do not disassemble the keyboard yet.
4. Check the Keyboard Layout
A key can appear to be broken when Windows is using an unexpected layout.
Open:
Settings > Time & language > Language & region
Check the installed keyboard layout.
Switch to the layout that matches the physical keyboard.
This is especially relevant when:
@and quotation marks are swapped- Z and Y are reversed
- Symbol keys type unexpected characters
- A key produces a different character rather than no character
A layout problem is not a membrane failure.
5. Check for Key Remapping
Gaming utilities, PowerToys, AutoHotkey, keyboard software, and manufacturer utilities can disable or remap individual keys.
Close those programs temporarily.
If you use Microsoft PowerToys, check Keyboard Manager.
If you use a gaming keyboard utility, reset the current profile or switch to a default profile.
Then test the key again.
A physical repair is unnecessary when software has intentionally reassigned the key.
6. Clean Around the Key Without Removing It
Dirt is one of the safest things to address first.
Disconnect the keyboard.
Turn it upside down and gently tap it.
Microsoft’s current keyboard-cleaning guidance recommends holding the keyboard upside down to remove loose debris and using compressed air between the keys.
Use short bursts of compressed air around the affected key.
Press the key repeatedly while cleaning.
Do not hold the can upside down.
Do not push the nozzle directly against the keyboard.
Then reconnect the keyboard and test.
For official cleaning guidance, see Microsoft’s keyboard cleaning instructions.
7. Clean Sticky Residue Around the Key
If the key feels sticky or returns slowly, surface contamination may be interfering with movement.
Disconnect the keyboard.
Lightly dampen a lint-free cloth or cotton swab with a small amount of mild soapy water.
Wipe around the edges of the key.
Do not drip liquid inside the keyboard.
Microsoft specifically warns against allowing water to drip into a keyboard while cleaning.
Let the surface dry completely before reconnecting it.
If a sugary drink was spilled directly into the keyboard, surface cleaning may not be enough. Residue can reach the rubber dome and membrane contacts inside.
8. Compare the Key Feel With Nearby Keys
Press the affected key and a neighboring working key.
Compare:
- Travel
- Resistance
- Click or tactile feel
- Return speed
- Side-to-side wobble
- Whether the key bottoms out
Key Feels Normal but Does Not Register
The problem may be electrical:
- Dirty contact
- Worn conductive pad
- Damaged membrane trace
- Controller issue
Key Feels Mushy or Collapsed
The rubber dome may be damaged, displaced, or worn.
Key Sticks Down
Look for:
- Debris
- Bent keycap
- Sticky residue
- Damaged key guide
The feel of the key can tell you whether the fault is mechanical or electrical.
9. Remove the Keycap Only if the Keyboard Allows It
Many full-size desktop membrane keyboards use keycaps that can be removed carefully.
However, not every keyboard is designed for casual keycap removal.
Before removing a keycap:
- Check the manufacturer’s support information
- Compare with the keyboard model
- Avoid laptop keys
- Avoid low-profile scissor mechanisms
- Avoid large stabilized keys unless necessary
Keys such as:
- Spacebar
- Enter
- Shift
- Backspace
often use stabilizer wires or clips and are easier to damage.
For a simple letter or number key on a removable-keycap desktop keyboard, use a proper keycap puller if available.
Pull upward evenly.
Do not twist aggressively.
If the keycap resists strongly, stop.
10. Inspect the Keycap
With the keycap removed, check it for:
- Cracks
- Broken guide posts
- Bent plastic
- Sticky residue
- Debris underneath
- Warping
A cracked keycap can prevent proper downward force from reaching the rubber dome.
Clean the keycap separately with mild soap and water if the manufacturer allows it.
Make sure it is completely dry before reinstalling.
11. Inspect the Rubber Dome
Under many membrane keycaps is a rubber dome.
When you press the key, the dome collapses and helps press the contact area beneath it.
Inspect the dome without pulling or stretching it.
Look for:
- Tear
- Split
- Permanent collapse
- Misalignment
- Sticky residue
- Missing dome
Press the dome gently with a clean finger or plastic tool.
Dome Feels Firm and Returns Normally
The problem may be at the membrane contact rather than the rubber.
Dome Is Torn or Does Not Spring Back
The keyboard may need a replacement dome sheet or complete keyboard replacement.
Individual rubber domes are not always sold separately.
12. Test the Key With the Keycap Removed
If the keyboard design safely exposes the rubber dome, reconnect the keyboard only after making sure no loose metal tools or liquid are present.
Press the rubber dome directly.
Open Notepad and see whether the key registers.
Key Works Without the Keycap
The keycap or key guide is likely the problem.
Clean or replace the keycap.
Key Still Does Not Work
The problem is below the keycap level.
Disconnect the keyboard again before opening the housing.
13. Decide Whether Opening the Keyboard Is Worth It
Opening a membrane keyboard is reasonable only when:
- It is an external desktop keyboard
- Warranty is expired or not a concern
- Screws are accessible
- No glued or sealed construction is involved
- Replacement cost is high enough to justify repair
- You are comfortable reassembling many key parts
Do not open the keyboard if:
- It belongs to an employer
- It is under warranty
- It is a laptop keyboard
- It contains a rechargeable lithium battery that must be removed unsafely
- The case is ultrathin or adhesive-sealed
- You cannot find model-specific disassembly information
For a built-in laptop keyboard, use model-specific repair steps instead. For example, TechWise Zone has a dedicated Microsoft Surface Laptop Keyboard Not Working guide because built-in laptop keyboard troubleshooting is very different from opening a basic external membrane keyboard.
14. Photograph the Keyboard Before Disassembly
Before removing screws, take photos of:
- Front
- Back
- Cable routing
- Battery compartment
- Screw locations
- Rubber dome sheet
- Membrane layers
- Internal ribbon connectors
Membrane keyboards can contain many loose components.
A reference photo makes reassembly much easier.
Keep screws organized by location.
15. Disconnect Power Completely
For a USB keyboard, unplug it.
For a wireless keyboard:
- Turn it off
- Remove replaceable batteries
- Disconnect the receiver
For a rechargeable keyboard, follow the manufacturer’s service procedure.
Do not work on an energized keyboard.
Avoid metal tools touching exposed circuit contacts.
16. Open the Keyboard Housing Carefully
Remove visible screws.
Check for screws hidden under:
- Rubber feet
- Labels
- Battery cover
- Decorative plugs
Separate the case gently.
Do not force it.
Some keyboards use plastic clips in addition to screws.
If the case refuses to open, recheck for hidden screws.
Force can crack the shell or break internal ribbon cables.
17. Identify the Membrane Layers
A typical membrane keyboard may contain:
- Keycap layer
- Rubber dome sheet
- Printed membrane circuit
- Spacer layer
- Controller board
- Metal or plastic support plate
The exact design varies.
The membrane circuit often consists of thin flexible plastic sheets with printed conductive paths.
When a key is pressed, conductive contact areas meet and close an electrical circuit.
Do not crease, fold, scratch, or stretch the membrane sheets.
18. Inspect the Membrane Contact Under the Dead Key
Locate the position of the failed key.
Check the matching area on the membrane for:
- Dirt
- Liquid residue
- Corrosion
- Grease
- Dark marks
- Scratches
- Torn plastic
- Broken conductive path
Compare it with a nearby working key.
Do not scrape the printed conductive surface with a knife or screwdriver.
The traces can be extremely thin.
19. Clean the Membrane Contacts Gently
If the contact area is visibly dirty, use a very small amount of high-purity isopropyl alcohol on a lint-free swab.
The keyboard must be disconnected from power.
Wipe gently.
Do not soak the membrane.
Do not scrub aggressively.
Allow the alcohol to evaporate completely before reassembly.
Avoid household cleaners that leave oily or conductive residue.
If the membrane manufacturer provides a specific cleaning procedure, follow it instead.
20. Clean Liquid Spill Residue
Sugary drinks are particularly damaging to membrane keyboards.
Even after the water evaporates, sugar can leave a sticky or conductive film.
If a spill reached the membrane:
- Disconnect all power.
- Open the keyboard only if the design allows it.
- Separate the membrane layers carefully.
- Photograph their orientation.
- Clean contaminated areas gently.
- Let every layer dry completely.
- Reassemble.
Do not reconnect the keyboard while moisture remains.
If corrosion has eaten through the conductive traces, cleaning alone will not restore the key.
21. Check for a Damaged Conductive Trace
A membrane key can stop working when the printed circuit trace is interrupted.
Inspect the path leading away from the affected contact.
A broken trace may look like:
- Scratch
- Crack
- Corroded gap
- Discolored section
- Worn printed line
If several keys in the same row or column stop working together, a shared trace becomes more suspicious than several rubber domes failing at once.
This is an important clue.
22. Understand Row and Column Failures
Keyboard matrices organize many keys into electrical rows and columns.
That means one damaged trace can disable several keys that seem unrelated physically.
For example, you may find:
- Several letters failing
- A vertical group of keys dead
- Certain keys failing together after a spill
When several keys share the same fault pattern, inspect membrane traces and ribbon connections rather than replacing several keycaps.
23. Check the Membrane Ribbon Connection
The membrane usually connects to a small controller board.
Inspect the ribbon or contact tail.
Look for:
- Misalignment
- Dirt
- Corrosion
- Loose clamp
- Torn contact
- Creased membrane
Do not pull hard on a flexible ribbon.
If the connector uses a locking tab, release it correctly before moving the ribbon.
A poor ribbon connection can cause groups of keys to fail.
24. Reseat the Membrane Connection
If the connection is removable and the design is obvious:
- Photograph it.
- Release the connector lock if present.
- Remove the membrane tail gently.
- Inspect the contacts.
- Reinsert it straight.
- Lock the connector.
- Reassemble enough to test safely.
Do not force the contact strip into the connector.
A crooked membrane tail can create additional dead keys.
25. Be Cautious With Conductive Paint Repairs
Some DIY repair guides recommend conductive paint or conductive ink for broken membrane traces.
This can work in limited cases, but it is not a beginner fix.
Problems include:
- Bridging neighboring traces
- Applying too much material
- Poor adhesion
- Wrong resistance
- Repair cracking when the membrane flexes
- Permanent damage
If the keyboard is inexpensive, replacing it is often more practical.
If it is rare or valuable, a specialist repair may be safer.
Do not use ordinary metallic paint, solder, foil, graphite paste, or random adhesive over membrane traces.
Soldering directly to thin plastic membrane sheets can melt them.
26. Do Not Use Pencil Graphite as a Permanent Repair
Rubbing pencil graphite over a failed contact is sometimes suggested online.
It is unreliable.
Graphite can:
- Wear off
- Smear
- Change resistance
- Contaminate nearby contacts
- Create intermittent behavior
Use proper replacement parts or a suitable conductive repair product only when you understand the circuit.
For an ordinary inexpensive membrane keyboard, replacement is usually the better long-term solution.
27. Check for a Worn Conductive Pad
Some rubber-dome designs include a conductive pad that contacts the membrane.
Over time, that surface can wear or become contaminated.
Clues include:
- Key works only when pressed very hard
- Key registers intermittently
- Dome feels normal
- Membrane trace looks intact
Clean the area gently.
If the conductive pad is physically worn, replacing the rubber dome sheet is more reliable than coating it with improvised materials.
28. Fix a Key That Works Only When Pressed Hard
This symptom often points to incomplete contact.
Start with:
- Remove debris.
- Clean around the key.
- Inspect the keycap.
- Check the rubber dome.
- Inspect the contact area.
- Check for liquid residue.
If the key registers with extra force but not normal pressure, the key mechanism is probably reaching the electrical contact only inconsistently.
Do not keep hammering the key.
That can worsen the dome, keycap, or membrane.
29. Fix a Membrane Key That Repeats Characters
A repeating key may be making contact multiple times during one press.
Possible causes include:
- Sticky key
- Contaminated contact
- Damaged rubber dome
- Keycap binding
- Software repeat setting
- Electrical bounce from wear
Clean the key first.
Then test the keyboard on another computer.
If the repeat follows the keyboard, physical repair becomes more likely.
If it happens only on one PC, check keyboard repeat settings and software.
30. Fix Several Membrane Keys Not Working
When several keys fail, look for patterns.
Nearby Keys Fail
Possible causes:
- Spill
- Local membrane contamination
- Mechanical damage
- Dome sheet damage
Keys in a Row or Column Fail
Possible causes:
- Broken matrix trace
- Ribbon connection
- Controller-board connection
Random Keys Fail
Possible causes:
- Widespread liquid damage
- Membrane wear
- Controller fault
- Software remapping
Testing on a second computer remains important.
31. Fix a Membrane Keyboard After a Spill
Immediately disconnect the keyboard.
For USB:
- Unplug it
For wireless:
- Turn it off
- Remove batteries if possible
Do not keep typing to see whether it still works.
If the spill is only on the keycap surface, clean it carefully.
If liquid clearly entered the keyboard, complete drying and internal cleaning may be necessary.
Sugary drinks, coffee with milk, soft drinks, and juice are more problematic than clean water because they leave residue.
If the keyboard was inexpensive and heavily soaked, replacement may be safer and more reliable than repair.
32. Reassemble the Keyboard Carefully
Before closing the case:
- Confirm membrane layers are aligned
- Confirm rubber dome sheet is flat
- Confirm ribbon connections are seated
- Confirm no screws or tools are inside
- Confirm no moisture remains
Align the case halves.
Install screws without overtightening.
Reinstall the keycap straight down.
Then reconnect the keyboard.
33. Test Every Key After Repair
Do not test only the repaired key.
Open a keyboard tester or text editor and check:
- Letters
- Numbers
- Function keys
- Modifiers
- Arrow keys
- Numpad
- Enter
- Backspace
- Spacebar
Internal membrane misalignment can fix one key while breaking another.
If several new keys stop working after reassembly, reopen the keyboard and check the membrane alignment and ribbon connection.
34. When the Keyboard Driver Is Actually the Problem
A single dead physical key is usually less likely to be a driver problem than an entire keyboard failure.
But if the keyboard behaves incorrectly only on one PC, try:
- Right-click Start.
- Open Device Manager.
- Expand Keyboards.
- Right-click the keyboard device.
- Choose Uninstall device.
- Restart Windows.
Windows should detect the keyboard again.
Do not install random keyboard drivers from third-party download sites.
Most basic USB membrane keyboards use standard HID drivers built into Windows.
35. When to Replace the Keyboard Instead of Repairing It
Replacement is often the sensible choice when:
- Conductive traces are badly corroded
- Membrane sheet is torn
- Several rubber domes are damaged
- Controller board has failed
- Liquid damage is widespread
- Replacement parts are unavailable
- Keyboard costs less than the repair materials
- Repair remains intermittent
A repair makes more sense when the keyboard is:
- Expensive
- Ergonomic
- Specialized
- Vintage
- Hard to replace
- Sentimentally important
Do not spend hours repairing a basic keyboard when a replacement costs less and gives more reliable results.
36. Do Not Use This Repair Process on Every Laptop Keyboard
Many laptop keyboards are not simple removable-keycap membrane boards.
They may use:
- Scissor switches
- Very fragile clips
- Integrated top cases
- Riveted assemblies
- Backlight layers
- Sealed membranes
Removing one laptop keycap incorrectly can break the hinge mechanism.
For laptop-specific failures, use the exact model’s repair documentation.
For example, the Microsoft Surface Laptop Keyboard Not Working article focuses on firmware, Windows, diagnostics, and Surface hardware rather than treating the built-in keyboard like a cheap external membrane board.
Membrane Keyboard One Key Not Working
When only one key fails:
- Test it in multiple apps.
- Test another PC.
- Clean around the key.
- Compare its feel with neighboring keys.
- Remove the keycap only if supported.
- Inspect the rubber dome.
- Test the dome directly.
- Inspect the membrane contact if necessary.
A single isolated failure most often points to the key mechanism or contact area rather than the entire keyboard controller.
Membrane Keyboard Key Only Works When Pressed Hard
This usually means the contact is incomplete.
Possible causes include:
- Dirty contact
- Worn conductive pad
- Weak rubber dome
- Damaged keycap
- Misaligned membrane
Cleaning is the best first repair.
If the conductive surface is worn, replacement of the dome or membrane assembly is usually more reliable than improvised coatings.
Membrane Keyboard Key Feels Mushy
A mushy key can indicate:
- Rubber dome damage
- Sticky residue
- Misaligned keycap
- Debris
- Dome that has lost elasticity
Remove the keycap only if the design supports it.
Compare the dome with a nearby key.
A torn or collapsed dome usually needs replacement.
Membrane Keyboard Key Is Stuck
Disconnect the keyboard.
Clean around the key.
Use compressed air.
If the keycap can be safely removed, inspect it for sticky residue or mechanical damage.
Do not spray lubricant such as WD-40 into the keyboard.
Oil-based products can contaminate the membrane and attract more dirt.
Membrane Keyboard Key Not Registering After Cleaning
If the key still does not register:
- Test another computer.
- Test without the keycap.
- Inspect the rubber dome.
- Inspect membrane contact.
- Inspect the trace.
- Check the ribbon connector.
At that point, the issue is probably below the surface.
Membrane Keyboard Stopped Working After Water Spill
Disconnect it immediately.
Do not reconnect until it is fully dry.
If only clean water entered the keyboard and power was removed quickly, careful drying may be enough.
If the spill contained sugar, milk, salt, or other residue, internal cleaning is more likely to be necessary.
If several keys fail afterward, inspect the membrane for contamination and corrosion.
Can You Repair a Membrane Keyboard?
Yes, some membrane keyboards are repairable.
Common successful repairs include:
- Cleaning debris
- Cleaning contacts
- Replacing a damaged keycap
- Reseating the membrane
- Repairing a loose ribbon connection
- Replacing a rubber dome sheet
However, severe trace damage, controller failure, or widespread liquid damage can make replacement more practical.
Frequently Asked Questions
Why is one key on my membrane keyboard not working?
The most common causes are debris, a damaged keycap, worn rubber dome, dirty membrane contact, liquid residue, or a damaged conductive trace.
Can I remove a membrane keyboard key?
On many external desktop keyboards, normal letter and number keycaps can be removed carefully. Laptop, low-profile, and stabilized keys can be much easier to damage, so check the keyboard design first.
Why does my keyboard key work only when I press hard?
The rubber dome or contact may no longer close the circuit reliably. Clean the key and membrane contact first, then inspect for a worn dome or conductive pad.
Can I clean a membrane keyboard with alcohol?
High-purity isopropyl alcohol can be useful for cleaning certain internal contact areas when the keyboard is fully disconnected, but use very little and follow manufacturer guidance. Do not soak the membrane.
Should I use WD-40 on a sticky keyboard key?
No. Oil-based lubricants can contaminate the keyboard and attract debris.
Can compressed air fix a dead key?
It can help when dirt or debris is preventing the key from moving correctly. Microsoft recommends compressed air for cleaning between keyboard keys.
Can a broken membrane trace be repaired?
Sometimes, but trace repair is delicate. Conductive repair products can create shorts if applied incorrectly. On inexpensive keyboards, replacement is often the safer option.
Why are several keys in one row not working?
A shared matrix trace or ribbon connection may be damaged. Several keys failing together is less likely to be caused by individual keycaps.
Is a membrane keyboard worth repairing?
It depends on the keyboard. A basic inexpensive board is often cheaper to replace. An ergonomic, specialty, or hard-to-find keyboard may justify a careful repair.
Should I reinstall Windows because one key stopped working?
No. Test the keyboard on another computer first. If the same physical key fails there, reinstalling Windows will not repair the keyboard hardware.
Start With the Key, Not the Operating System
A single membrane keyboard key that stops working is usually best diagnosed from the outside in.
First prove that the problem follows the physical keyboard. Then clean the key, compare its mechanical feel, and inspect the keycap and rubber dome only if the design allows it.
Opening the keyboard should come later.
Once you reach the membrane itself, work carefully. Thin conductive traces, flexible ribbon connections, and printed contacts are easy to damage.
If the key still fails after cleaning, dome inspection, membrane-contact cleaning, and connection checks, replacement may be more practical than attempting a delicate conductive-trace repair.
