
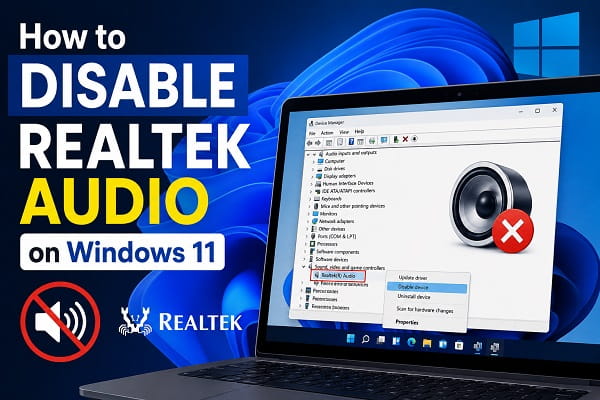
Realtek audio is responsible for the built-in speakers, headphone jack and, on many computers, the analogue microphone input. You may want to disable it after connecting a USB headset, an external sound card, a USB DAC or a monitor that carries sound through HDMI or DisplayPort.
The safest way to disable Realtek audio on Windows 11 is to open Settings > System > Sound > All sound devices, select the Realtek output and click Don’t allow. This turns off that sound endpoint without removing its driver. If you need to disable the entire Realtek audio controller, use Device Manager instead.
These two actions are not identical. Turning off only Speakers (Realtek(R) Audio) can leave a Realtek microphone available. Disabling Realtek(R) Audio under Sound, video and game controllers usually disables every input and output handled by the controller.
Choose the Right Realtek Audio Option to Disable
Windows may display several items with Realtek in their names. The correct one depends on what you want to stop.
| What you want to do | Best option | Likely result |
|---|---|---|
| Stop sound from the built-in speakers | Disable the Realtek speaker endpoint in Settings | Speakers stop working, while other audio devices remain available |
| Stop using the headphone jack | Disable the Realtek playback endpoint | The analogue jack and speakers may both stop working |
| Turn off only the built-in or jack microphone | Disable the Realtek microphone endpoint | Realtek output can continue working |
| Stop the complete Realtek audio driver | Disable Realtek(R) Audio in Device Manager | Speakers, headphone jack and related microphone inputs may stop |
| Stop the Realtek tray utility from starting | Disable its startup entry | Audio usually continues, but the helper app does not start automatically |
| Remove effects or fix distorted sound | Turn off audio enhancements | Realtek audio stays enabled without its optional processing |
| Permanently use a dedicated sound device | Disable onboard audio in UEFI or BIOS | The integrated Realtek controller disappears from Windows |
Before disabling anything, connect the device you plan to use instead. Confirm that a USB headset, Bluetooth speaker, HDMI monitor or dedicated sound card produces sound. This prevents a situation where every working output is disabled at once.
Method 1: Disable the Realtek Audio Output in Settings
This is the best method if you only want Windows and apps to stop using Realtek speakers. It is easy to reverse and does not remove the driver.
- Press Windows + I to open Settings.
- Select System, then Sound.
- Scroll to Advanced and open All sound devices.
- Under Output devices, select Speakers, Realtek(R) Audio, Realtek High Definition Audio or the similarly named Realtek output.
- Find the Audio or Allow section.
- Click Don’t allow next to the option that permits apps and Windows to use the device for audio.
The wording and position of the button can differ slightly between Windows 11 versions. If the button says Allow, the device is already disabled.
Return to Settings > System > Sound afterward. Choose the USB, Bluetooth, HDMI or other output you want from the sound output list.
How to enable the Realtek output again
Open Settings > System > Sound > All sound devices, select the disabled Realtek device and click Allow.
Use the next method if the Realtek device does not appear under All sound devices.
Method 2: Disable Realtek Speakers From the Sound Control Panel
The classic Sound Control Panel gives you a clear list of active and disabled playback devices. It also works when the modern Settings page does not show the option you need.
- Press Windows + R.
- Enter
mmsys.cpland press Enter. - Open the Playback tab.
- Right-click Speakers (Realtek(R) Audio) or the corresponding Realtek playback device.
- Select Disable.
Windows should switch to another available default output. If it does not, right-click the device you want to use and select Set as Default Device.
How to restore a hidden Realtek playback device
A disabled device can disappear from the visible list. To restore it:
- Open
mmsys.cplagain. - Right-click an empty area on the Playback tab.
- Enable Show Disabled Devices.
- Right-click the Realtek speakers and select Enable.
- Select Set as Default Device if you want Windows to use them again.
Method 3: Disable Realtek Audio in Device Manager
Device Manager provides two levels of control. You can disable one speaker or microphone endpoint, or disable the entire Realtek controller.
Microsoft also uses Device Manager as the place to check whether an audio controller is enabled when Windows cannot detect an output device. Its instructions identify Sound, video and game controllers as the relevant section for the main audio device. See Microsoft’s audio device detection instructions for that process.
Disable only the Realtek speaker endpoint
- Right-click Start and select Device Manager.
- Expand Audio inputs and outputs.
- Right-click Speakers (Realtek(R) Audio).
- Select Disable device.
- Confirm the action.
This method targets the speaker endpoint instead of the main audio controller. It is suitable when you want a Realtek microphone to remain available.
Disable the complete Realtek audio controller
- Open Device Manager.
- Expand Sound, video and game controllers.
- Right-click Realtek(R) Audio, Realtek High Definition Audio or the equivalent Realtek controller.
- Select Disable device.
- Click Yes to confirm.
Sound may stop immediately. On some systems, Windows will ask for a restart.
Disabling the complete controller can affect:
- Built-in laptop speakers
- The 3.5 mm headphone or headset jack
- A microphone connected through the analogue jack
- A built-in microphone routed through the Realtek controller
- Jack detection and device pop-up messages
- Realtek Audio Console features
HDMI and DisplayPort audio normally use the NVIDIA, AMD or Intel display-audio driver, not the Realtek controller. USB and Bluetooth audio devices also use separate drivers. Those outputs should remain available unless the computer manufacturer has configured the hardware differently.
How to re-enable Realtek in Device Manager
Return to the same Device Manager category, right-click the disabled Realtek item and select Enable device. Restart the computer if the device does not become available immediately.
If the item is missing, select View > Show hidden devices, followed by Action > Scan for hardware changes.
How to Disable Only the Realtek Microphone
You do not need to disable all Realtek audio to turn off a microphone. Target the input endpoint instead.
Using Windows Settings
- Open Settings > System > Sound.
- Select All sound devices under Advanced.
- Under Input devices, choose Microphone (Realtek(R) Audio).
- Click Don’t allow.
Using Device Manager
- Open Device Manager.
- Expand Audio inputs and outputs.
- Right-click the Realtek microphone.
- Select Disable device and confirm.
If the microphone is malfunctioning rather than unwanted, use the Windows 11 microphone not working fixes before disabling the controller. If it works but sounds unusually quiet or loud, adjust it with the Windows 11 microphone gain settings.
For privacy without disabling the hardware, open Settings > Privacy & security > Microphone. You can block microphone access for all apps or turn it off for selected apps. This is often a better choice when the microphone should remain available for trusted programs.
Disable the Realtek Startup App Without Disabling Sound
Some PCs start a Realtek helper, control panel component or background utility when you sign in. Disabling that startup entry does not normally disable the audio driver. It only prevents the related app from launching automatically.
- Press Ctrl + Shift + Esc to open Task Manager.
- Select Startup apps.
- Look for a name such as Realtek HD Audio Universal Service, Realtek Audio Console, Realtek HD Audio Manager or an entry published by Realtek Semiconductor.
- Right-click it and select Disable.
- Restart Windows and test the speakers and headphone jack.
This can remove a tray icon or reduce background startup activity. However, it may also stop automatic jack notifications or prevent a companion interface from opening at sign-in.
If audio stops behaving correctly, return to Task Manager > Startup apps, right-click the entry and select Enable.
Stop or Disable the Realtek Audio Service
Realtek driver packages sometimes install a service called Realtek Audio Universal Service, RtkAudioUniversalService or a similar name. The exact service varies by computer and driver package.
Stopping that service is not the same as disabling the Realtek sound device. Basic playback may continue, while these features stop working:
- Headphone and microphone jack detection
- Realtek Audio Console controls
- Speaker or microphone effects
- Automatic switching when a plug is inserted
- Manufacturer-specific sound profiles
To test the result:
- Press Windows + R.
- Enter
services.mscand press Enter. - Find the Realtek audio service.
- Double-click it and note its current Startup type.
- Click Stop.
- Test sound, the headphone jack and the Realtek Audio Console.
If the result is what you want, set Startup type to Manual first. This is easier to recover from than selecting Disabled immediately. To undo the change, restore the original startup type, click Start and restart Windows.
Do not disable Windows Audio or Windows Audio Endpoint Builder. They support sound throughout Windows, including many non-Realtek devices.
Turn Off Realtek Audio Enhancements Instead
If the reason for disabling Realtek is crackling, muffled sound, volume changes or delay, turn off audio enhancements before disabling the hardware.
- Open Settings > System > Sound.
- Select the Realtek output under Output or All sound devices.
- Find Audio enhancements.
- Set it to Off.
- If Spatial sound is enabled, turn it off temporarily as well.
- Play audio and check whether the problem is gone.
This leaves the device working but removes optional processing. Depending on the driver, extra effects may also appear in Realtek Audio Console or under More sound settings > Playback > Speakers > Properties > Enhancements.
If distortion continues, update or reinstall the Realtek driver from the support page for your laptop, motherboard or PC model. Avoid third-party driver download websites. A manufacturer package can contain the correct jack mapping and Audio Console components for that exact hardware.
Disable Realtek Audio With PowerShell
PowerShell is useful for automation, remote administration or a repeatable setup. Run the commands only after identifying the exact Realtek device. A broad command can disable more audio components than intended.
- Right-click Start and select Terminal (Admin).
- Approve the User Account Control prompt.
- Run this command to list media-class devices containing Realtek in their names:
Get-PnpDevice -Class Media |
    Where-Object FriendlyName -Match 'Realtek' |
    Format-Table Status, FriendlyName, InstanceId -Auto
- Read the results and copy the InstanceId of the exact device you want to disable.
- Replace the placeholder in the following command with that full ID:
Disable-PnpDevice -InstanceId 'PASTE_INSTANCE_ID_HERE' -Confirm:$false
Microsoft documents that Disable-PnpDevice disables a Plug and Play device and requires an administrator account.
To re-enable the same device, use:
Enable-PnpDevice -InstanceId 'PASTE_INSTANCE_ID_HERE' -Confirm:$false
Do not paste an InstanceId copied from another computer. Even two systems with the same Realtek chip can use different identifiers.
If the PowerShell command cannot find Realtek
Try listing audio endpoints as well:
Get-PnpDevice |
    Where-Object FriendlyName -Match 'Realtek' |
    Format-Table Class, Status, FriendlyName, InstanceId -Auto
The main controller usually appears in the MEDIA class. Individual speakers and microphones can appear as audio endpoints. Confirm the friendly name and class before disabling anything.
Disable Onboard Realtek Audio in UEFI or BIOS
Disabling onboard audio in the firmware is the strongest option. The Realtek controller will normally disappear from Windows, so the operating system cannot enable or reinstall it.
Use this only if the computer has another working sound device, such as a PCIe sound card, USB DAC, USB headset or display with HDMI audio.
- Save open work and restart the computer.
- Enter UEFI or BIOS setup. Common keys are Delete, F2, F10 and Esc, but the correct key depends on the manufacturer.
- Look in menus such as Advanced, Onboard Devices, Integrated Peripherals or I/O Configuration.
- Find Onboard Audio, HD Audio Controller, Integrated Audio or Azalia Audio.
- Set it to Disabled.
- Save the changes and exit.
Not every computer exposes this setting. The option is more common on desktop motherboards than on laptops.
On a laptop, disabling onboard audio can remove the built-in speakers, headphone jack and internal microphone together. Use Device Manager if you need more selective control.
To restore Realtek audio, return to the same firmware setting, select Enabled or Auto, save and restart.
Disabling Realtek Audio Versus Uninstalling Its Driver
These actions produce different results.
| Action | What it does | Does Windows keep the driver? | Best use |
|---|---|---|---|
| Disable an endpoint | Stops one speaker or microphone entry | Yes | Selective control |
| Disable the controller | Stops the Realtek hardware in Windows | Yes | Using another audio system |
| Uninstall the device | Removes the current device installation | Not always | Repairing a damaged driver |
| Uninstall and remove the driver package | Removes the device and its selected driver package | No, until reinstalled | Clean driver troubleshooting |
| Disable onboard audio in UEFI | Prevents Windows from detecting the controller | Yes, but unused | Permanent dedicated-audio setup |
Do not uninstall the driver if your only goal is to stop Windows from using Realtek. Windows Update or a restart may detect the controller and install the driver again. Disable device is more suitable and easier to reverse.
Uninstallation makes sense when Realtek audio is broken and you intend to install a fresh driver afterward.
What Happens After Realtek Audio Is Disabled?
The outcome depends on the item you disabled.
Internal speakers stop working
Most laptop speakers and many desktop analogue outputs rely on the Realtek controller. This is expected after disabling the controller or speaker endpoint.
The headphone jack may stop working
The 3.5 mm jack is usually part of the integrated audio system. Disabling Realtek can stop both output and microphone input through a headset jack.
HDMI or DisplayPort audio should still work
Audio sent through a graphics card or integrated GPU normally appears as NVIDIA High Definition Audio, AMD High Definition Audio Device or Intel Display Audio. Select the monitor or TV from Settings > System > Sound after disabling Realtek.
USB and Bluetooth audio should still work
USB headsets, USB DACs and Bluetooth speakers use their own device paths. They should remain functional, although Windows may need you to select the new default output.
The Realtek Audio Console may show an error
The console needs a compatible Realtek driver and, on some computers, its background service. It may fail to connect after the controller or service is disabled. Re-enable the relevant component if you need the console again.
Realtek Audio Keeps Coming Back After Restart
First identify what was changed.
- If you disabled only the startup app, the audio device remains enabled by design.
- If you uninstalled the driver, Windows may reinstall it after detecting the hardware.
- If a driver update recreated an endpoint, disable the main controller in Device Manager if you truly need all Realtek audio off.
- If the controller is enabled in UEFI, Windows can continue detecting it.
For a reversible fix, disable Realtek(R) Audio under Sound, video and game controllers. For a permanent desktop setup with dedicated audio hardware, disable onboard audio in UEFI or BIOS.
The Disable Device Option Is Missing or Greyed Out
Try these checks:
- Sign in with an administrator account.
- Open Device Manager from the Windows + X menu.
- Check both Audio inputs and outputs and Sound, video and game controllers.
- Select View > Show hidden devices.
- Right-click the exact device rather than its category heading.
- Restart Windows and try again.
Some managed work or school computers restrict device changes through administrator policy. Contact the system administrator if Windows says that the action is blocked.
No Sound After Disabling Realtek
This usually means Windows has no active default output or the selected replacement is not ready.
- Click the speaker icon on the taskbar.
- Open the output-device selector beside the volume slider.
- Select the USB, Bluetooth, HDMI or other intended device.
- Open Settings > System > Sound and confirm that its output meter responds.
- Disconnect and reconnect the external device if necessary.
- Close and reopen the app that was playing audio.
Some games, meeting apps and media programs keep their own audio-device selection. Check the app’s sound settings if Windows sound works but that program remains silent.
If no alternative output appears, re-enable Realtek through Settings or Device Manager until the replacement device is installed and working.
Should You Disable Realtek Audio?
Disabling it is reasonable when you always use another audio device, need to stop programs from selecting the wrong output or want to isolate a driver conflict. It is also useful on a desktop with a dedicated sound card.
It is usually unnecessary for performance. An enabled but unused Realtek controller has little effect on normal system speed. If the only concern is the tray app, disable its startup entry rather than the hardware. If the concern is distorted sound, turn off enhancements and repair the driver first.
Use the least disruptive option that solves the problem:
- Disable the speaker endpoint to stop only Realtek playback.
- Disable the microphone endpoint to stop only Realtek recording.
- Disable the controller when no Realtek input or output is needed.
- Disable the startup app when only the background utility is unwanted.
- Disable onboard audio in UEFI only for a deliberate, long-term hardware setup.
Frequently Asked Questions
Is it safe to disable Realtek audio in Windows 11?
Yes. Disabling the device does not damage the audio chip. It only prevents Windows from using it. Make sure another output is available if you still need sound.
Will Bluetooth audio work if Realtek is disabled?
Normally, yes. Bluetooth audio uses the Bluetooth adapter and its own device drivers. Select the Bluetooth headset or speaker as the output after disabling Realtek.
Will HDMI audio still work without Realtek?
Normally, yes. HDMI and DisplayPort audio usually use an Intel, NVIDIA or AMD display-audio device. The monitor or TV must support audio and be selected as the Windows output.
Can I disable Realtek speakers but keep the microphone?
Yes. Disable Speakers (Realtek(R) Audio) under Settings, the Sound Control Panel or Audio inputs and outputs in Device Manager. Do not disable the main Realtek controller.
Does disabling Realtek Audio Console disable sound?
Disabling the console or its startup entry normally stops only the control interface. Basic sound can continue. Some effects, jack prompts and manufacturer features may no longer be available.
Is disabling Realtek the same as uninstalling it?
No. Disabling keeps the installed device and driver but prevents Windows from using them. Uninstalling removes the device installation and may remove its driver package. Windows can reinstall an uninstalled device automatically.
Why does Realtek return after I uninstall it?
Windows detects the integrated audio controller during startup and may reinstall a suitable driver. Disable the device instead if you want it to remain present but inactive.
Does disabling Realtek improve gaming performance?
It is unlikely to produce a noticeable performance improvement. Disable it to solve device-selection or driver-conflict problems, not as a general gaming optimization.
How do I turn Realtek audio back on?
Open the location where it was disabled and reverse the setting. Click Allow in Sound Settings, select Enable in the Sound Control Panel, choose Enable device in Device Manager or restore onboard audio to Enabled in UEFI.
Should I disable Realtek in BIOS?
Only do so when you have a reliable replacement audio device and do not need the built-in speakers, analogue jack or related microphone. Device Manager is safer when the change is temporary.
The right method is determined by scope. For most people, disabling the Realtek speaker endpoint is enough. Device Manager is better when every Realtek input and output must be stopped, while UEFI should be reserved for computers that permanently use dedicated audio hardware.
