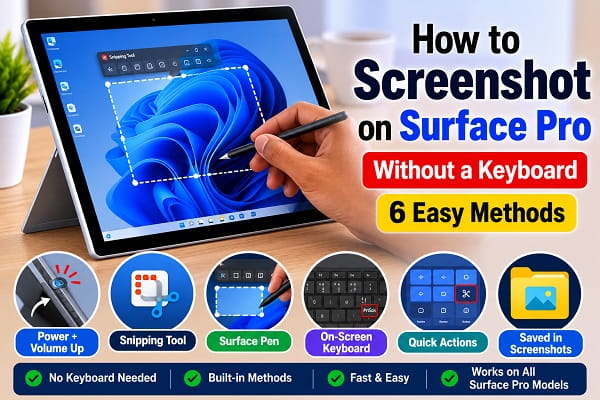
Taking a screenshot is one of the quickest ways to capture important information on your Surface Pro. Whether you’re saving a webpage, documenting an error message, sharing a presentation, or capturing an image, screenshots make it easy to keep a visual record of what’s on your screen.
Unlike a traditional laptop or desktop computer, a Surface Pro is often used without a physical keyboard. This leaves many users wondering how to take a screenshot when keyboard shortcuts like Windows + Shift + S or PrtScn aren’t available.
Fortunately, Microsoft provides several built-in ways to capture screenshots using the touchscreen, hardware buttons, Surface Pen, and Windows tools. Most methods take only a few seconds and don’t require installing any third-party software.
In this guide, I’ll show you six simple ways to take a screenshot on a Surface Pro without using a keyboard, along with tips for editing, saving, and troubleshooting screenshots.
If you’re looking for more Windows productivity tips, you may also find How to Change File Type on Windows 11 useful.
Can You Take a Screenshot on a Surface Pro Without a Keyboard?
Yes.
Even if your Surface Type Cover is disconnected or you don’t own one, you can still capture screenshots using:
- Physical hardware buttons
- Snipping Tool
- Surface Pen
- On-screen keyboard
- Touch controls
- Windows accessibility features
Windows 11 includes all the tools you need.
Method 1: Use the Power and Volume Up Buttons
This is the quickest method when using your Surface Pro as a tablet.
To capture a screenshot:
- Display the screen you want to capture.
- Press the Power button.
- Immediately press the Volume Up button.
- Release both buttons.
The screen briefly dims, indicating the screenshot has been captured successfully.
The image is automatically saved in:
Pictures\ScreenshotsThis method works similarly to taking a screenshot on many smartphones.
Method 2: Use the Snipping Tool
Windows 11 includes the Snipping Tool, which allows you to capture specific areas of the screen.
To use it:
- Tap Start.
- Search for Snipping Tool.
- Open the application.
- Click New.
- Select one of the capture modes:
- Rectangle
- Window
- Full Screen
- Freeform
- Drag your finger or stylus over the area you want to capture.
You can then:
- Annotate the screenshot
- Crop it
- Save it
- Copy it
- Share it
The Snipping Tool offers much more flexibility than the hardware button method.
Method 3: Use the Surface Pen
If your Surface Pro supports the Surface Pen, taking screenshots becomes even easier.
Depending on your pen model:
- Press the shortcut button on the Surface Pen.
- The Snipping Tool opens automatically.
- Select the area you want to capture.
- Save or edit the screenshot.
Some Surface Pen models can even be configured to launch the Snipping Tool with a single click.
This is one of the fastest methods for users who regularly annotate documents or presentations.
Method 4: Use the On-Screen Keyboard
Even without a physical keyboard, Windows 11 provides a virtual keyboard.
To use it:
- Open Settings.
- Navigate to Accessibility.
- Select Keyboard.
- Enable the On-Screen Keyboard.
Once it appears:
- Open the screen you want to capture.
- Use the virtual PrtScn key if available.
- Paste the screenshot into Paint, Word, or another application using the appropriate on-screen shortcut or context menu.
This method is particularly useful when you’re using desktop applications that rely on keyboard input.
Method 5: Use the Screen Snipping Quick Action
Windows 11 includes quick access to screen capture tools.
To use it:
- Open the Quick Settings panel.
- Launch the Snipping Tool if it’s pinned.
- Capture the desired area.
- Edit or save the image.
This provides quick access without opening the Start menu every time.
Method 6: Use Voice Access or Accessibility Features
If you’re unable to use the hardware buttons or touchscreen comfortably, Windows 11’s accessibility features provide another way to capture screenshots.
For example, you can use Voice Access to navigate Windows and launch the Snipping Tool using voice commands.
To enable Voice Access:
- Open Settings.
- Select Accessibility.
- Click Speech.
- Turn on Voice Access.
- Use voice commands to open the Snipping Tool and capture your screen.
This method is especially useful for users with mobility limitations or those who prefer hands-free operation.
Where Are Surface Pro Screenshots Saved?
The location depends on the method you use.
Hardware Buttons
Screenshots are automatically saved in:
C:\Users\YourUsername\Pictures\ScreenshotsSnipping Tool
After taking a screenshot, you can choose where to save it.
If you don’t save it immediately, it remains available within the Snipping Tool until you close the application.
Clipboard Screenshots
Some screenshot methods copy the image directly to the clipboard.
You can paste it into:
- Paint
- Microsoft Word
- OneNote
- Outlook
- Microsoft Teams
- Any image editor
How to Edit a Screenshot
After capturing your screenshot, you may want to:
- Crop unnecessary areas.
- Highlight important information.
- Draw arrows.
- Add text.
- Blur sensitive details.
The built-in Snipping Tool supports basic editing, while Microsoft Paint provides additional options.
For more advanced editing, you can use applications such as Paint.NET, Photoshop, or other image editors.
How to Share a Screenshot
Windows 11 makes sharing screenshots simple.
You can:
- Attach them to emails.
- Upload them to OneDrive.
- Share them in Microsoft Teams.
- Send them through messaging apps.
- Insert them into Word or PowerPoint documents.
If OneDrive photo backup is enabled, your screenshots may automatically sync across your devices.
What If Screenshot Buttons Don’t Work?
If pressing the Power + Volume Up buttons doesn’t capture a screenshot, try these fixes:
Restart Your Surface Pro
Temporary software glitches can prevent screenshots from working correctly.
Restart your Surface and try again.
Update Windows
Install the latest Windows updates to ensure all screenshot features are working properly.
Go to:
Settings → Windows Update
Then click Check for updates.
Update Surface Drivers
Microsoft regularly releases firmware and driver updates for Surface devices.
Keeping these updated can resolve hardware button issues.
Test the Buttons Individually
Verify that:
- The Power button works normally.
- The Volume Up button changes the volume.
If either button isn’t functioning, the problem may be hardware-related.
Try the Snipping Tool Instead
If the hardware buttons fail, the Snipping Tool usually continues working without any issues.
Tips for Taking Better Screenshots
To improve your screenshots:
- Clean the screen before capturing.
- Close unnecessary windows.
- Use Full Screen mode for complete captures.
- Use Rectangle mode when focusing on a specific area.
- Organize screenshots into folders for easier access.
- Rename important screenshots to make them easier to find later.
These simple habits help keep your screenshots organized and professional.
Frequently Asked Questions
Can I take a screenshot on a Surface Pro without a keyboard?
Yes.
You can use the Power + Volume Up buttons, the Snipping Tool, the Surface Pen, the on-screen keyboard, or Windows accessibility features.
What buttons take a screenshot on a Surface Pro?
Press the Power button and Volume Up button at the same time.
The screen briefly dims to indicate the screenshot has been captured.
Where are screenshots saved?
Screenshots taken with the hardware buttons are typically stored in:
Pictures → Screenshots
Other methods may allow you to choose a different save location.
Does every Surface Pro support hardware button screenshots?
Most Surface Pro models support using the Power and Volume Up buttons for screenshots, although button placement may vary slightly depending on the model.
Can I edit screenshots immediately?
Yes.
The Snipping Tool allows you to crop, annotate, highlight, and save screenshots immediately after capturing them.
Why isn’t my Surface Pro taking screenshots?
Possible causes include:
- Windows needs updating.
- Temporary software glitches.
- Faulty hardware buttons.
- Outdated Surface drivers.
Trying the Snipping Tool can help determine whether the issue is related to the hardware buttons.
If you’re looking for more Windows productivity guides, you may also find How to Change File Type on Windows 11, Restart File Explorer on Windows 11, How to Check BIOS Version on Windows 11, and Create a Samba Share on Windows 11 helpful. These guides cover common Windows tasks that can make working on your Surface Pro even more efficient.
Whether you’re using your Surface Pro as a laptop or tablet, taking screenshots without a keyboard is quick and easy using the built-in tools available in Windows 11. From the Power and Volume Up buttons to the Snipping Tool and Surface Pen, there are several reliable methods to capture exactly what’s on your screen. By choosing the method that best fits your workflow and keeping your device updated, you’ll be able to save, edit, and share screenshots whenever you need them.
