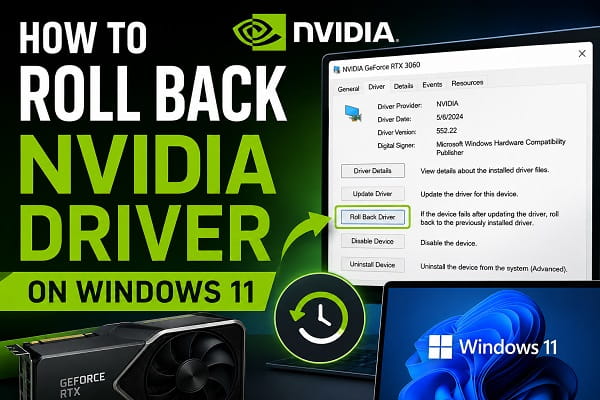
To roll back an NVIDIA driver in Windows 11, right-click Start, open Device Manager, expand Display adapters, double-click your NVIDIA GPU, and select Driver > Roll Back Driver. Choose a reason, confirm the rollback, and restart the computer.
If the Roll Back Driver button is greyed out, Windows no longer has the previous driver package available. Download the earlier compatible driver from NVIDIA’s official driver archive and install it manually instead.
Rolling back is most useful when screen flickering, game crashes, low frame rates, black screens, display problems, or application errors began immediately after an NVIDIA driver update.
When Should You Roll Back an NVIDIA Driver?
A newer graphics driver is not automatically the best driver for every PC, game, and application. New releases add game profiles, security improvements, bug fixes, and support for new hardware, but a particular release can also conflict with an older GPU, game update, laptop firmware, Windows build, or creative application.
Consider returning to the previous driver when a problem started directly after the update, including:
- Games crashing or freezing
- Lower frame rates or severe stuttering
- Screen flickering
- A black screen after Windows starts
- External monitors no longer being detected
- Incorrect screen resolution or refresh rate
- NVIDIA Control Panel failing to open
- Video-editing, 3D, or GPU-accelerated applications crashing
- Driver timeout messages
- Blue-screen errors mentioning the graphics driver
- Excessive GPU power use, fan noise, or temperature after the update
Do not assume the driver is responsible merely because one is available. Restart the computer first, check whether the problem affects more than one game or application, and note exactly when it began. A damaged cable, unstable overclock, game update, Windows update, or failing GPU can produce similar symptoms.
What Happens When You Roll Back the Driver?
Device Manager replaces the current NVIDIA display driver with the previous version retained in the Windows driver store.
The process normally does not delete:
- Personal files
- Installed games
- Game saves
- Applications
- Windows accounts
- Files stored on other drives
However, a clean manual installation can reset NVIDIA profiles and custom 3D settings. Record any important NVIDIA Control Panel changes before beginning.
The older driver will also lack fixes and profiles introduced by the newer release. Treat a rollback as a way to restore stability while you wait for a corrected driver, not necessarily as a permanent solution.
Before Rolling Back
Check the currently installed version
- Right-click Start and select Device Manager.
- Expand Display adapters.
- Double-click the NVIDIA graphics card.
- Open the Driver tab.
- Record the Driver Version, Driver Date, and Driver Provider.
NVIDIA also allows you to open NVIDIA Control Panel and select Help > System Information. The driver version appears near the top. Keeping this information makes it easier to confirm that the rollback worked.
Identify the exact GPU
The name displayed under Display adapters may be something like NVIDIA GeForce RTX 4060 Laptop GPU or GeForce GTX 1660 SUPER. Record the complete name. A desktop and laptop GPU with a similar model number may require different selections on the download page.
If both Intel or AMD integrated graphics and an NVIDIA GPU are listed, make changes only to the NVIDIA device.
Create a restore point
- Press Windows + S.
- Search for Create a restore point.
- Open it and confirm protection is enabled for the system drive.
- Click Create.
- Name it Before NVIDIA driver rollback.
System Restore provides another recovery route if several system changes occurred together. It does not replace a backup of important files.
Download the intended driver before removing anything
If Device Manager cannot perform the rollback, having the correct installer already downloaded prevents Windows Update or a loss of display functionality from complicating the process.
Use NVIDIA’s official driver download page or Advanced Driver Search for previous releases. Avoid third-party driver-download websites.
Laptop owners should also check the support page for their exact computer model. The laptop manufacturer may provide a customised or validated NVIDIA driver for hybrid graphics, power management, brightness control, or external display routing.
Method 1: Roll Back the NVIDIA Driver in Device Manager
This is the fastest and least disruptive method.
- Save open work and close games or GPU-intensive applications.
- Right-click Start.
- Select Device Manager.
- Expand Display adapters.
- Double-click your NVIDIA graphics card.
- Open the Driver tab.
- Click Roll Back Driver.
- Select the reason that best describes the problem.
- Click Yes to confirm.
- Restart Windows when the process finishes.
Microsoft provides the same sequence in its official driver rollback instructions.
The screen may flash, go black briefly, or change resolution while Windows switches display drivers. That is normally expected. Do not force the computer off unless it remains completely unresponsive for an extended period.
After restarting, return to Device Manager > Display adapters > NVIDIA GPU > Properties > Driver and confirm that the version number changed.
Why Is Roll Back Driver Greyed Out?
The button is unavailable when Windows does not have an earlier driver package to restore. Common reasons include:
- This is the first NVIDIA driver installed on the PC.
- The previous package was removed during a clean installation.
- Disk Cleanup or another maintenance tool deleted old driver files.
- The driver was previously uninstalled.
- Windows replaced or cleaned its driver store.
- The PC was recently reset or Windows was reinstalled.
Administrator permission is also required. If you use a standard Windows account, sign in with an administrator account.
There is no safe setting that can recreate a missing rollback copy. Use the manual installation method below.
Method 2: Install an Older NVIDIA Driver Manually
Step 1: Choose the correct driver
On NVIDIA’s driver search page, match all of these details:
- Product type, such as GeForce or NVIDIA RTX
- Product series
- Exact GPU model
- Windows 11 64-bit
- Driver type offered for the product
- Download type, usually Game Ready Driver or Studio Driver
- Language
Game Ready Drivers prioritise day-one support for games. Studio Drivers focus on validation for creative applications. Both can support gaming and creative work, but it is usually best to remain on the same branch unless you intentionally want to switch.
Do not choose an extremely old release simply because it predates the problem. Start with the driver immediately before the problematic version, or a version you know worked correctly. A very old driver may not support a newer Windows build, application, or game.
Step 2: Close running applications
Close games, browsers playing protected video, recording tools, NVIDIA Control Panel, monitoring utilities, and creative applications. Disconnect an unnecessary second monitor if the update caused multi-display problems.
Step 3: Run the NVIDIA installer
- Right-click the downloaded installer and select Run as administrator.
- Allow the files to extract.
- Accept the licence agreement.
- Choose the components you need.
- Select Custom (Advanced) when offered.
- Enable Perform a clean installation if the current profiles or installation may be corrupted.
- Complete the installation.
- Restart the computer.
A clean installation resets NVIDIA settings and profiles. It is useful after a failed update, but it is not required for every ordinary downgrade.
Official NVIDIA drivers for supported Windows hardware are digitally signed. You should not need to disable driver-signature enforcement to install an older official release. If Windows reports that a driver is unsigned, stop and confirm that the file came directly from NVIDIA or the PC manufacturer.
Step 4: Verify the result
Check the driver version in Device Manager or NVIDIA Control Panel. Test the exact game, monitor, or application that failed before the rollback. Avoid changing several other settings until you know whether the older driver solved the problem.
Method 3: Use System Restore
System Restore is useful when the NVIDIA update occurred alongside Windows updates, software installations, registry changes, or other driver updates.
- Press Windows + R.
- Type
rstrui.exeand press Enter. - Select Next.
- Choose a restore point created before the NVIDIA problem began.
- Select Scan for affected programs to see what will change.
- Continue through the prompts.
- Allow Windows to restart and complete the restoration.
System Restore can reverse drivers, system files, installed programs, and settings added after the selected point. It does not normally remove personal documents, but recently installed applications may need to be reinstalled.
Use this method only when Device Manager and a normal manual installation are unsuitable or when the problem involves more than the NVIDIA driver.
Method 4: Uninstall the Current Driver Before Installing the Older One
Try this when the existing installation is corrupted or an older NVIDIA installer repeatedly fails.
Before uninstalling, download the replacement driver and save your work.
- Right-click Start and open Device Manager.
- Expand Display adapters.
- Right-click the NVIDIA GPU.
- Select Uninstall device.
- If Windows offers Attempt to remove the driver for this device, select it only when you intend to remove that package.
- Click Uninstall.
- Restart the PC.
- Run the older NVIDIA installer.
- Restart again when installation finishes.
Windows may temporarily use Microsoft Basic Display Adapter, causing low resolution, limited refresh-rate choices, and reduced graphics performance. This is temporary. Do not launch games until the NVIDIA driver is installed.
On a laptop with hybrid graphics, the internal screen may continue working through the integrated GPU. External ports routed through the NVIDIA GPU may remain unavailable until the driver is restored.
Should You Use Display Driver Uninstaller?
Display Driver Uninstaller, commonly called DDU, is a third-party utility that removes display-driver packages, services, registry entries, profiles, and leftovers. It can be helpful, but it is not necessary for a normal rollback.
Consider DDU only when:
- NVIDIA installations repeatedly fail.
- Several driver versions were installed over one another and problems persist.
- Windows cannot start normally with the NVIDIA driver active.
- The system changed from an AMD GPU to an NVIDIA GPU or the reverse.
- A standard uninstall and clean NVIDIA installation did not work.
- NVIDIA services or Control Panel remain broken after reinstalling.
DDU makes wider changes than Device Manager. Create a restore point, download the intended NVIDIA driver first, and obtain DDU only from its developer’s official Wagnardsoft website. Booting into Safe Mode is recommended by the tool’s instructions because fewer graphics-driver components are active.
The basic process is:
- Download the older NVIDIA driver and DDU from their official sources.
- Disconnect from the internet temporarily if Windows repeatedly installs a driver before you can finish.
- Boot Windows 11 into Safe Mode.
- Open DDU.
- Select GPU and NVIDIA.
- Choose Clean and restart.
- Return to normal Windows.
- Install the downloaded NVIDIA driver.
- Restart and reconnect to the internet.
Our how to boot Windows 11 in Safe Mode article covers the available startup methods.
Do not use DDU after every driver update. Routine use adds complexity without providing a benefit when NVIDIA’s installer and Device Manager work normally.
How to Prevent Windows From Replacing the Older Driver
Windows 11 uses Windows Update to install recommended hardware drivers automatically. After a rollback, it may eventually offer or install a newer display driver again.
Pause updates while testing
- Open Settings.
- Select Windows Update.
- Use Pause updates for a short period.
Pausing gives you time to confirm whether the older driver is stable. It also pauses security and quality updates, so resume updates after testing.
Avoid optional driver updates
Go to Settings > Windows Update > Advanced options > Optional updates. Do not select an NVIDIA display driver while you are intentionally testing an older version. Microsoft notes that optional driver updates are not installed automatically, although recommended drivers may still arrive through normal Windows Update.
Check the NVIDIA app
If NVIDIA App is installed, do not approve or initiate the newer driver while testing. An available-update notification does not mean you must install it immediately.
Use advanced update controls only when necessary
Windows Pro, Enterprise, and Education editions provide Group Policy options for controlling driver delivery. These policies can affect all device drivers or require hardware IDs, so they are inappropriate for most home users.
The Device Installation Settings option is not a guaranteed block for every driver delivered through Windows Update. Do not rely on it as the only control.
Avoid disabling Windows Update permanently. Doing so prevents important security and reliability fixes from reaching the PC.
What to Do After the Rollback
Test one issue at a time:
- Confirm the installed driver version.
- Open NVIDIA Control Panel.
- Verify the correct resolution and refresh rate.
- Test each connected monitor.
- Launch the game or application that previously failed.
- Monitor performance and temperature at normal settings.
- Check Windows reliability history for new crashes.
Keep overclocks disabled during testing. A driver change can reveal an unstable GPU, VRAM, CPU, or memory overclock that appeared stable with another release.
Problems After Rolling Back
The screen is black
Wait briefly for the driver installation to finish. If the screen does not return, press Windows + Ctrl + Shift + B once to reset the graphics driver. You may hear a beep and see the display flash.
If that does not help, force a restart only as a last resort. Boot into Safe Mode, uninstall the problematic driver, and install a different compatible version. The full troubleshooting sequence is explained in Windows graphics reset.
NVIDIA Control Panel is missing or will not open
Restart Windows first. On systems using a DCH driver, NVIDIA Control Panel may be delivered through Microsoft Store. Open the Store, search for NVIDIA Control Panel, and install or update it.
If the app is present but produces an error, use the steps in NVIDIA Control Panel not opening.
The older driver will not install
Confirm the exact GPU, Windows version, 64-bit operating system, desktop or laptop selection, and driver branch. A driver can refuse installation when the GPU is unsupported, the package is intended for a different product family, or a laptop requires an OEM package.
Do not bypass signature enforcement to force an incompatible package. Try the PC manufacturer’s validated driver or the next newer compatible NVIDIA release.
Games still crash
The driver may not be the cause. Check game files, remove overclocks, disable third-party overlays, monitor temperature, install game updates, and test another game. If the issue affects only one title, check its known issues and minimum driver requirement.
Performance is worse on the older driver
Newer games may require recent optimisations. Return to the latest stable driver or try a release between the old and new versions. Compare settings because a clean installation can reset power, V-Sync, scaling, and application profiles.
Windows shows Microsoft Basic Display Adapter
The NVIDIA package is not currently active. Run the correct NVIDIA installer. If the GPU is missing entirely from Device Manager, select Action > Scan for hardware changes, restart, and check the BIOS or laptop graphics mode. A persistent absence may indicate a hardware or firmware problem.
Roll Back or Reinstall the NVIDIA Driver?
| Situation | Best first choice |
|---|---|
| Problem began immediately after one update | Device Manager rollback |
| Roll Back Driver is greyed out | Manual installation of the previous driver |
| Current installation appears corrupted | NVIDIA custom clean installation |
| Several system changes caused problems | System Restore |
| Repeated installs and uninstalls still fail | DDU as a last resort |
| Only one game has a problem | Check the game before changing drivers |
| New game requires a newer driver | Install a corrected newer release |
If you want to repair the current version rather than downgrade it, follow how to reinstall NVIDIA drivers on Windows.
Frequently Asked Questions
Does rolling back an NVIDIA driver delete games or files?
No. A normal driver rollback changes the display driver and does not delete personal files, installed games, or game saves.
Why can’t I click Roll Back Driver?
Windows does not have a previous NVIDIA package stored for that device, or the account lacks administrator permission. Download and install the previous compatible driver manually.
Can I install any older NVIDIA driver?
No. The driver must support your exact GPU, Windows version, architecture, and product type. Very old releases may not support newer games, applications, or Windows builds.
Will rolling back improve FPS?
Only if the newer driver caused a regression, conflict, or stuttering problem. A rollback does not inherently increase GPU performance.
Should I choose Game Ready or Studio Driver?
Choose Game Ready for frequent new-game support and Studio for a release branch validated around creative applications. Staying on the same branch makes before-and-after testing easier.
Is DDU safe?
DDU is widely used, but it is an advanced third-party cleanup tool that makes broader changes than a normal uninstall. Download it from the developer, create a restore point, and use it only when ordinary methods fail.
Can Windows Update reinstall the newer driver?
Yes. Pause updates temporarily while testing and avoid selecting the newer NVIDIA package under Optional updates. Resume Windows security updates after testing.
How do I return to the newest driver later?
Download it through NVIDIA App or NVIDIA’s official website, close GPU-intensive programs, run the installer, and restart Windows.
Can I roll back an NVIDIA laptop driver?
Yes. Device Manager works the same way, but a laptop maker’s validated driver may be preferable because hybrid graphics, power management, brightness, and display outputs can depend on OEM customisation.
How long should I keep the older driver?
Keep it while it remains stable and supports your applications, then review NVIDIA’s later release notes for a fix. Security updates, new games, and application requirements may eventually make a newer driver necessary.
Start with Device Manager because it is the quickest and most reversible option. When Windows has discarded the earlier package, manually install the correct previous release from NVIDIA or the laptop manufacturer. Reserve System Restore and DDU for wider or persistent failures, and never force an unsigned or incompatible graphics package merely to obtain an older version.
